Settings
With the Settings module, you can set your preferences, and configure the appearance or actions in DiAutomotive.
New part numbers are automatically added to DiAutomotive during EDI processing. However, it is important for you to add any additional relevant information about the part. Trading Partners do not always send every detail about a part on demand schedules, therefore, you must identify any missing details and set defaults to help you automate paperwork and EDI.
Work with Trading Partner Parts
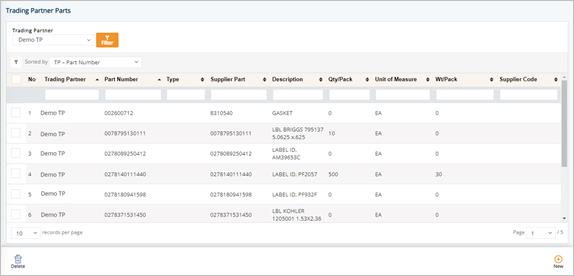
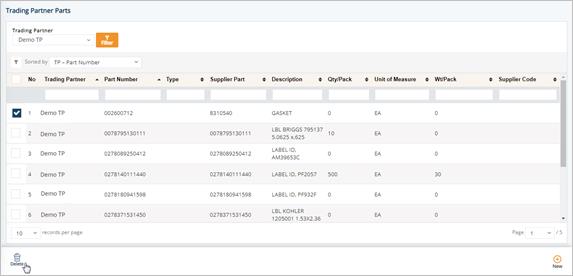
1. On the Settings menu, click Trading Partner Parts.
2. On the Trading Partner Parts screen, click the part that you want to view.
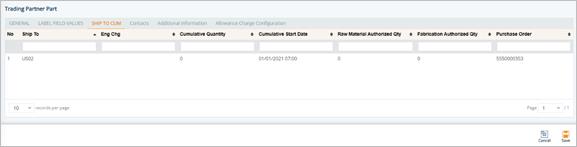
3. On the Trading Partner Part screen, select the GENERAL, LABEL FIELD VALUES, or SHIP TO CUM tabs to view the corresponding details.
GENERAL tab

LABEL FIELD VALUES tab
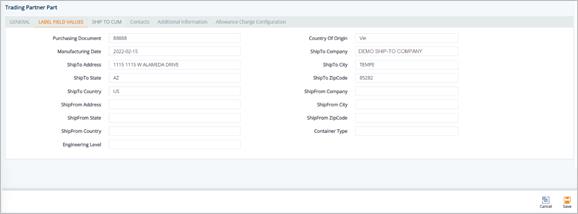
§ Label Field Values: As labels are printed, DiAutomotive pulls the data from the label’s default information from these fields.
SHIP TO CUM tab
Contacts tab
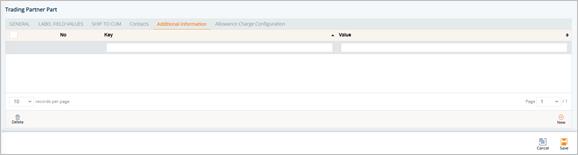
Additional Information tab
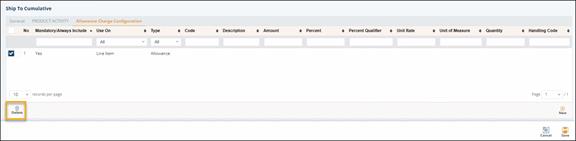
Allowance Charge Configuration tab
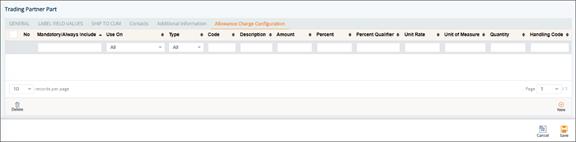
To set up a new allowance or charge configuration to a Trading Partner Part
1. On the Trading Partner Part screen, switch to the Allowance Charge Configuration tab.
2. Click New.
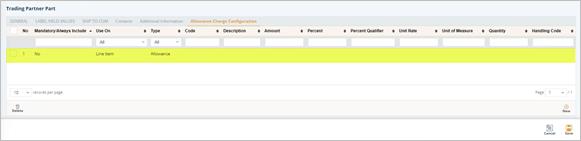
3. On the Adding Allowance Charge Configuration window, fill out the form.

4. Click Save.
A new Allowance or Charge configuration is added to the Trading Partner Part.
Field Definitions – Allowance Charge Configuration
§ Mandatory/Always Include: Mark the Allowance or Charge record as the required field.
§ Use On: Value is Line Item. After being created, the new Allowance or Charge record will be saved in Customer Finance/Supplier Finance > Invoices > Details > Allowance Charge.
tip For additional details, see If Line Item is selected in the Use On dropdown list.
§ Type: Options include Allowance, Charge, or Tax.
§ Code: The Allowance or Charge Code. Do the following:
- Click the Search icon in the Code field.
- On the Select Allowance Code window, select the Allowance or Charge Code.
- Click Select.

The selected Allowance or Charge Code is loaded in the Code field.
§ Description: A brief description of the Allowance or Charge Code.
§ Percent: The percentage value of the Allowance or Charge.
§ Amount: The amount value of the Allowance or Charge.
§ Percent Qualifier: A code to identify the category of the percentage value.
§ Unit Rate: Unit price.
§ Unit of Measure: Applied measurement unit (e.g., Piece, KG, CM...).
§ Quantity: The quantity.
§ Handling Code: A code specifying the method/way to calculate the Allowance or Charge.
There is little reason to create new parts unless the Trading Partner is non-EDI, you are adding a test part, or you’re adding an accidentally-deleted part. However, it is standard procedure to Change the details of parts.
1. On the Settings menu, click Trading Partner Parts.
2. On the Trading Partner Parts screen, click New.
3. Fill out the details of the new part on the GENERAL tab. Use the following Field Definitions.
4. Scroll down to the Barcode Defaults section, and then follow these steps:
a. Select the label template in the Container dropdown list.
b. Select the label template in the Master dropdown list.
c. Select the label template in the Mixed dropdown list.

5. When you’re finished, click Save.
The selected templates will be applied to the label printing job with priority #2 (when there is no setup in the Trading Partner Packages module).
Field Definitions
§ Trading Partner: The code defining the Trading Partner in DiAutomotive.
§ Supplier Code: Your Supplier Code assigned by the Trading Partner.
§ Part Number: The Trading Partner’s part number.
§ Part Type: Unique codes assigned to each type of item.
§ Supplier Part: The internal part number or SKU (Stock Keeping Unit).
§ Part UOM: The Unit of Measure for the part.
§ Description: The description for the part.
§ Origin Country: The country of origin for the part.
§ Unit Weight: Weight of an individual piece.
§ Wt/Pack: (QPP x Unit Weight) + Weight of Container. If blank, Gross, Net and Tare Weights will be calculated via the Container Record.
§ Unit Price: Price of an individual piece.
§ Qty/Pack: Quantity filling one container.
§ Qty/Master: Parts in a master (pallet). Used for label printing and shipping weight calculations.
- Print Master: Set DiAutomotive to automatically print a master label when a container print job meets the quantity in exactly one or more master containers.
o Example 1: Quantity per master = 180, Quantity Per Pack = 60, 360 pcs worth of labels printed, 360/180=2. 2 Master Labels will automatically print.
o Example 2: Quantity per master = 180, Quantity Per Pack = 60, 300 pcs worth of labels printed, 300/180=1.67, 0 Master Labels will automatically print.
§ Package Code: Unique codes assigned to the packaging of the part.
§ Returnable Ctn: The standard Returnable Container type for this part (must match a record in the Container file).
§ Last Printed: The last time this label was printed.
§ Labels/Box: Number of labels to print per container (usually 2).
§ Remove Part Dashes: Removes dashes from the part numbers on the label.
§ Remove Serial Dashes: Removes dashes from the serial numbers on the label.
1. On the Settings menu, click Trading Partner Parts.
2. On the Trading Partner Parts screen, select the part that you want to remove, and then click the Delete icon.
3. On the confirmation message, click OK.
DiAutomotive defines an internal part number as a product or a SKU (Stock Keeping Unit). When orders are shipped against your customer’s part numbers, entries are made into an internal parts record that tracks all shipments of each SKU. Internal parts are also used in connection to an external system when exporting.
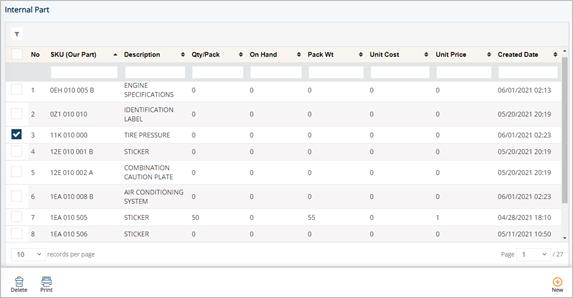
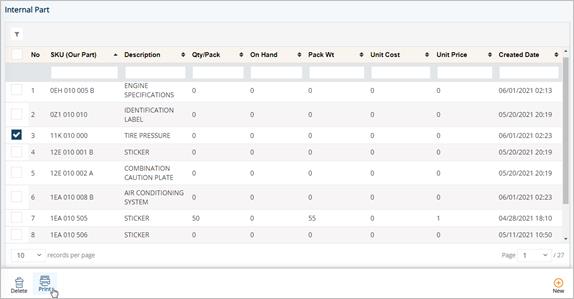
1. On the Settings menu, click Internal Parts.
2. On the Internal Part screen, click the part that you want to view.
tip For a full description of each field, refer to the Field Definitions in the next section.
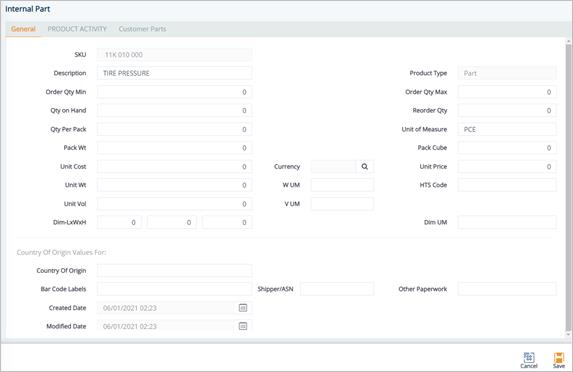
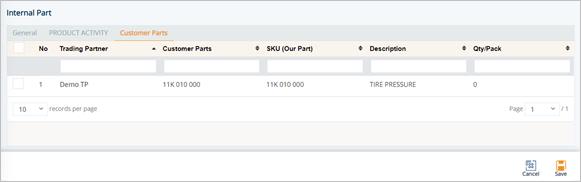
3. On the Internal Part screen, select the General, PRODUCT ACTIVITY, or Customer Parts tabs to view the corresponding details.
General tab
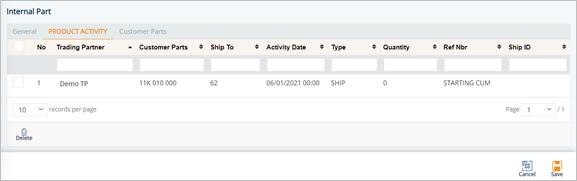
PRODUCT ACTIVITY tab
Customer Parts tab
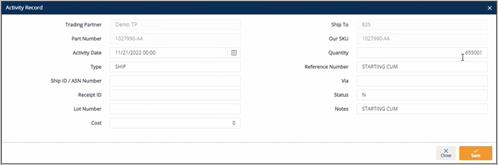
To view a Product Activity record
ð On the PRODUCT ACTIVITY tab, click the activity record that you want to view.
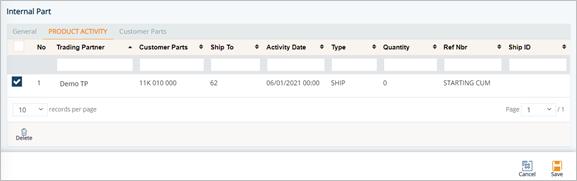
The Activity Record window is displayed.
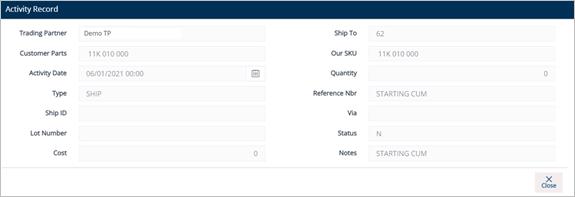
Field Definitions-Activity Record
§ Trading Partner: The Trading Partner to whom this part is shipped and the Cumulative Quantity adjusted.
§ Ship To: The associated Ship To that needs the quantity adjustment.
§ Customer Parts: The Trading Partner’s part number.
§ Our SKU: Internal part number (SKU).
§ Activity Date: The date and time when the activity record was saved.
§ Quantity: The quantity of a shipment, or for the adjustment to Cumulative quantities.
§ Type: The type of activity, such as shipment, receiving product, etc.
§ Reference Nbr: Order number or RAN number.
§ Ship ID: Ship ID (ASN Number).
§ Via: Transportation method.
§ Lot Number: The lot number.
§ Cost: The cost associated with this activity.
§ Notes: Any additional information for the activity record or notes for future reference.
Work with Customer Part
To view a Customer Part
ð On the Customer Parts tab, click the part that you want to view.
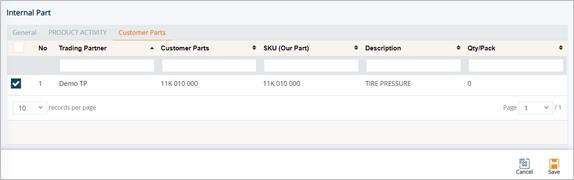
The Part Detail window is displayed.
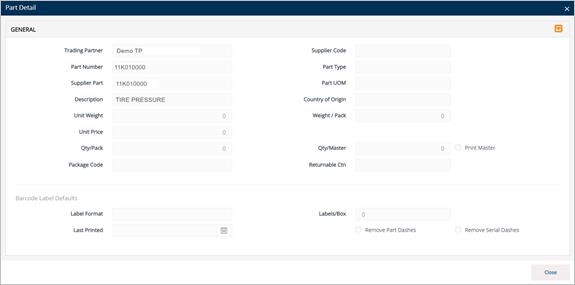
Field Definitions-Part Detail
§ Trading Partner: The code defining the Trading Partner in DiAutomotive.
§ Supplier Code: Your Supplier Code assigned by the Trading Partner.
§ Part Number: The Trading Partner’s part number.
§ Part Type: Unique codes assigned to each type of item.
§ Supplier Part: The internal part number or SKU (Stock Keeping Unit).
§ Part UOM: The Unit of Measure for the part.
§ Description: The description for the part.
§ Country of Origin: The country of origin for the part.
§ Unit Weight: Weight of an individual piece.
§ Weight/Pack: (QPP x Unit Weight) + Weight of Container. If blank, Gross, Net and Tare Weights will be calculated via the Container Record.
§ Unit Price: Price of an individual piece.
§ Qty/Pack: Quantity filling one container.
§ Qty/Master: Parts in a master (pallet). Used for label printing and shipping weight calculations.
- Print Master: Set DiAutomotive to automatically print a master label when a container print job meets the quantity in exactly one or more master containers.
o Example 1: Quantity per master = 180, Quantity Per Pack = 60, 360 pcs worth of labels printed, 360/180=2. 2 Master Labels will automatically print.
o Example 2: Quantity per master = 180, Quantity Per Pack = 60, 300 pcs worth of labels printed, 300/180=1.67, 0 Master Labels will automatically print.
§ Package Code: Unique codes assigned to the packaging of the part.
§ Returnable Ctn: The standard Returnable Container type for this part (must match a record in the Container file).
§ Label Format:The label format when labels are printed for this part, as defined in the Barcode Labels file.
§ Last Printed: The last time this label was printed.
§ Labels/Box: Number of labels to print per container (usually 2).
§ Remove Part Dashes: Removes dashes from the part numbers on the label.
§ Remove Serial Dashes: Removes dashes from the serial numbers on the label.
Internal part records are created when you send Shipments. Generally, there is little to no reason to add internal parts unless cumulative quantities have discrepancies that require it.
1. On the Settings menu, click Internal Parts.
2. On the Internal Part screen, click New.
3. Fill out the details of the new part on the General tab. Use the following Field Definitions.
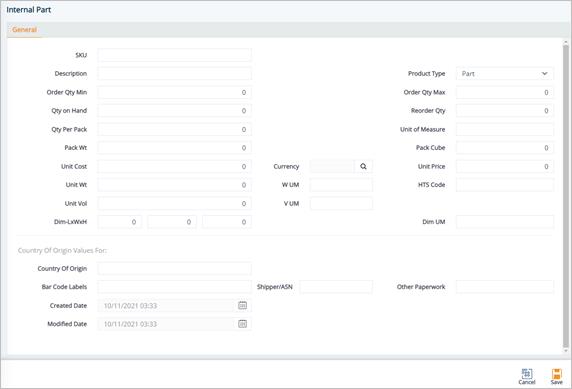
4. When you are finished, click Save.
Field Definitions
§ SKU:The internal part number or Stock Keeping Unit.
§ Description: The description of the product.
§ Qty On Hand:The amount of product available for use in inventory.
§ Reorder Qty:The amount of product that needs to be reordered.
§ Qty Per Pack: The number of units in a pack.
§ Unit of Measure: Unit of measure used.
§ Pack Wt: The packaged weight of the product.
§ Pack Cube:The cubic space of one package of this part.
§ Unit Cost:The individual cost of the product.
§ Unit Price: The price of a single product.
§ Unit Wt:The weight of a single product.
§ Unit Vol:The volume of a single product.
§ V UM: The volume unit of measure (e.g., cubic inches).
§ W UM: The weight unit of measure. The default is LB.
§ Dim UM: The dimension unit of measure.
§ Dim – LxWxH: Dimensions – Length, Width and Height.
§ HTS Code: Harmonized Tariff Schedule code with 7-10 digits, and is often unique after the 6th digit and determined by individual countries of import.
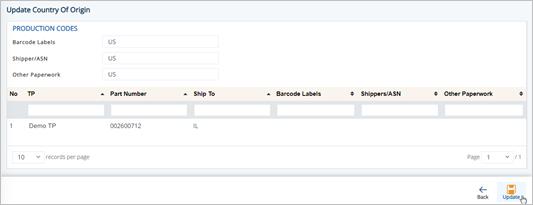
Field Definitions-Country of Origin
§ Country of Origin: The country that manufactures or produces the product.
§ Bar Code Labels: The default origin code for barcode labels that will populate the Ship To Cumulative parts records.
§ Shipper/ASN: The default origin code for the shipper or ASN that will populate the Ship To Cumulative parts records.
§ Other Paperwork: The default origin code for other paperwork that will populate the Ship To Cumulative parts records.
§ Created Date: The date when the product was created.
§ Modified Date: The date when the product was last modified.
Print a Product Activity Report or Product List
1. On the Settings menu, click Internal Parts.
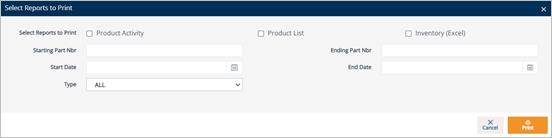
2. On the Internal Part screen, click the Print icon.
3. On the Select Reports to Print window, do the following:
a. Select the Product Activity or Product List check box, or select the Inventory (Excel) check box if you want to send an inventory report to an Excel spreadsheet for inventory reconciliation.
b. Type the Starting Part Nbr and Ending Part Nbr.
c. Enter the Start Date and Time, and the End Date and Time.
d. Select the type of activity report in the Type drop-down list, and then click OK.
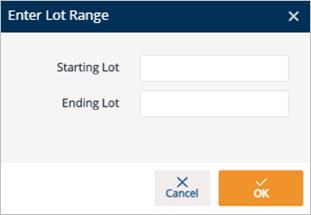
4. On the Enter Lot Range window, type the Starting Lot and Ending Lot numbers, and then click OK.
5. Click OK to print or preview the report.
1. On the Settings menu, click Internal Parts.
2. On the Internal Part screen, select the record that you want to remove, and then click the Delete icon.
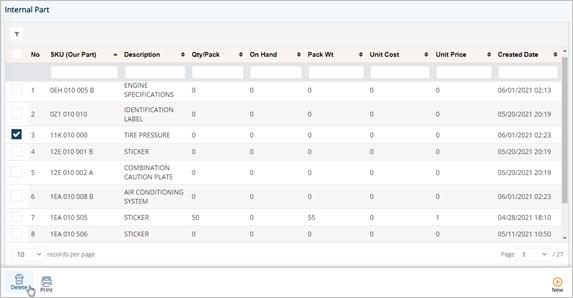
3. On the confirmation message, click OK.
A new Ship To Cumulative record is created for a part number when that part is requested to ship to a location for the first time. The Ship To Cumulative record is used to identify part information specific only to that customer’s ship-to location.
You can maintain this file when the Trading Partner bases their order authorizations on cumulative quantities. If cumulative quantities are used to generate order balances, the Ship To Cumulatives are used to track and maintain every cumulative quantity, such as annual cumulative quantity resets.
Use the Ship To Cumulatives screen to complement ship-to records because at times, additional details may be needed for the record when incomplete data is provided from incoming EDI.
§ Adjust cumulative discrepancies, raw material discrepancies, and fabrication discrepancies
§ Correct product activity discrepancies between DiAutomotive and your customer
1. On the Settings menu, click Ship To Cumulatives.
2. On the Ship To Cumulatives screen, click the line item that you want to view.
tip For a full description of each field, refer to the Field Definitions in the next section.
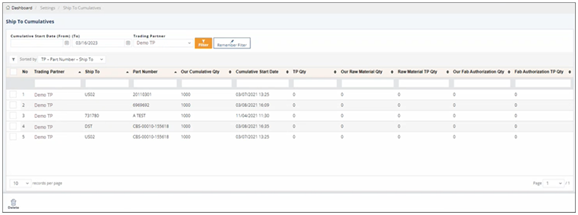
§ Ship To: The code representing the customer’s address.
§ Part Number: The Trading Partner’s part number.
§ Our Cumulative Qty: Your total cumulative quantity for the report.
§ Cumulative Start Date: The date when the cumulative report starts.
§ TP Qty: The Trading Partner’s quantity.
§ Our Raw Material Qty: The DiAutomotive calculated cumulative quantity for raw material from within the Start/Release date to present.
§ Our Fab Authorization Qty: The DiAutomotive calculated cumulative quantity for fabrication from within the Start/Release date to present.
§ Fab Authorization TP Qty: The authorized quantity for fabrication from the Trading Partner.
3. On the Ship To Cumulative screen, select the General, PRODUCT ACTIVITY, orAllowance Charge Configuration tabs to view the corresponding details.
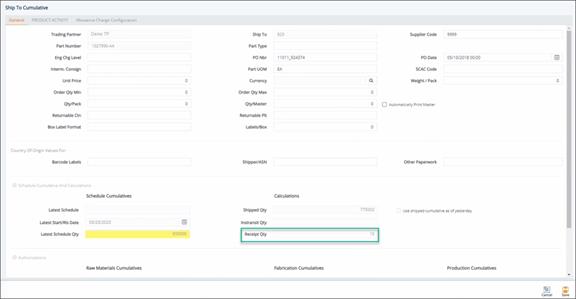
General tab

Note You can scroll down to view more fields on the General tab.

Field Definitions-General
§ Trading Partner: The Trading Partner to whom this part is shipped and the Cumulative Quantity adjusted.
§ Part Number: The Trading Partner's requested part number, found on the EDI release.
§ Eng Chg Level: Engineering Change Level for Parts going to this specific Ship To.
§ Interm. Consign: Intermediate consignee.
§ Qty/Pack: The number of units of a part in each shipping container.
§ Returnable Ctn: The standard Returnable Container type for this part.
§ Box Label Format: The label format when labels are printed for this part, as defined in the Barcode Labels file.
§ Ship To: The code representing the customer’s address.
§ Part Type: Unique identifying codes assigned to each part type if shown on the EDI release.
§ PO Nbr: The purchase order number.
§ Part UOM: The Unit of Measure for the part.
§ SCAC Code: The Equipment Prefix.
§ Qty/Master: Parts in a master (pallet). Used for label printing and shipping weight calculations.
- Print Master: Set DiAutomotive to automatically print a master label when a container print job meets the quantity in exactly one or more master containers.
o Example 1: Quantity per master = 180, Quantity Per Pack = 60, 360 pcs worth of labels printed, 360/180=2. 2 Master Labels will automatically print.
o Example 2: Quantity per master = 180, Quantity Per Pack = 60, 300 pcs worth of labels printed, 300/180=1.67, 0 Master Labels will automatically print.
§ Returnable Plt: The returnable pallet.
§ Labels/Box: Number of labels to print per container (usually 2).
§ Supplier Code: Your Supplier Code assigned by the Trading Partner.
§ PO Date: The date when the purchase order was created.
§ Unit Price: Price of an individual piece.
§ Weight/Pack: If the Container file does not have this returnable container or if the returnable container does not have a weight default setting, the Weight per Pack is used to calculate ASN weights.
§ Country of Origin Values:
- Barcode Labels: The default origin code for barcode labels that will populate the Ship To Cumulative parts records.
- Shipper/ASN: The default origin code for the shipper or ASN that will populate the Ship To Cumulative parts records.
- Other Paperwork: The default origin code for other paperwork that will populate the Ship To Cumulative parts records.
§ Shipment Cumulative and Calculations:
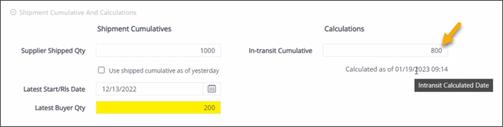
- Shipment Cumulatives:
ü Supplier Shipped Qty: The supplier’s total cumulative quantity since the Start Date.
ü Latest Start/Release Date: The latest start/release date of the cumulative quantity updated according to the incoming document.
ü Latest Buyer Qty: The latest quantity received by the buyer. If there is a discrepancy between the supplier’s shipped quantity and the buyer’s latest received quantity, this field will be highlighted in yellow.
- Calculations:
ü In-transit Cumulative: The quantity that is shipped from the supplier but has not yet arrived at the buyer’s end. The formula to calculate the In-transit Cumulative depends on the ConfigINI. One of the common formulas is In-transit Cumulative = Supplier Shipped Qty – Latest Buyer Qty. Also, the latest in-transit calculated date and time will be displayed below the field.
§ Authorizations:

- Raw Materials Cumulatives: The calculated cumulative quantity for raw material based on the buyer’s incoming documents.
ü Highest Qty Reported: The highest cumulative quantity for raw material reported in the supplier’s system.
ü Latest Auth Qty: The latest cumulative quantity for raw material authenticated according to the received incoming document. If the Latest Auth Qty is higher than the Highest Qty Reported, then the highest number will be updated in the Highest Qty Reported field. If it is equal or smaller, no update is applied.
ü Latest Schedule: The latest schedule of the cumulative quantity for raw material updated according to the incoming documents.
ü Latest Start/Release Date: The start/release date of the cumulative quantity for raw material updated according to the incoming documents.
- Fabrication Cumulatives: The calculated cumulative quantity for fabrication.
ü Highest Qty Reported: The highest cumulative quantity for fabrication reported in the supplier’s the system.
ü Latest Auth Qty: The latest cumulative quantity for fabrication authenticated according to the received incoming document. If the Latest Auth Qty is higher than the Highest Qty Reported, then the highest number will be updated in the Highest Qty Reported field. If it is equal or smaller, no update is applied.
ü Latest Schedule: The latest schedule of the cumulative quantity for fabrication updated according to the incoming documents.
ü Latest Start/Release Date: The start/release date of the cumulative quantity for fabrication updated according to the incoming documents.
- Production Cumulatives: The calculated cumulative quantity for production.
ü Highest Qty Reported: The highest cumulative quantity for production reported in the supplier’s the system.
ü Latest Auth Qty: The latest cumulative quantity for production authenticated according to the received incoming document. If the Latest Auth Qty is higher than the Highest Qty Reported, then the highest number will be updated in the Highest Qty Reported field. If it is equal or smaller, no update is applied.
ü Latest Schedule: The latest schedule of the cumulative quantity for production updated according to the incoming documents.
ü Latest Start/Release Date: The start/release date of the cumulative quantity for production updated according to the incoming documents.
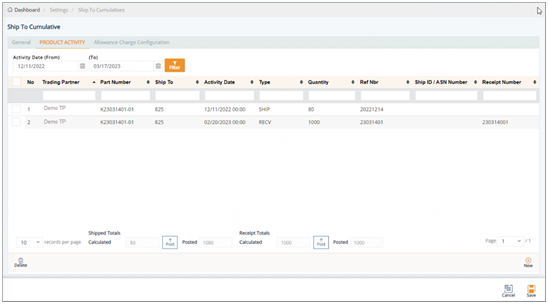
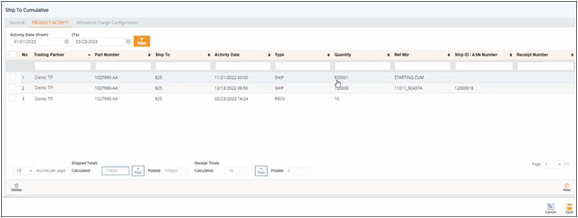
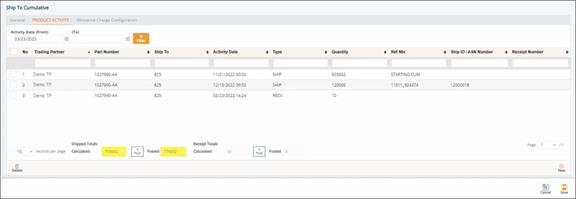
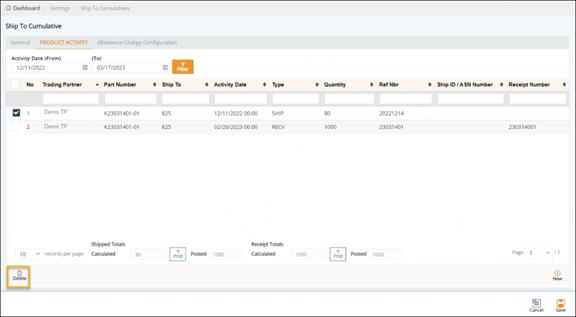
PRODUCT ACTIVITY tab
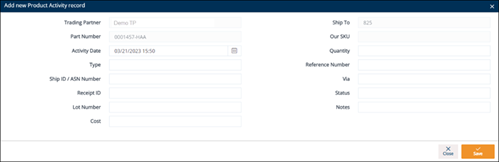
Field Definitions-Product Activity
§ Trading Partner: The Trading Partner to whom this part is shipped and the Cumulative Quantity adjusted.
§ Ship To: The associated Ship To that needs the quantity adjustment.
§ Part Number: The Trading Partner’s part number.
§ Our SKU: Internal part number (SKU).
§ Activity Date: The date and time when the activity record was saved.
§ Quantity: The quantity of a shipment, or for the adjustment to Cumulative quantities.
§ Type: The type of activity, such as shipment, receiving product, etc.
§ Reference Number: Order number or RAN number.
§ Ship ID/ASN Number: Ship ID (ASN Number).
§ Receipt Number: Corresponds to the Receipt Number on the Supplier Demand Requests screen > Product Receipt tab.
§ Via: Transportation method.
§ Lot Number: The lot number.
§ Status: Default value is N (New). When receiving EDI, activity record will be added automatically, and N is set in the Status field by default. When manually creating an activity record, this field is optional and can be blank.
§ Cost: The cost associated with this activity.
§ Notes: Any additional information for the activity record or notes for future reference.
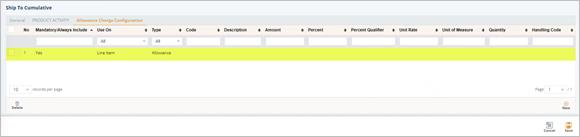
Allowance Charge Configuration tab
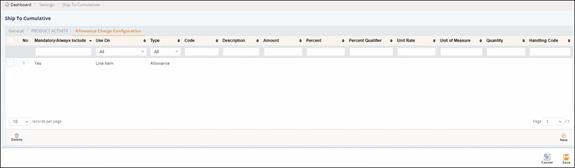
Field Definitions-Allowance Charge Configuration
§ Mandatory/Always Include: Mark the Allowance or Charge as the required field.
§ Use On: Value is Line Item.
§ Type: Options include Allowance and Charge.
§ Code: The Allowance or Charge Code.
§ Description: A brief description about the Allowance or Charge Code.
§ Percent: The percentage value of Allowance or Charge. Only enter a numeric value in this field.
§ Amount: The amount value of Allowance or Charge. Only enter a numeric value in this field.
§ Percent Qualifier: The code to identify the category of percentage value.
§ Unit Rate: Unit price.
§ Unit of Measure: The applied measurement unit, such as piece, KG, CM, etc.
§ Quantity: The quantity.
§ Handling Code: The code specifying the method to calculate the Allowance or Charge.
Unless there is a ship to cumulative quantity adjustment to be made, there is no reason to delete a Product Activity record. For example, if shipments were made without sending EDI data where they normally would, DiAutomotive cumulative quantities may not be correct. Cumulative inconsistencies between DiAutomotive and your customer can cause problems with getting accurate shipping requirements. This may require a manual adjustment by adding a new shipment record, which corrects product activity discrepancies between DiAutomotive and your customer.
To create a Product Activity record
Note As usual, Product Activity records are automatically created when you import Shipments or Receiving Advices. If you want to manually add a new record, follow these steps:
1. On the PRODUCT ACTIVITY tab, click the New button.
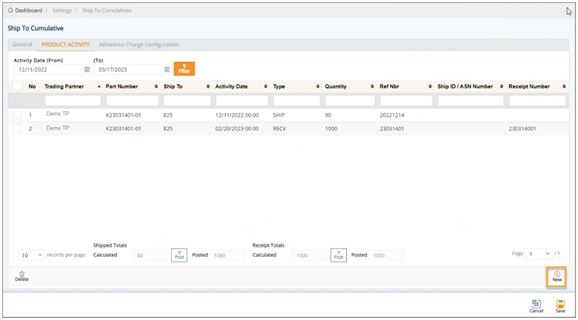
2. On the Add New Product Activity Record window, fill out the form.
TIP Refer to the Field Definitions-Product Activityin the previous section.
3. Click Save.
The new record is added.
To edit a Product Activity record
1. On the PRODUCT ACTIVITY tab, select the record that you want to edit.
2. On the Activity Record window, make the changes as needed.
3. Click Save.
To Post Shipped Qty and Post Receipt Qty
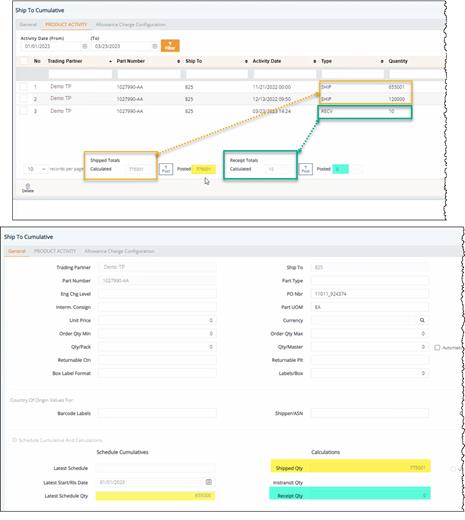
You can use the Post buttons in the Shipped Totals Calculated and the Receipt Totals Calculated sections to update the cumulative shipped quantity and receipt quantity for consistencies in real time.
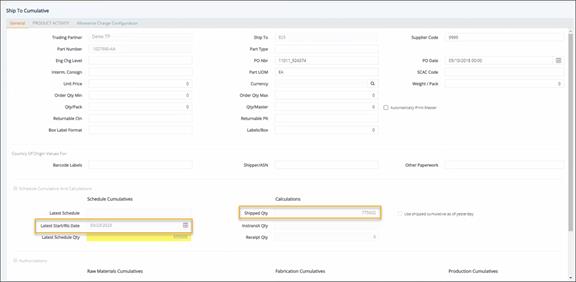
The following screenshot describes the relevance between the quantities on the PRODUCT ACTIVITY tab and the ones on the General tab.
§ Shipped Totals Calculated= the sum quantity of the records of the SHIP type.
- The adjacent Posted field corresponds to the Shipped Qty (on the General tab > Calculations section).
§ Receipt Totals Calculated= the sum quantity of the records of the RECV type.
- The adjacent Posted field corresponds to the Receipt Qty (on the General tab > Calculations section).


To Post Shipped Qty
1. On the PRODUCT ACTIVITY tab, click the Post button next to the Shipped Totals Calculated field.
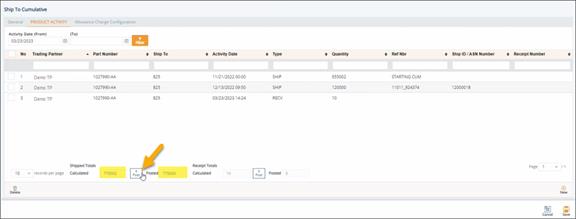
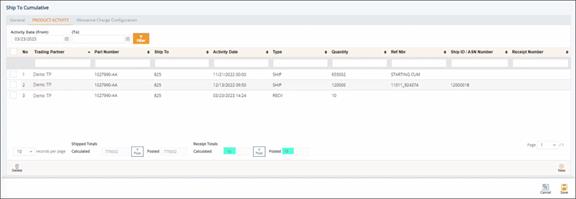
The Posted value is updated to match the Shipped Totals Calculated quantity.

2. Switch to the General tab to view the Shipped Qty, which has been updated.
The Shipped Qty is updated to match the Posted quantity. Also, the Latest Start/Release Date is updated to match the Activity Date (From).
To Post Receipt Qty
1. On the PRODUCT ACTIVITY tab, click the Post button next to the Receipt Totals Calculated field.
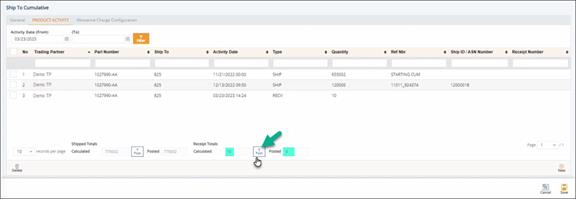
The Posted value is updated to match the ReceiptTotals Calculated quantity.

2. Switch to the General tab to view the Receipt Qty, which has been updated.
TheReceipt Qty is updated to match the Posted quantity.
To delete a Product Activity record
1. On the PRODUCT ACTIVITY tab, select the record that you want to remove, and then click the Delete icon.
2. On the confirmation message, click OK.
Work with Allowance Charge Configuration
To add an allowance or charge to a Ship to Cumulative record
1. On the Ship To Cumulative screen, switch to the Allowance Charge Configuration tab.
2. Click New.
3. On the Adding Allowance Charge Configuration window, fill out the form. Use the Field Definitions displayed below.

4. Click Save.
A new Allowance or Charge configuration is added to the Ship To Cumulative record.
Field Definitions – Allowance Charge Configuration
§ Mandatory/Always Include: Mark the Allowance or Charge record as the required field.
§ Use On: Value is Line Item. After being created, the new Allowance or Charge record will be saved in Customer Finance/Supplier Finance > Invoices > Details > Allowance Charge.
tip For additional details, see If Line Item is selected in the Use On dropdown list.
§ Type: Options include Allowance, Charge, or Tax.
§ Code: The Allowance or Charge Code. Do the following:
- Click the Search icon in the Code field.
- On the Select Allowance Code window, select the Allowance or Charge Code.
- Click Select.
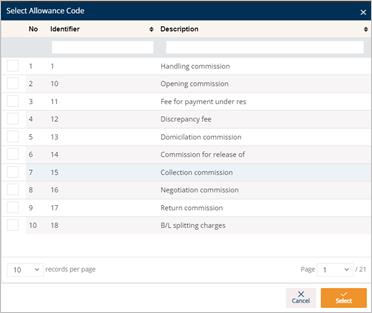
The selected Allowance or Charge Code is loaded in the Code field.
§ Description: A brief description of the Allowance or Charge Code.
§ Percent: The percentage value of the Allowance or Charge.
§ Amount: The amount value of the Allowance or Charge.
§ Percent Qualifier: A code to identify the category of the percentage value.
§ Unit Rate: Unit price.
§ Unit of Measure: Applied measurement unit (e.g., Piece, KG, CM...).
§ Quantity: The quantity.
§ Handling Code: A code specifying the method/way to calculate the Allowance or Charge.
To delete an allowance or charge
1. On the Allowance Charge Configuration tab, select the record that you want to remove, and then click the Delete icon.
2. On the confirmation message, click OK.
Delete a Ship To Cumulative Record
1. On the Settings menu, click Ship To Cumulatives.
2. On the Ship To Cumulatives screen, select the cumulative record that you want to remove, and then click the Delete icon.

3. On the confirmation message, click OK.
Many Trading Partners require packaging details on their paperwork and transmitted EDI. These details may include container and pallet information. The Packaging file is also useful in automating the calculations of tare weights on your shipments if they are set as the default. If the Trading Partner includes a requested packaging type on their releases, the records will be added to the Packaging file, but will most likely not have enough information to automate shipment weights. Other Trading Partners do not send this information even though they are expecting specific returnable information. In both cases, adding or updating containers should be a standard user maintenance task. Any kind of packaging relating to the tare is stored in this file, such as returnable and expendable pallets, returnable and expendable containers, returnable and expendable inner containers, and other layered packaging.
Work with Trading Partner Packaging
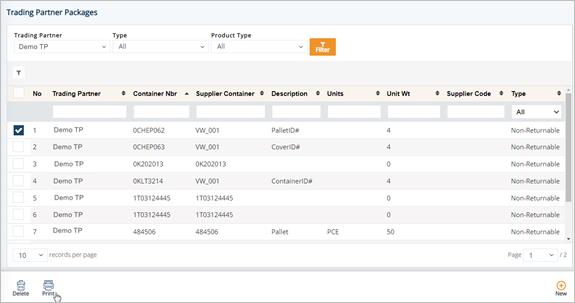
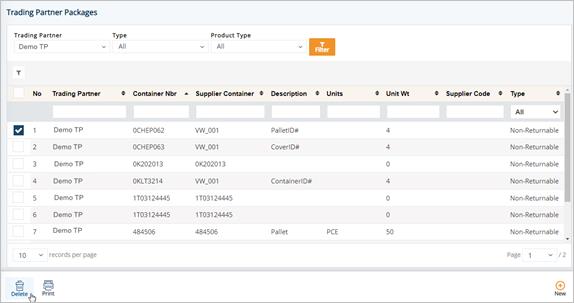
1. On the Settings menu, click Trading Partner Packaging.
Note Each package listed on the screen has a value in the Type column. These types indicate the latest status of the container.
- New: The container is new.
- Returnable: The container can be returned, that is, this is not expendable packaging.
- Non-Returnable: The container cannot be returned.
2. On the Trading Partner Packages screen, click the package that you want to view.
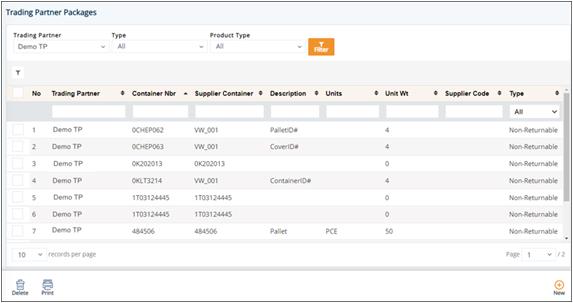
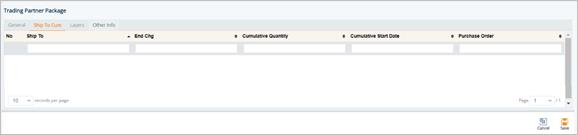
3. On the Trading Partner Package screen, select the General, Ship To Cum, or Layers tabs to view the corresponding details.
General tab

Ship To Cum tab
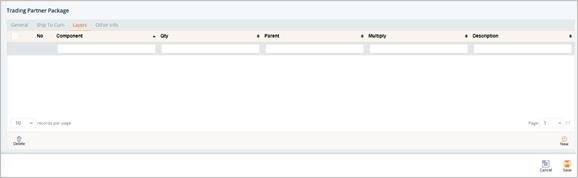
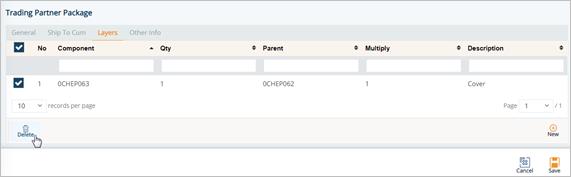
Layers tab
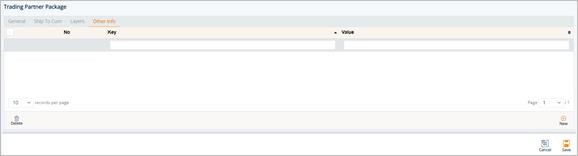
Other Info tab
Field Definitions-Layers
§ Component: Customer's container Type.
§ Qty: Quantity in this container.
§ Parent: Our container type.
§ Multiply: Used with container components to identify how many items are in a set.
§ Description: Descriptions about the layer of the container.
Work with Layers
To view a Layer
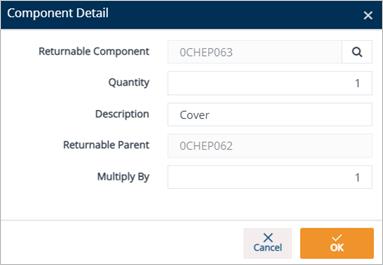
ð On the Layers tab, click the component that you want to view.
The Component Detail window is displayed.
To add a layer for packaging
1. On the Layers tab, click New.
2. On the Component Detail window, do the following:
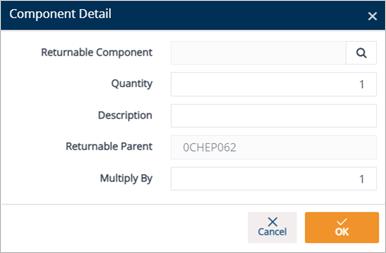
a. Select a Returnable Component:
i. Click the Search icon in the Returnable Component field.
ii. On the Browse Returnable Containers window, choose the Returnable Container and click Select.
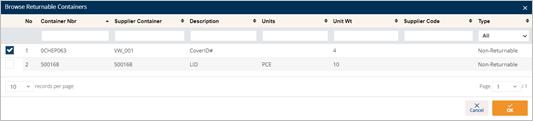
The selected Returnable Containeris loaded in the Returnable Component field.
b. Enter the Quantity.
c. Type a Description in the text box.
d. Enter the Multiply By amount.
3. When you’re finished, click OK.
To delete a layer
1. On the Layers tab, select the layer that you want to remove, and then click the Delete icon.
2. On the confirmation message, click OK.
1. On the Settings menu, click Trading Partner Packaging.
2. On the Trading Partner Packages screen, click New.
3. On the Trading Partner Package screen, fill out the details of the new package. Use the following Field Definitions.
4. Scroll down to the Barcode Label Defaults section, and then do the following:
a. Select the label template in the Container dropdown list.
b. Select the label template in the Master dropdown list.
c. Select the label template in the Mixed dropdown list.
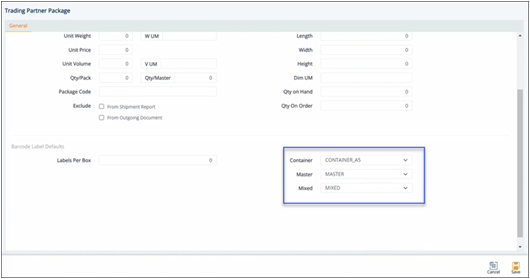
5. When you are finished, click Save.
The selected templates will be applied to the label printing job with priority #1.
Field Definitions-GENERAL
§ Trading Partner: The customer to whom this container ships to.
§ Supplier Code:Your Supplier Code assigned by the Trading Partner.
§ Container ID: The Trading Partner’s number for this empty container (also known as part number).
§ Supplier Ctn ID: The SKU (Stock Keeping Unit) of this tare.
§ Description:The packaging description as shown on paperwork such as the Bill of Lading (BOL).
§ Origin Country: The country of origin of the empty container.
§ Returnable: Checked if this is not expendable packaging.
§ Unit of Measure: How the containers are measured, for example, EA or 100cwt.
§ Unit Weight: The weight of one empty container (required for automated weights on ASNs).
§ Unit Price:The price of a single empty container.
§ Unit Volume: The volume unit of measure, for example, cubic inches.
§ Length:The saved packaging dimension (for reference only).
§ Width: The saved packaging dimension (for reference only).
§ Height: The saved packaging dimension (for reference only).
§ Qty/Pack: The standard part quantity that goes inside this container.
§ Qty/Master: The standard container count that goes on a master.
§ Qty on Hand: The amount available for use in inventory.
§ Qty on Order: The amount awaiting arrival.
§ Package Code: The packaging code as used by the Trading Partner (e.g., Box25).
§ Labels per Box: The number of labels to print per container.
|
|
NOTE Once the packaging file’s defaults have been completed, each package serial number and master serial will be assigned a package type. For every one of these serials, the assigned package weight will be added to the total in the tare weight field. |
1. On the Settings menu, click Trading Partner Packaging.
2. On the Trading Partner Packages screen, click the Print icon.
3. On the Select Reports to Print window, do the following:
a. Select the Trading Partner in the drop-down list
b. Select the Ship To in the drop-down list.
c. Enter the Start Date and Time, and the End Date and Time.
d. In the CHECK REPORTS DESIRED section, select the report that you want to print, and then click Print.
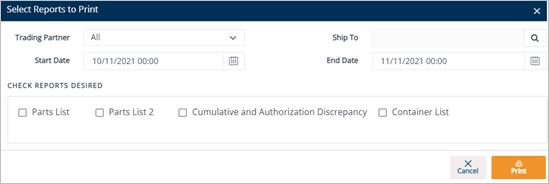
4. Click OK to print or preview the report.
1. On the Settings menu, click Trading Partner Packaging.
2. On the Trading Partner Packages screen, select the packaging record that you want to remove, and then click the Delete icon.
3. On the confirmation message, click OK to confirm.
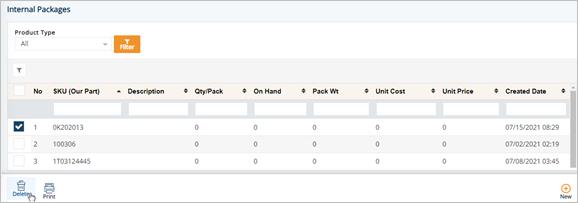
1. On the Settings menu, click Internal Packaging.
2. On the Internal Packages screen, click the package that you want to view.
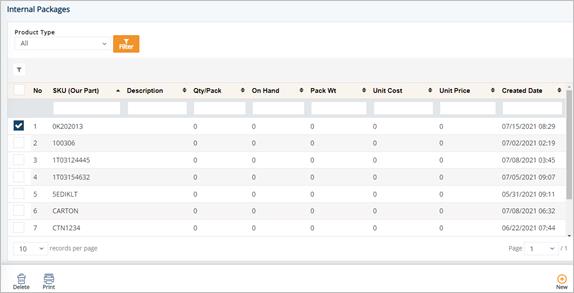
tip For a full description of each field, refer to the Field Definitions in the next section.
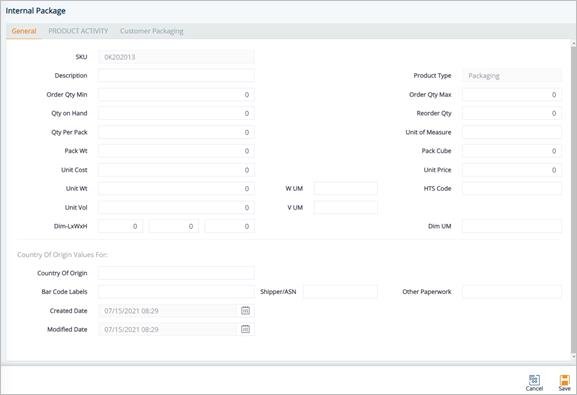
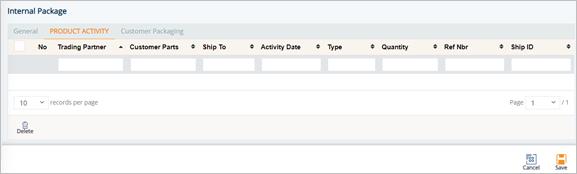
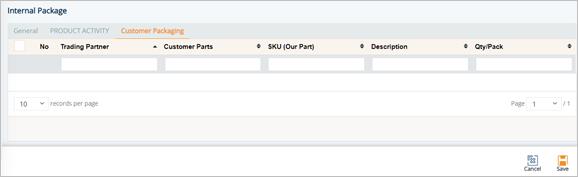
3. On the Internal Package screen, select the General, PRODUCT ACTIVITY, or Customer Packaging tabs to view the corresponding details.
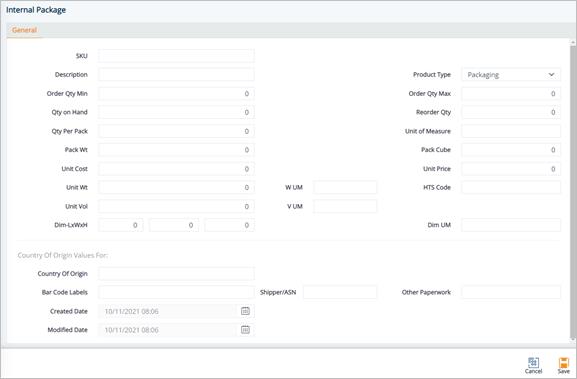
General tab
PRODUCT ACTIVITY tab
Customer Packaging tab
1. On the Settings menu, click Internal Packaging.
2. On the Internal Packages screen, click New.
3. Fill out the details of the new package on the General tab. Use the following Field Definitions.
4. When you are finished, click Save.
Field Definitions
§ SKU:The internal part number or Stock Keeping Unit.
§ Description: The description of the product.
§ Order Qty Min: The minimum amount of product.
§ Order Qty Max: The maximum amount of product.
§ Qty On Hand:The amount of product available for use in inventory.
§ Reorder Qty:The amount of product that needs to be reordered.
§ Qty Per Pack: The number of units in a pack.
§ Unit of Measure: Unit of measure used.
§ Pack Wt: The packaged weight of the product.
§ Pack Cube:The cubic space of one package of this part.
§ Unit Cost:The individual cost of the product.
§ Unit Price: The price of a single product.
§ Unit Wt:The weight of a single product.
§ Unit Vol:The volume of a single product.
§ V UM: The volume unit of measure (e.g., cubic inches).
§ W UM: The weight unit of measure. The default is LB.
§ Dim UM: The dimension unit of measure.
§ Dim – LxWxH: Dimensions – Length, Width and Height.
§ HTS Code: Harmonized Tariff Schedule code with 7-10 digits, and is often unique after the 6th digit and determined by individual countries of import.
Field Definitions-Country of Origin
§ Country of Origin: The country that manufactures or produces the product.
§ Bar Code Labels: The default origin code for barcode labels that will populate the Ship To Cumulative parts records.
§ Shipper/ASN: The default origin code for the shipper or ASN that will populate the Ship To Cumulative parts records.
§ Other Paperwork: The default origin code for other paperwork that will populate the Ship To Cumulative parts records.
§ Created Date: The date when the product was created.
§ Modified Date: The date when the product was last modified.
1. On the Settings menu, click Internal Packaging.
2. On the Internal Packages screen, select the package that you want to remove, and then click the Delete icon.
3. On the confirmation message, click OK.
In DiAutomotive, the Address file contains every mailing address that each Trading Partner uses for paperwork and constructing outgoing EDI. If your Trading Partner sends you address information, DiAutomotive will add whatever it can to its records. Not all pertinent address information is always transmitted, therefore, it is important for you to review the addresses that DiAutomotive populates. For instance, your customer may send you their address code but not the mailing address itself, or you may use an intermediate consignee that was not specified electronically.
Work with Trading Partner Addresses
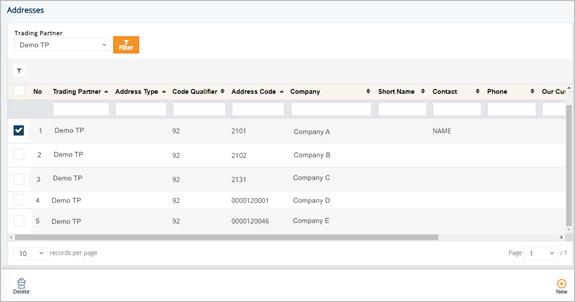
1. On the Settings menu, click Addresses.
2. On the Addresses screen, click the address that you want to view.
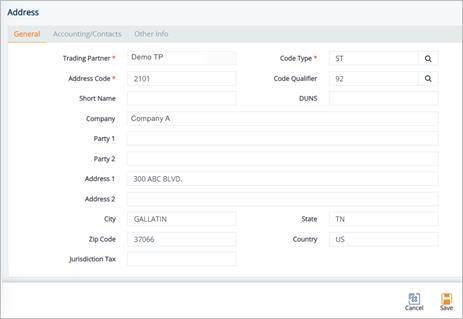
3. On the Address screen, view the corresponding details on the General, Accounting/Contacts, or Other Info tabs.
General tab
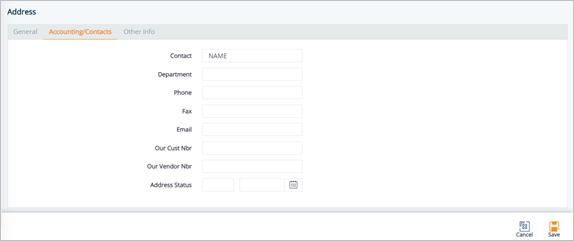
Accounting/Contacts tab
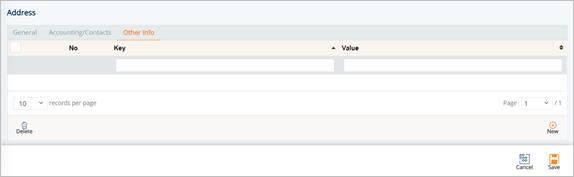
Other Info tab
To add an allowance or charge configuration to an Address
1. On the Address screen, switch to the Allowance Charge Configuration tab.
2. Click New.
3. On the Adding Allowance Charge Configuration window, fill out the form. Use the Field Definitions displayed below.
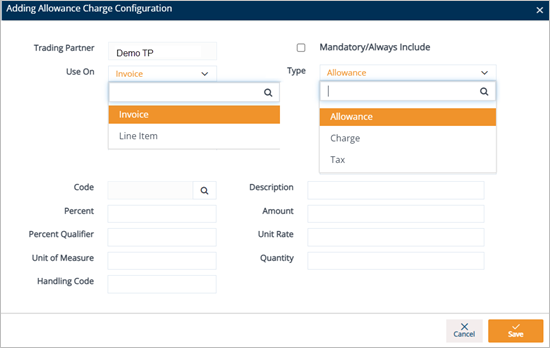
4. Click Save.
A new Allowance or Charge configuration is added to the Address.
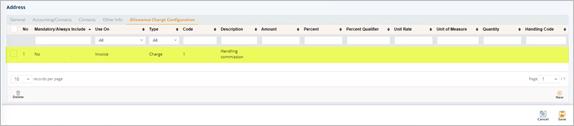
Field Definitions – Allowance Charge Configuration
§ Mandatory/Always Include: Mark the Allowance or Charge record as the required field.
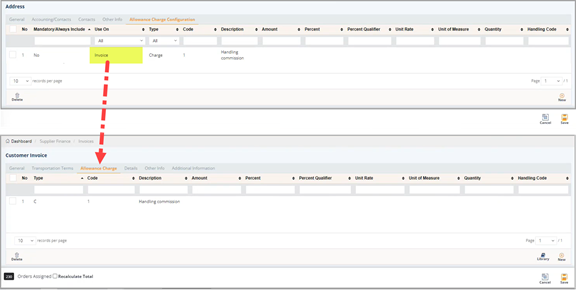
§ Use On: Value is Invoice or Line Item.
§ If Value is Invoice: After being created, the new Allowance or Charge record will be saved in Customer Finance/Supplier Finance > Invoices > Allowance Charge.
tip For more information, see If Invoice is selected in the Use On dropdown list.
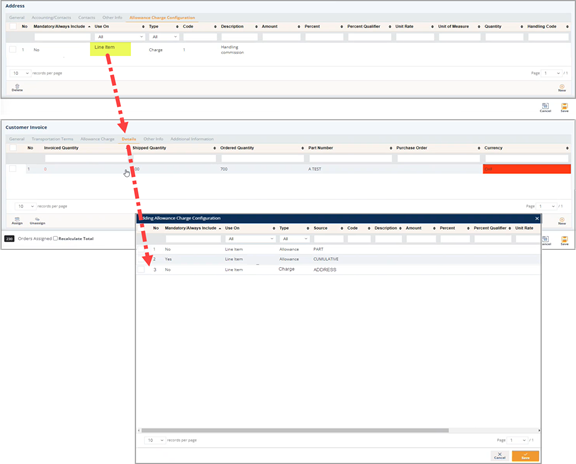
§ If Value is Line Item: After being created, the new Allowance or Charge record will be saved in Customer Finance/Supplier Finance > Invoices > Details > Allowance Charge.
tip For more information, see If Line Item is selected in the Use On dropdown list.
§ Type: Options include Allowance, Charge, or Tax.
§ Code: The Allowance or Charge Code. Do the following:
- Click the Search icon in the Code field.
- On the Select Allowance Code window, select the Allowance or Charge Code.
- Click Select.
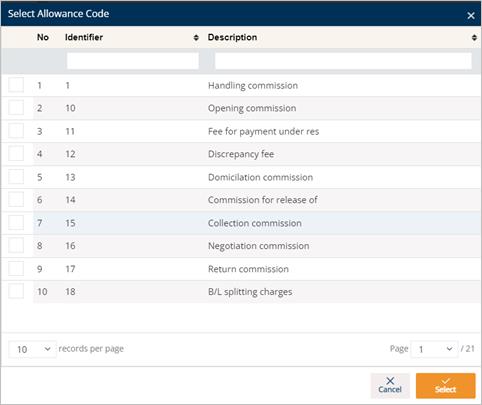
The selected Allowance or Charge Code is loaded in the Code field.
§ Description: A brief description of the Allowance or Charge Code.
§ Percent: The percentage value of the Allowance or Charge.
§ Amount: The amount value of the Allowance or Charge.
§ Percent Qualifier: A code to identify the category of the percentage value.
§ Unit Rate: Unit price.
§ Unit of Measure: Applied measurement unit (e.g., Piece, KG, CM...).
§ Quantity: The quantity.
§ Handling Code: A code specifying the method/way to calculate the Allowance or Charge.
Create a Trading Partner Address
Normally, addresses are automatically added with incoming data. For non-EDI Trading Partners, this may be needed in order for DiAutomotive to create Bill of Lading paperwork and Packing Lists that require address information.
1. On the Settings menu, click Addresses.
2. On the Addresses screen, click New.
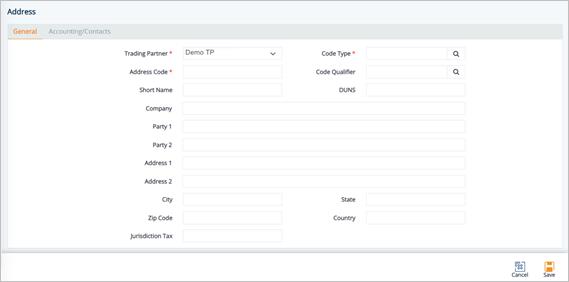
3. Fill out the details of the new Trading Partner address on the General and Accounting/Contacts tabs. Use the following Field Definitions.
4. When you’re finished, click Save.
Field Definitions-General
§ Trading Partner: The ID code of the Trading Partner.
§ Code Type: The code identifying the type of the Trading Partner’s addresses.
§ Address Code: The EDI qualifier for the address (92=Predefined, 1=DUNS).
§ Short Name: A brief name assigned to the Trading Partner in the system.
§ DUNS: The Trading Partner’s registered DUNS (Data Universal Numbering System) number. This unique numeric identifier is a nine-digit number.
§ Company: The name of the company.
§ Address 1: The first line of the address, containing the number and name of the street or road where the company is located.
§ Address 2: The second line of the address, usually used for suite, office, or building number, or other identifying information where the company is located.
§ City: The city where the company is located.
§ State: The state where the company is located.
§ Zip Code: The postal code where the company is located.
§ Country: The country where the company is located.
Field Definitions-Accounting/Contacts
§ Contact: The primary contact person.
§ Department: The name of the department in which the primary contact person works.
§ Phone: The telephone number of the primary contact person.
§ Fax: The fax number of the primary contact person to which printed materials are sent.
§ Email: The email address of the primary contact person.
§ Our Cust Nbr: The address connection to external applications such as an ERP and MRP.
§ Our Vendor Nbr: Your vendor number for this vendor's Ship From address.
§ Address Status: This field is used in certain incoming EDI documents.
|
|
NOTE Examples of some codes in this record are Supplier, Vendor, Ship From, Ship To, Material Issuer, Intermediate Consignee, Buyer Address, etc. |
To add a code type
1. On the Address screen, click the Search icon in the Code Type field.
2. On the Select Address Qualifier window, do the following:
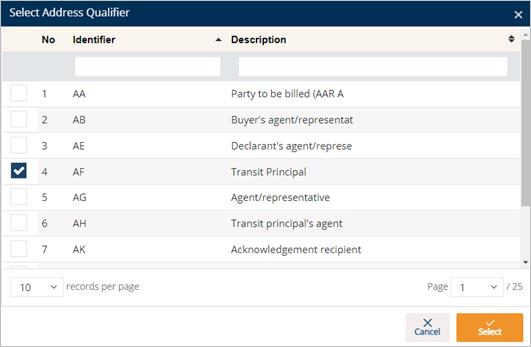
a. Select the Address Qualifier that you want to add.
b. Click Select.
The selected code type is loaded.

To add a code qualifier
1. On the Address screen, click the Search icon in the Code Qualifier field.
2. On the Select an option window, do the following:
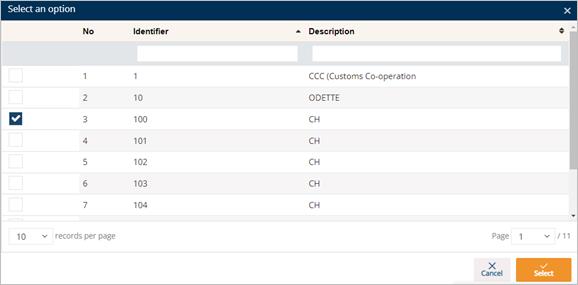
a. Select the Code Qualifier that you want to add.
b. Click Select.
The selected code qualifier is loaded.

Delete a Trading Partner Address
1. On the Settings menu, click Addresses.
2. On the Addresses screen, select the record that you want to remove, and then click the Delete icon.
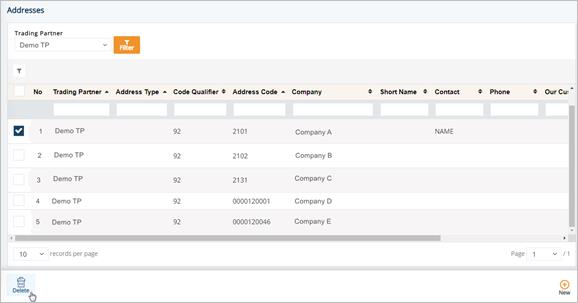
3. On the confirmation message, click OK.
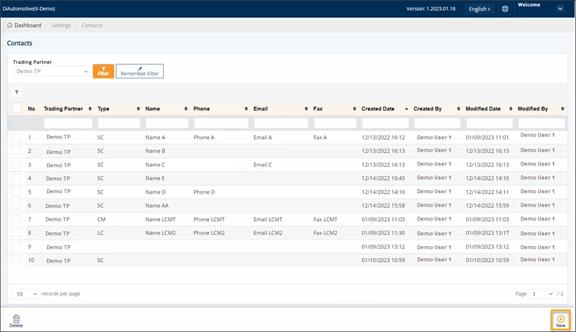
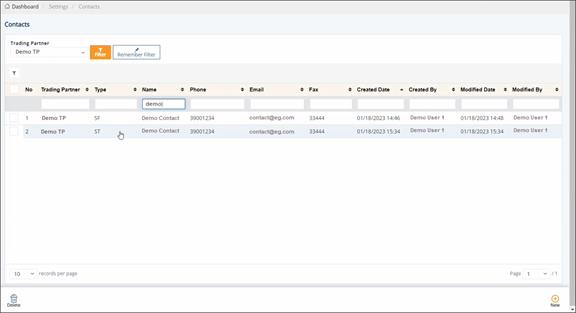
With the Contacts feature, you can manage all the contact points in DiAutomotive. Each contact point has their details (name, type, phone number, email, and fax) for communication about product issues and/or company branches.
This section provides instructions on how to add a new Contact. The Contact records can be assigned to the Trading Partner Parts and/or Addresses, depending on your needs. Once the Contact records are assigned, you can view the assigned information on the corresponding tabs.
To add a new Contact, perform as follows:
1. On the Settings menu, click Contacts.
2. On the Contacts screen, click the New button.
3. On the General tab, do the following:
a. Select the Trading Partner in the dropdown list.
b. Fill out the Name, Type Name, Phone, Email, and Fax fields.
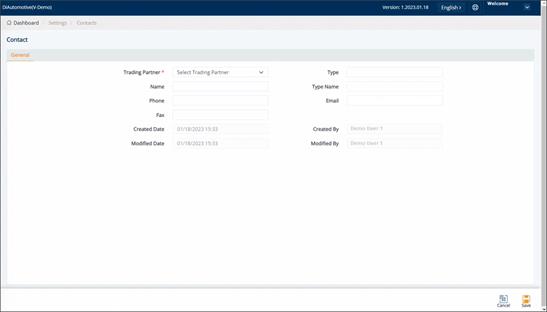
4. When you’re finished, click Save.
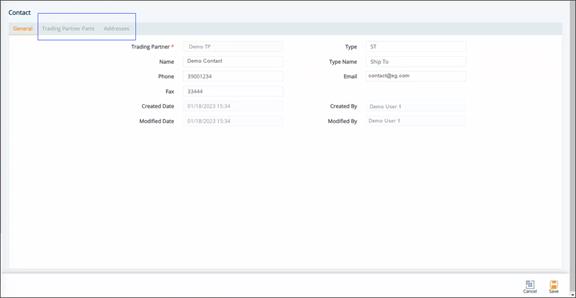
Once the new contact is saved successfully, the Trading Partner Parts and the Addresses tabs will be displayed.
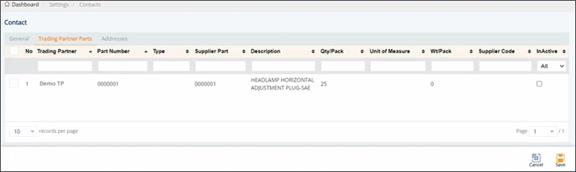
View Linked Trading Partner Parts
The Trading Partner Parts tab lists all the Trading Partner Parts that the Contact is assigned to. The assigned contact will be the contact point for the linked parts/products. For more information, refer to the steps on how to assign a Contact to a Trading Partner Part.
To view the Trading Partner Parts that are linked to a Contact, follow these steps:
1. On the Settings menu, click Contacts.
2. On the Contacts screen, select the record that you want to view.

3. On the Contact screen, switch to the Trading Partner Parts tab.
The linked Trading Partner Part information is displayed.
The Addresses tab lists all the company address information that the Contact is assigned to. For more information, refer to the steps on how to assign a Contact to an Address.
To view the Addresses that are linked to a Contact, do the following:
1. On the Settings menu, click Contacts.
2. On the Contacts screen, select the record that you want to view.
3. On the Contact screen, switch to the Addresses tab.
The linked Address information is displayed.
1. On the Settings menu, click Contacts.
2. On the Contacts screen, select the record that you want to remove, and then click the Delete icon.
3. On the confirmation message, click OK.
Assign a Contact to a Trading Partner Part
This section describes the steps on how to assign a Contact to a Trading Partner Part. You can later view the Parts informationon the Contacts screen > Trading Partner Parts tab.
1. On the Settings menu, click Trading Partner Parts.
2. On the Trading Partner Partsscreen, open the record that you want to view.
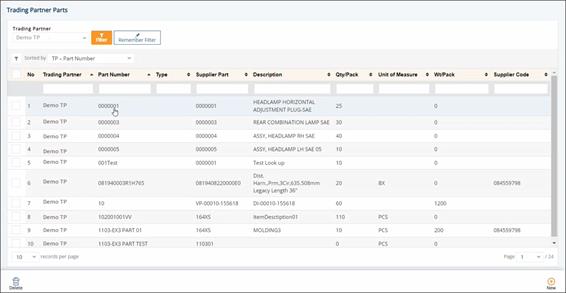
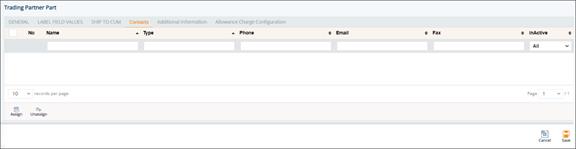
3. On the Trading Partner Part screen, switch to the Contacts tab.
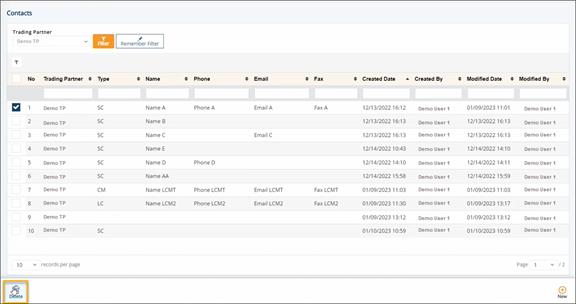
4. On the Contacts tab, click the Assign icon.

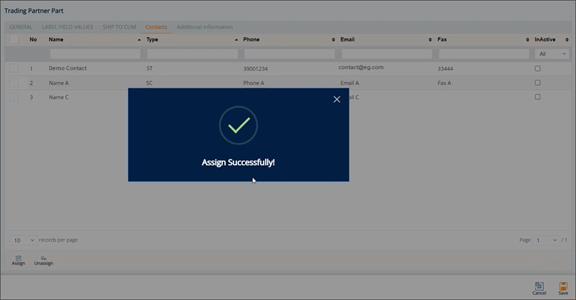
5. On the UnAssigned Contacts window, select the checkbox of the Contact that you want to assign to the Trading Partner Part, and then click OK.
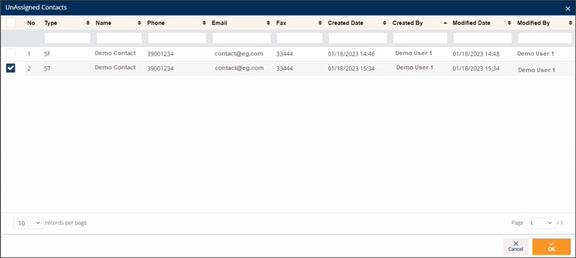
The Contact is assigned to the Trading Partner Part.
6. When you’re finished, click Save.
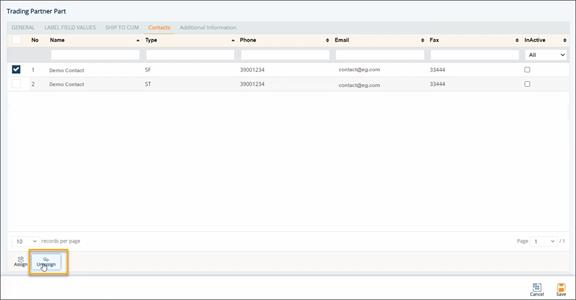
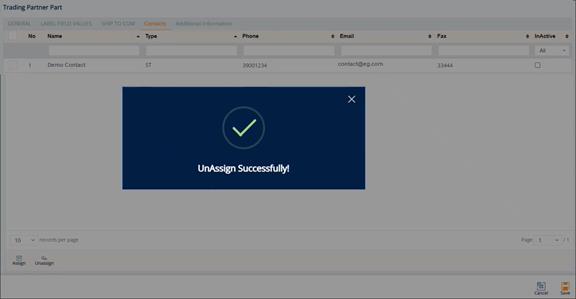
To unassign a Contact
1. On the Trading Partner Part screen > Contacts tab, select the Contact that you want to unassign from the Trading Partner Part, and then click the Unassign icon.
2. On the confirmation message, click OK.
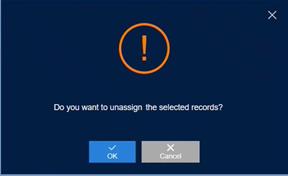
The connection between the Contact and the Trading Partner Part is removed.
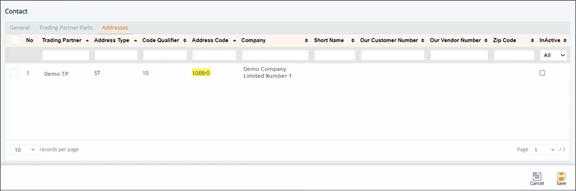
Assign a Contact to an Address
This section describes the steps on how to assign a Contact to an Address. You can later view the Address informationon the Contacts screen > Addresses tab.
1. On the Settings menu, click Addresses.
2. On the Addresses screen, open the record that you want to view.
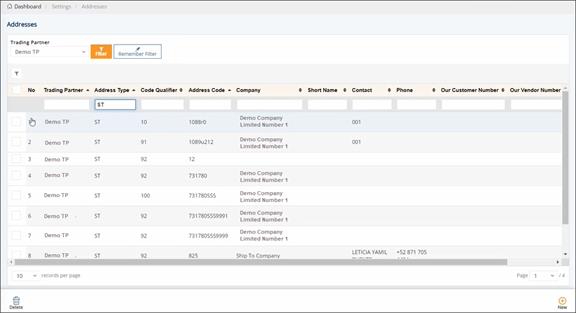
3. On the Address screen, switch to the Contacts tab.
In this example, the Address Code is 1088r0.

4. On the Contacts tab, click the Assign icon.
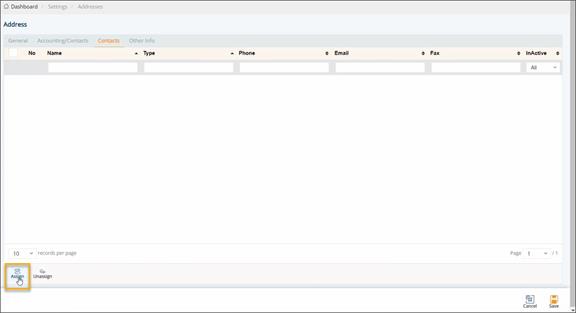
5. On the UnAssigned Contacts window, select the checkbox of the Contact that you want to assign to the Address, and then click OK.
The Contact is assigned to the Address.
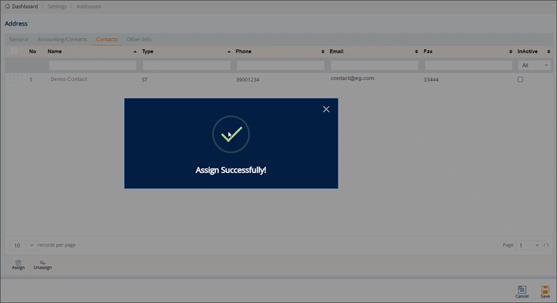
6. When you’re finished, click Save.
To unassign a Contact
1. On the Address screen > Contacts tab, select the Contact that you want to unassign from the Address, and then click the Unassign icon.
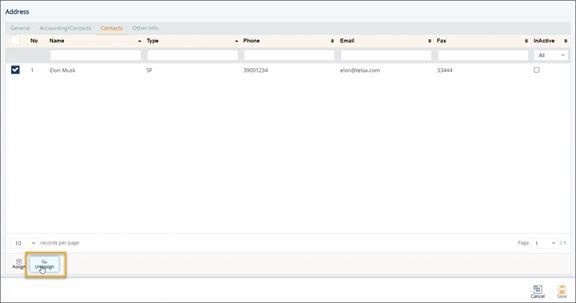
2. On the confirmation message, click OK.
The connection between the Contact and the Address is removed.
With this feature, you can you update the Country of Origin for Barcode Labels and Shippers/ASNs more efficiently.
1. On the Settings menu, click Country Of Origin Adjuster.
2. On the Country Of Origin Adjuster screen, select the Honda specs or Other Specs option.
o Hondaspecifications:
a. Select the Trading Partner in the drop-down list.
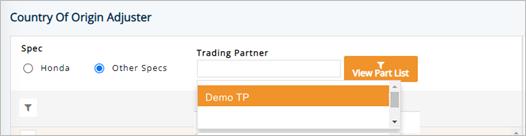
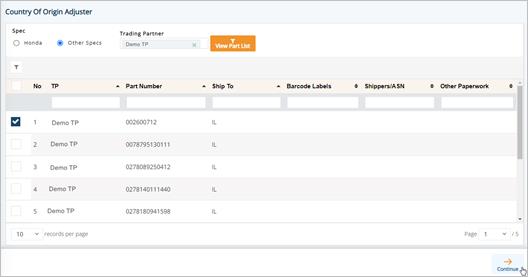
b. Click the View Part List button.
The parts list is displayed.
c. Select a Part and then click Continue.
d. On the Honda Requirements window, enter the FTC Type Codein the text box and then click Continue.
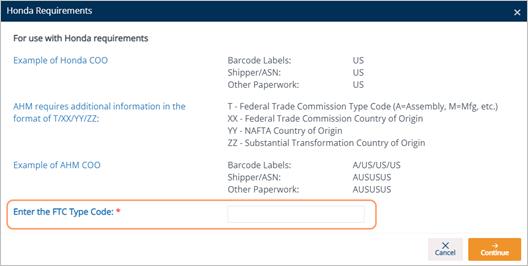
e. On the Update Country Of Origin page, click Update.
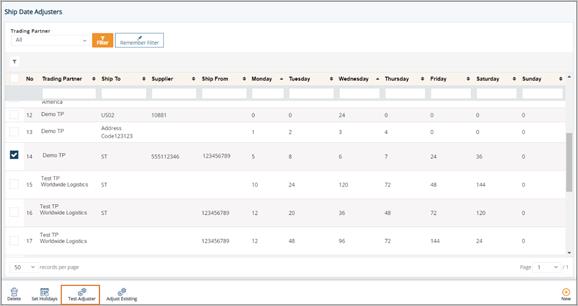
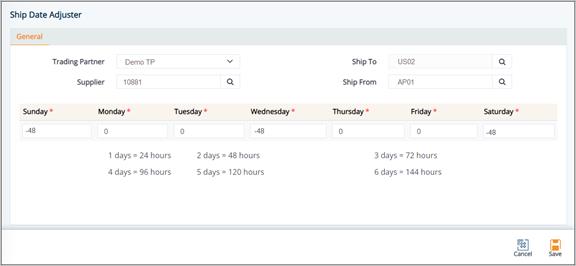
The Ship Date Adjuster is used to change “Our Ship Dates” when the Trading Partner’s requested ship date and time will be different from the actual ones. The original requested ship dates are not affected by this tool. This adjuster is commonly used for:
§ When only the delivery date was requested on EDI, the ship date will be the delivery date by default. Use the adjuster to set the more reasonable ship date based on the duration of transit.
§ Adjust for non-shipping days (weekends, holidays, and abnormal weekly hours).
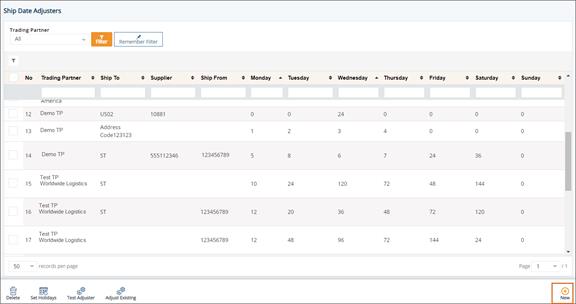
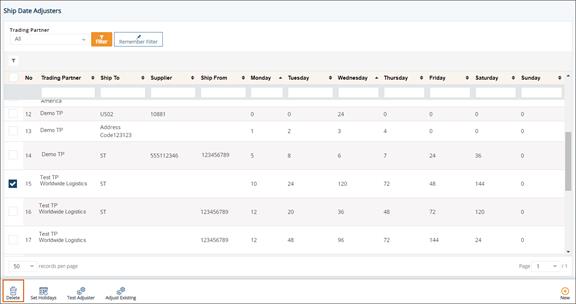
1. On the Settings menu, click Ship Date Adjuster.
2. On the Ship Date Adjuster screen, select the Trading Partner in the drop-down list and then click the Filter button.
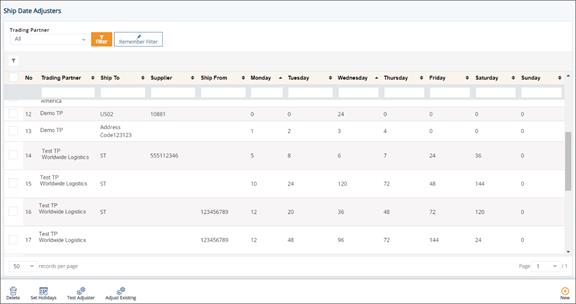
3. Click the item that you want to view.
The details are displayed on the General tab.
4. Make the changes if needed, and then click Save.
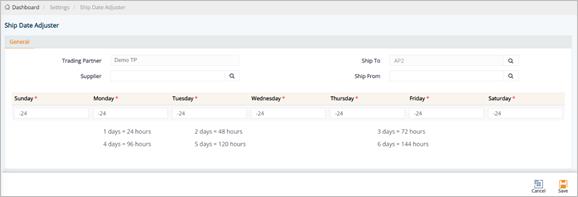
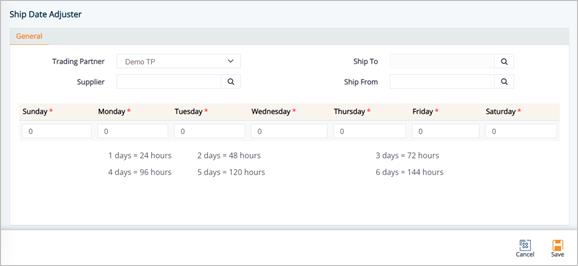
Field Definitions
§ Trading Partner: The trading partner whose ship date you want to adjust.
§ Ship To: The Ship To address.
§ Ship From: The Ship From address.
§ Supplier: The Supplier code.
§ The day of the week(from Sunday to Saturday): You can enter the number of hours you’d like to adjust each ship date to as it relates to the day of the week it comes in on.
The Ship Date may also be adjusted to any holidays when they are added to the Holiday Management file. In this topic, you will identify specific non-shipping days and the Ship Date Adjuster will set the ship date to one day earlier than that holiday.
Shipping date scenarios
Setting a holiday works in conjunction with the regular Ship To adjustments. For example, if the Ship Date for Monday was adjusted to Friday, then Thanksgiving adjustments may look like this if you are not shipping on Thanksgiving Day or the day after.
The Adjusted Ship Date will be the Wednesday before Thanksgiving.
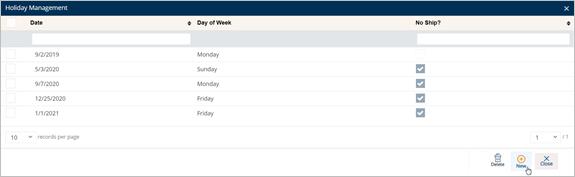
1. On the Settings menu, click Ship Date Adjuster.
2. On the Ship Date Adjusters screen, click the Set Holidays button.
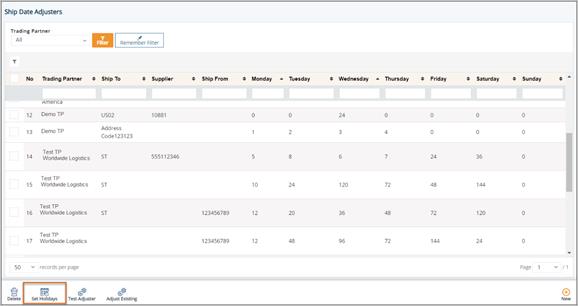
3. On the Holiday Management screen, click New.
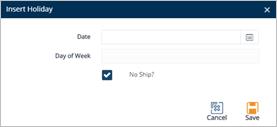
4. On the Insert Holiday window, do the following:
a. Enter the Date.
Note The Day of Week is filled in automatically.
b. Select the No Ship check box for that holiday, and then click Save.
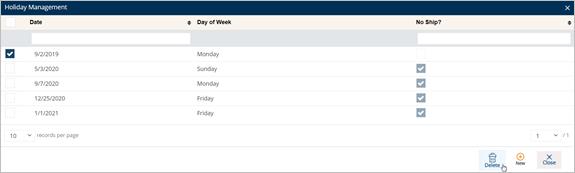
To delete a holiday
ð On the Holiday Management screen, select the holiday that you want to remove, and then click Delete.
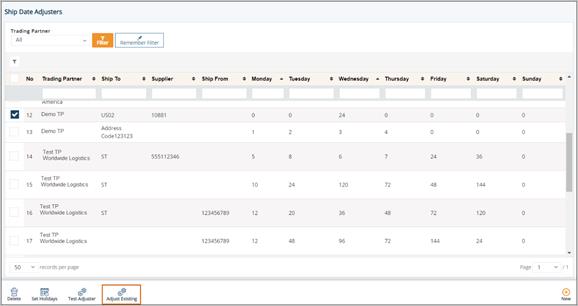
Adjust Existing Ship Date
1. On the Settings menu, click Ship Date Adjuster.
2. On the Ship Date Adjuster screen, select the record that you want to modify.
3. Click the Adjust Existing button.
4. On the Reset Ship Dates window, make the necessary adjustments. Use the following Field Definitions.
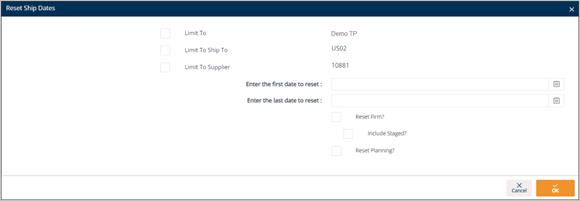
5. When you are finished, click OK.
Field Definitions – Reset Ship Date
§ Limit To: The Trading Partner who you want to limit to when resetting the ship date.
§ Limit To Ship To: The Ship To code that you want to limit to when resetting the ship date.
§ Limit To Supplier: The Supplier code that you want to limit to when resetting the ship date.
§ Enter First Date and Last Date to Reset: The first date and last date to adjust the ship date.
§ Reset Firm Order: Select to adjust the ship date of the Firm Order.
§ Include Staged: Select to include the Staged status of the Firm Order.
§ Reset Planning: Select to adjust the Planning ship date.
To verify if the adjustment is working as intended, you may experiment with a specific scenario by using the Test Adjuster button.
1. On the Settings menu, click Ship Date Adjuster.
2. On the Ship Date Adjuster screen, select the record that you want to test.
3. Then, click the Test Adjuster button.
4. On the Date Testing window, fill out the ship values for testing.

a. Click the Search icon in the Ship To field, and then select the Ship To on the Browse Ship To window.
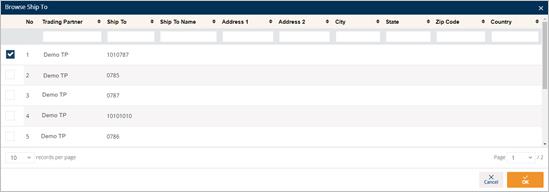
b. Click the Search icon in the Supplier field, and then select the Supplier on the Browse Supplier Code window.
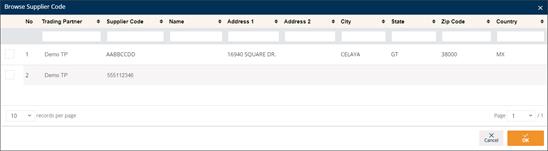
c. Click the Search icon in the Ship From field, and then select the Ship From on the Browse Ship From window.

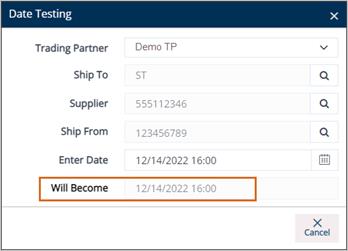
d. Fill out the Enter Date field.
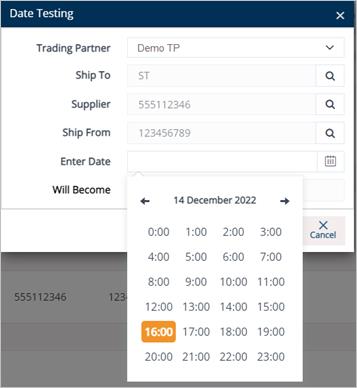
The Will Become field is automatically generated.
Create a Ship Adjuster Record
1. On the Settings menu, click Ship Date Adjuster.
2. On the Ship Date Adjuster screen, click New.
3. On the General tab, select the Trading Partner in the drop-down list.
4. Click the Search icon in the Ship To field, and then select the Ship To on the Browse Ship To window.
5. Click the Search icon in the Supplier field, and then select the Supplier on the Browse Supplier Code window.
6. Click the Search icon in the Ship From field, and then select the Ship From on the Browse Ship From window.
7. Next, enter the number of hours that you want to adjust each ship date to as it relates to the day of the week it comes in on.
a. Positive hours move our ship date/time later than the requested date from EDI. Negative hours move the ship date/time earlier.
b. In the example above, the customer requests only a delivery date. The in-transit is two days. The ship date should therefore be two days prior to the delivery date.
i. Shipments scheduled for Wed-Sat deliveries are shipped two days in advance.
ii. Because you do not ship on the weekend, Sunday’s delivery will be shipped on Friday’s shipment.
|
|
NOTE After making your entries, we recommend that you use the Test Adjuster to ensure that you are getting the desired results. |
Delete a Ship Adjuster Record
1. On the Settings menu, click Ship Date Adjuster.
2. On the Ship Date Adjuster screen, select the record that you want to remove.
3. Next, click the Delete button.
4. On the confirmation message, click OK.
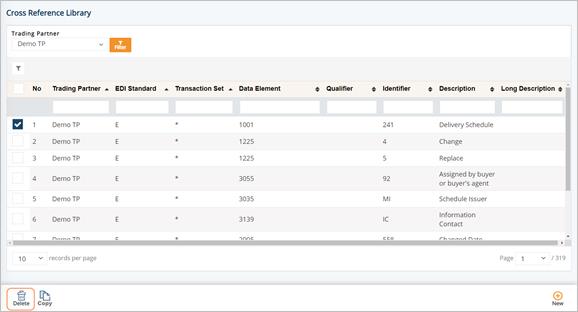
The Cross Reference Library contains all the cross-references that connect the user interface to the DiAutomotive system, to EDI transactions, imports, exports, or other internal processes. Each cross-reference record is a method to set definitions or defaults for:
· Technical codes into meaningful descriptions or headings for the user to see
· Translating internal codes for use in outgoing EDI, reports, or exports
· Translating external codes for use when processing incoming EDI, reports, or imports
1. On the Settings menu, click Cross Reference Library.
2. On the Cross Reference Library screen, click the record that you want to view.
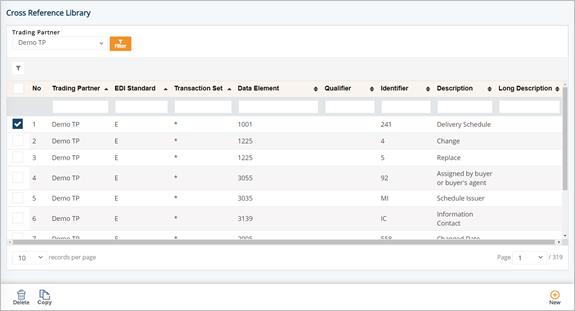
Information about the selected Cross Reference record is displayed.
1. On the Settings menu, click Cross Reference Library.
2. On the Cross Reference Library screen, click New.
3. Fill out the details of the new Cross Reference on the General tab. Use the following Field Definitions.
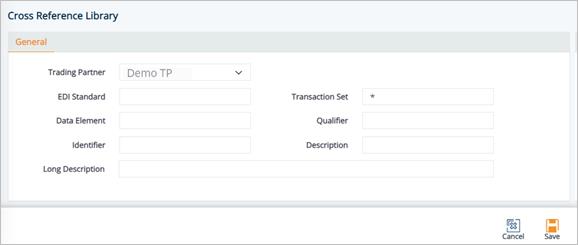
4. When you are finished, click Save.
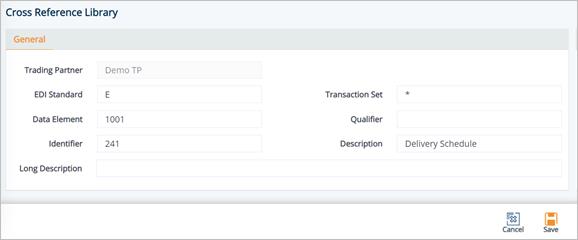
Field Definitions
Trading Partner: The Trading Partner this record is for.
EDI Standard: X12(X), EDIFACT(E), or ODETTE(O). Default to X if the setting isn’t EDI related.
Transaction Set: The EDI Transaction, otherwise use *.
Data Element: The EDI Element this record is from or will populate for outgoing.
Qualifier: The segment qualifier when using X12 EDI.
Identifier: The code from either the EDI Standard, DiAutomotive, or a third party being referenced.
Description: The cross-reference of the Identifier from EDI definitions to either a human-readable description in the interface or paperwork, or an external field.
Long Description: Used in addition to the Description, when additional translation or conversion is needed (usually due to customization).
1. On the Settings menu, click Cross Reference Library.
2. On the Cross Reference Library screen, select the Cross Reference that you want to copy, and then click the Copy icon.
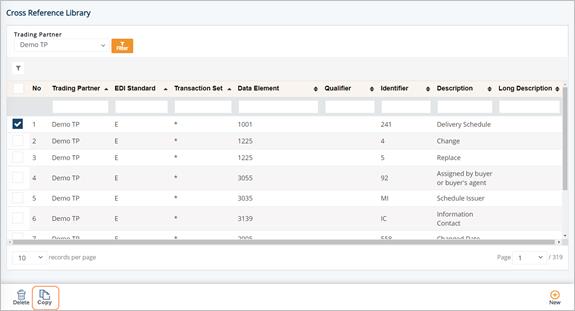
Note The new Cross Reference is displayed containing the same values as the original Cross Reference, except for the Identifier, Description, and Long Description.
3. On the new Cross Reference screen, fill out the Identifier, Description, and Long Description values.
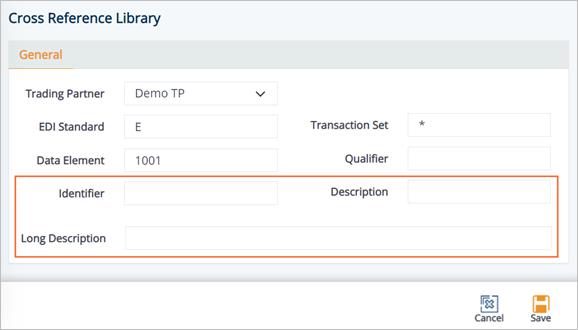
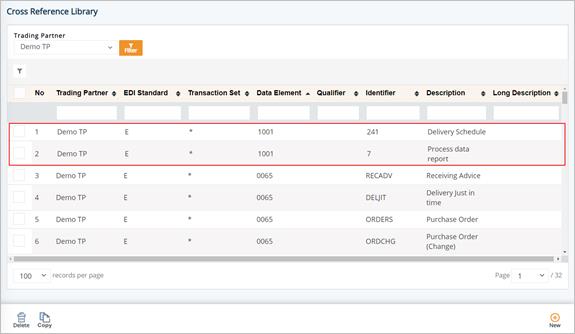
4. Click Save.
The Cross Reference is successfully copied.
1. On the Settings menu, click Cross Reference Library.
2. On the Cross Reference Library screen, select the Cross Reference that you want to remove, and then click the Delete icon.
3. On the confirmation window, click OK.
Email Notifications
DiAutomotive’s email function is used to automatically notify the appropriate people of certain events. DiAutomotive sends its email messages by group, for example, IT messages are sent to the IT group and Accounting messages are sent to the Accounting group.
Here are several examples:
§ Error notifications during processing of incoming files are sent to the IT Dept.
§ Notifications for the receipt of Remittance Advices are sent to you, and notifications upon receipt of Purchase Orders are sent to a different group of people.
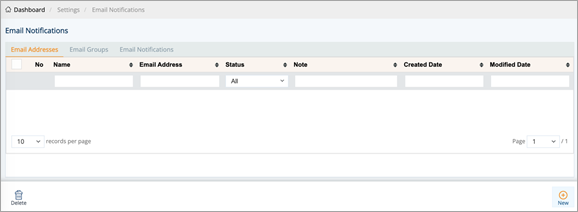
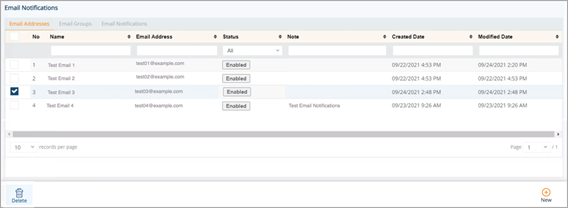
The Email Addresses feature functions like an address book and is used to create and store the email addresses that will be used by DiAutomotive to send relevant notifications.
To add an email address
1. Go to Settings > Email Notifications.
2. On the Email Addresses tab, click the New button.
3. On the Add New Email Address Record window, fill out the form, and then click Save.
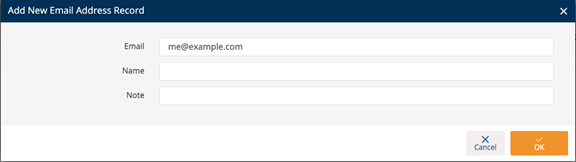
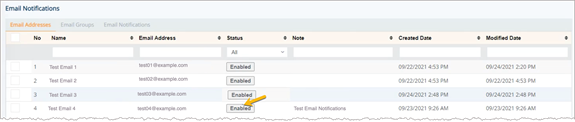
By default, the new email address is set to the Enabled status for DiAutomotive to send messages to.
Field Definitions
§ Name: Recipient’s name.
§ Email Address: Recipient’s email address.
§ Status:
- Enabled: The email address can receive notifications.
- Disabled: The email address cannot receive notifications.
§ Note: Any additional information about the email address or notes for future reference.
§ Created Date: The date when the email address was created.
§ Modified Date: The date when the email address was last modified.
To enable/disable an email address
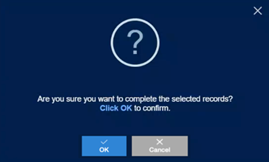
1. In the Status column, click the Enabled button to change its status to Disabled.
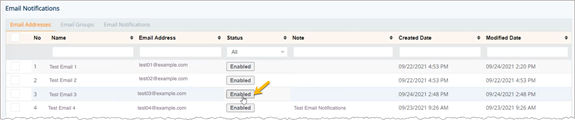
2. On the confirmation message, click OK to confirm.
The status of the email address becomes Disabled. The disabled email addresses can NOT be assigned to any email group. For more information, refer to the Email Groups section.

tip Click the Disabled button to change the status back to Enabled.
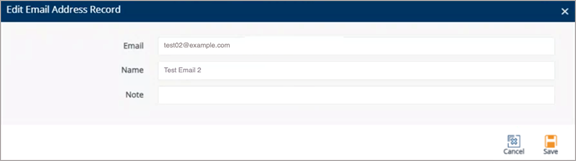
To edit an email address
1. On the Email Addresses tab, select the record that you want to change.
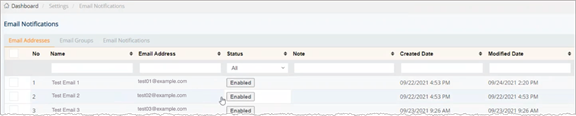
2. On the Edit Email Address Record window, make the changes, and then click Save.
To delete an email address
ð On the Email Addresses tab, select the record that you want to remove, and then click the Delete icon.
The Email Group feature is a good way for you to organize sending emails without having to specifically identify individual email addresses.
To add an email group
1. On the Email Notifications screen, switch to the Email Groups tab.
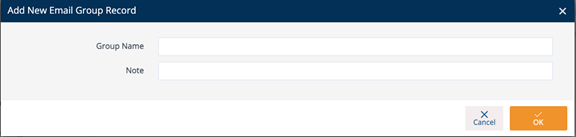
2. Click the New button.
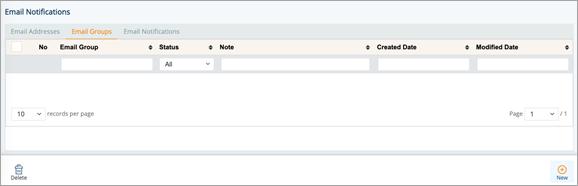
3. On the Add New Email Group Record window, fill out the form, and then click Save.
The new email group is set to the Enabled status by default.

To assign addresses to an email group
1. On the Email Group tab, select the group to which you want to assign email addresses.

2. On the Email Group Detail window, click the Assign  icon.
icon.
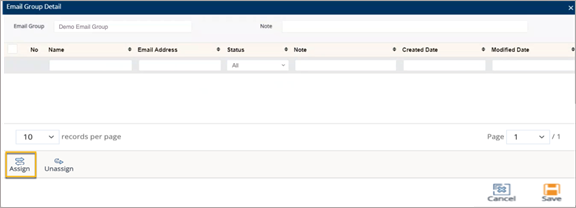
3. On the Email Addresses window, select the addresses that you want to assign to the email group, and then click OK.
NOTE Only Enabled addresses can be assigned to a group.

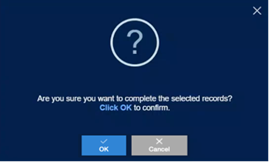
4. On the confirmation message, click OK to confirm

The Assign Successfully window appears.
5. Click Save.
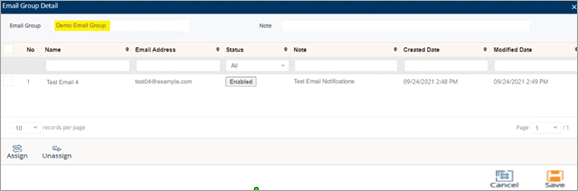
The email addresses are assigned to the email group.
TIPS
§ To unassign an email address from the group, use the Unassign  icon.
icon.
§ To disable/deactivate an email address, click the Enabled button to change its Status to Disabled. You can click it again to change its Status back to Enabled.
To enable/disable an email group
1. In the Status column, click the Enabled button to change its status to Disabled.
2. On the confirmation message, click OK to confirm.
The status of the email group becomes Disabled. The disabled email groups can NOT be assigned to receive email notifications. For more information, refer to the Email Notification Settingssection.
tip Click the Disabled button to change the Status back to Enabled.
To delete an email group
ð On the Email Group tab, select the record that you want to remove, and then click the Delete icon.

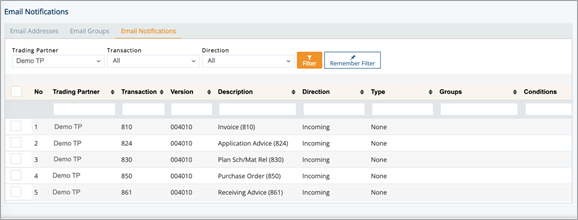
Email Notification Settings
The Email Notifications tab displays a list of transactions with their directions. You can use this feature to set up the email notification types and assign email groups to receive notifications during the processing of incoming/outgoing files. As a result, the notifications will be sent to the assigned email groups.
Here are several examples:
§ Notifications upon receipt of incoming Purchase Orders (ORDERS) are sent to the Sales group.
§ Notifications during processing of outgoing Invoices (INVOIC) are sent to the Accounting group.
To assign email notifications to a group
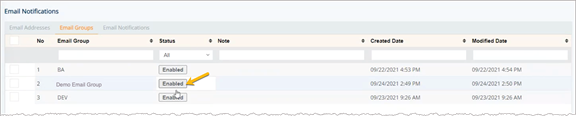
1. On the Email Notifications screen, switch to the Email Notifications tab.
2. Select the transaction to which you want to set up an email notification type.
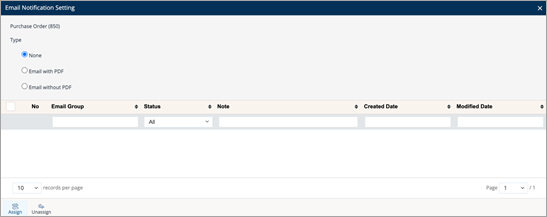
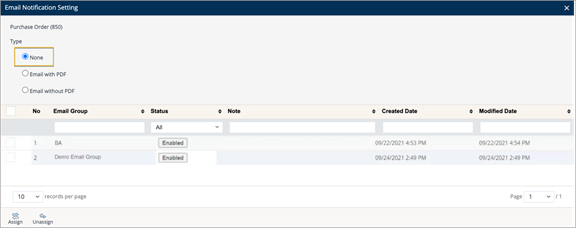
3. On the Email Notification Settings window, do the following:
a. Select the Type of email notification.
· None: Do not send notifications.
· Email with PDF: Send notifications with an enclosed PDF file.
· Email without PDF: Send notifications without a PDF file.
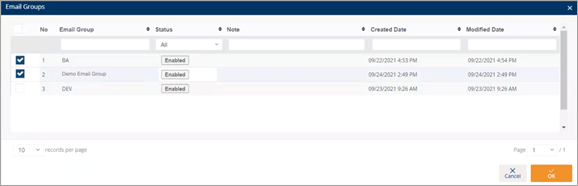
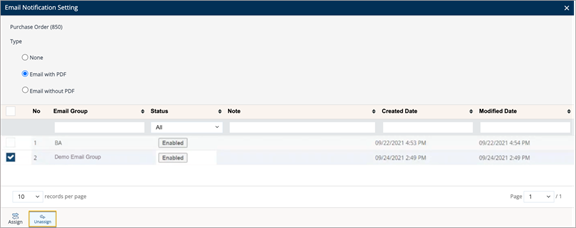
b. Next, click the Assign  icon.
icon.
c. On the Email Groups window, select the groups that will receive the email notifications, and then click OK.
NOTES
§ You can assign email notifications to Enabled groups only.
§ More than one email group can be set up to receive email notifications of a specific email type.
d. On the confirmation message, click OK to confirm.
The Assign Successfully window appears.
4. When the email groups are assigned, close the Email Notification Settings window.

TIPS
§ To unassign an email group from the settings, use the Unassign icon.
§ To disable/deactivate an email group, click the Enabled button to change its Status to Disabled. You can click it again to change its Status back to Enabled.
On the Email Notifications tab, the email notification type and the email groups are loaded accordingly.
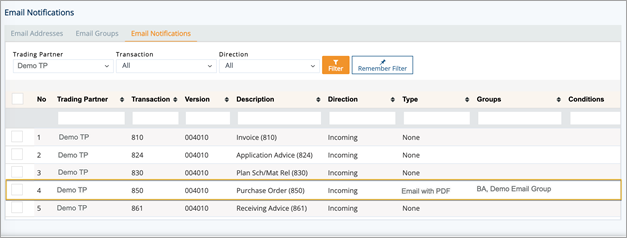
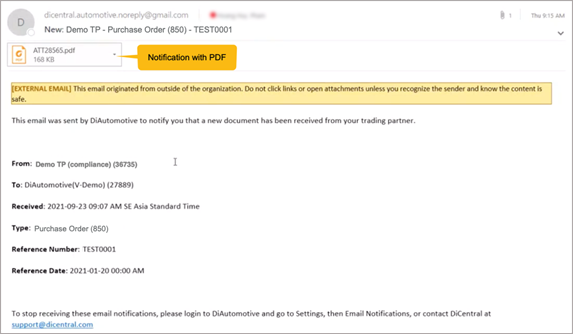
For example, when new Purchase Orders (ORDERS) arrive, DiAutomotive will send the documents in .pdf format as an attachment to the assigned email groups.
To disable sending email notifications
1. On the Email Notifications tab, select the notification that you want to disable.
2. On the Email Notification Settings window, change the Type to None.
ALTERNATIVE Disabled email groups will not receive notifications. You can click the Enabled button to change its status to Disabled. Click it again to change the status back to Enabled, as needed.
To unassign a group from email notifications
ð On the Email Notification Settings window, select the Email Group that you want to unassign, and then click the Unassign icon.
When groups are unassigned from receiving notifications, all the email addresses in the group will not receive notifications.
1. On the Settings menu, click Trading Partner Profiles.
2. On the Trading Partners screen, select the record that you want to work with.
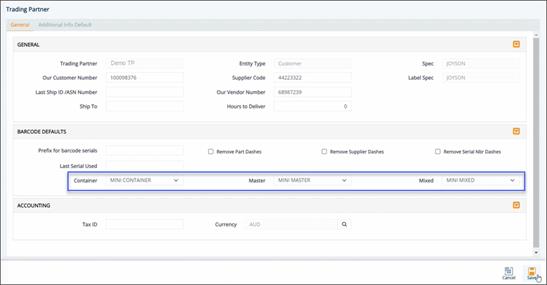
3. On the General tab, in the BARCODE DEFAULTS section, do the following:
a. Select the label template in the Container dropdown list.
b. Select the label template in the Master dropdown list.
c. Select the label template in the Mixed dropdown list.
d. When you’re finished, click Save.
The selected templates will be applied to the label printing job with priority #3 (when there is no setup in the Trading Partner Packages and the Trading Partner Parts modules).
Work with Additional Info Default
This section provides instructions on how to handle the Additional Info Default configurations in the Trading Partner Profiles. You can also set up the Default Value for the Additional Info Default record and change it later. Moreover, if the record is marked as Mandatory/Always Included, it will be automatically displayed on the Additional Information tab.
To set up a Default Value
1. On the Settings menu, click Trading Partner Profiles.
2. On the Trading Partners screen, select the record that you want to work with.

3. On the Trading Partner screen, switch to the Additional Info Default tab.
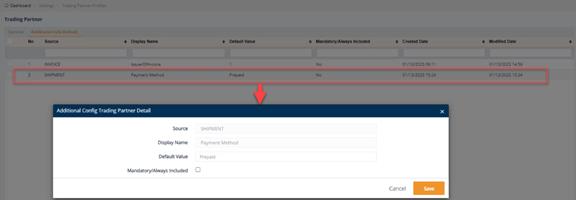
4. On the Additional Info Default tab, click New.

The Additional Info Default Configurations screen shows the Additional Info Default records.
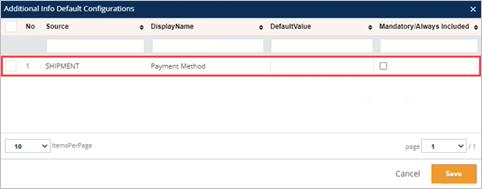
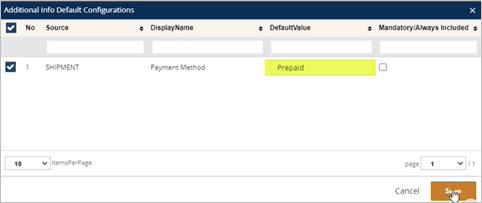
5. On the Additional Info Default Configurations screen, select the checkbox of the record that you want to add.
6. Enter the Default Value in the box.
In this example, the Default Value is Prepaid.
7. Click Save.
The new Additional Info Default record is added. In this example, its Mandatory/Always Included value is No.
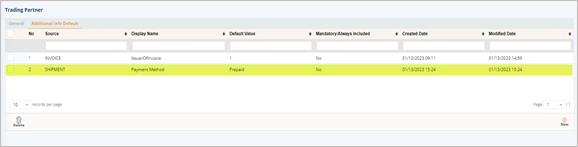
Example 1
In this example, the default value of the Additional Info Default records is Prepaid and the Mandatory/Always Included checkbox is NOT selected.
Add an Additional Information record to a Customer Shipment
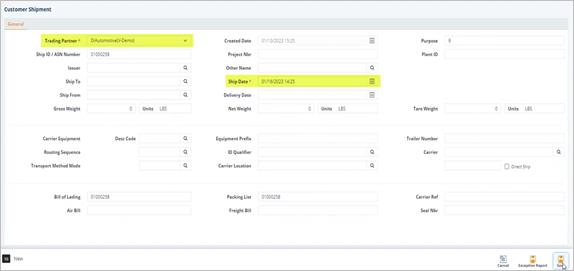
1. On the Settings menu, click Customer Shipments > Shipments.
2. On the Customer Shipment screen, fill out the form, and then click Save.
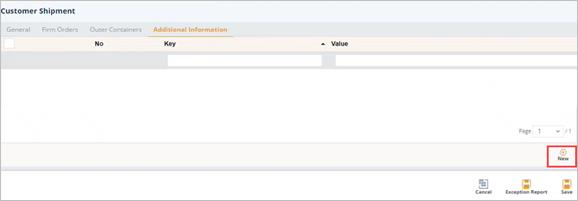
3. Switch to the Additional Information tab.
4. On the Additional Information tab, click New.
5. On the Other Info Config window, select the record that you want to add, and then click Save.
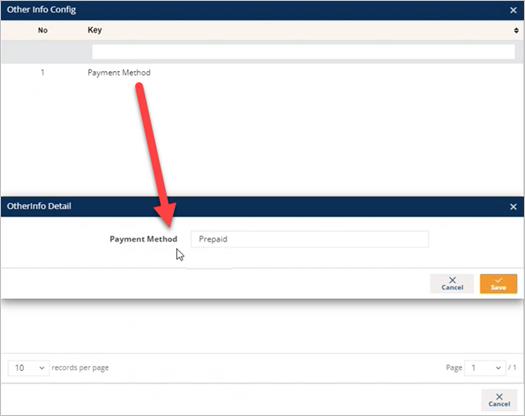
Note In this example, the default value of the Payment Method key is Prepaid. You can change it later, as needed.
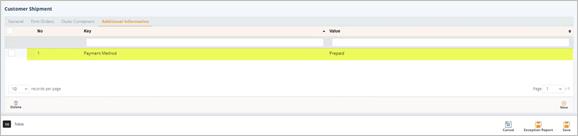
6. When the record is added to the Additional Information tab, click Save to finish.
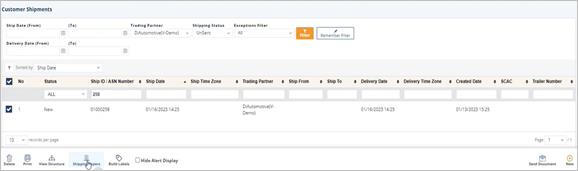
1. On the Customer Shipments screen, select the record for which you want to print shipping documents.
2. Click the Shipping Papers icon.
3. On the View Shipping Papers window, select the documents that you want to print, and then click Save.
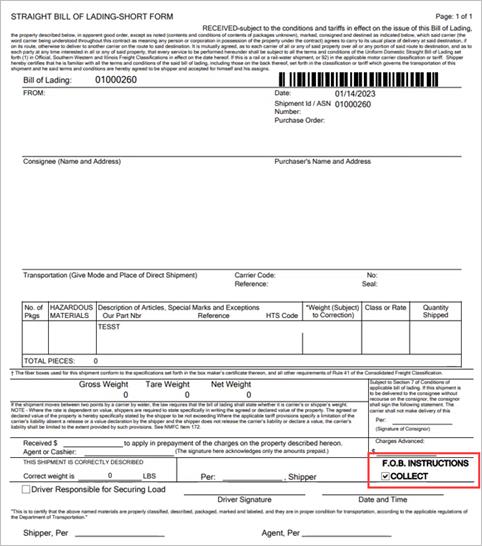
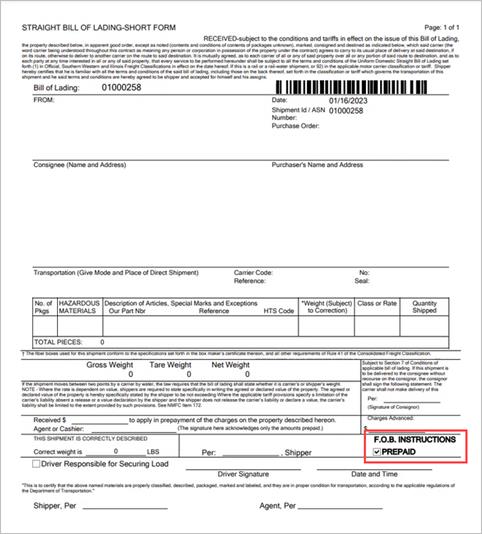
Example: Bill of Lading

The Bill of Lading form displays the default value that you set up in Trading Partner Profile.
To set up an Additional Info Default record as Mandatory/Always Included
When the Mandatory/Always Included checkbox is selected, the Additional Info Default records will be automatically applied to the Additional Information tab of the new Customer Shipments upon creation.
1. On the Settings menu, click Trading Partner Profile.
2. On the Trading Partners screen, select the record that you want to work with.
3. On the Trading Partner screen > Additional Info Default tab, select the record.
4. On the Additional Config Trading Partner Detail screen, do the following:
a. Change the Default Value in the box as needed.
In this example, the Default Value is changed to Collect.
b. Select the Mandatory/Always Included checkbox.
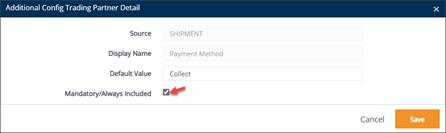
5. Click Save.
The Mandatory/Always Included value of the new Additional Info Default record is Yes.

Example 2
In this example, the default value of the Additional Info Default record is Collect and the Mandatory/Always Included checkbox is selected.
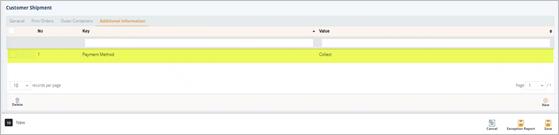
The Additional Information record is automatically applied to a Customer Shipment
ð On the Customer Shipment window, switch to the Additional Information tab.
The Additional Info Default record is automatically applied because it has been set as mandatory. There is no need to click the New button to connect the values.
View Shipping Papers
Note For the steps on how to view a Bill of Lading, refer to Example 1 above.