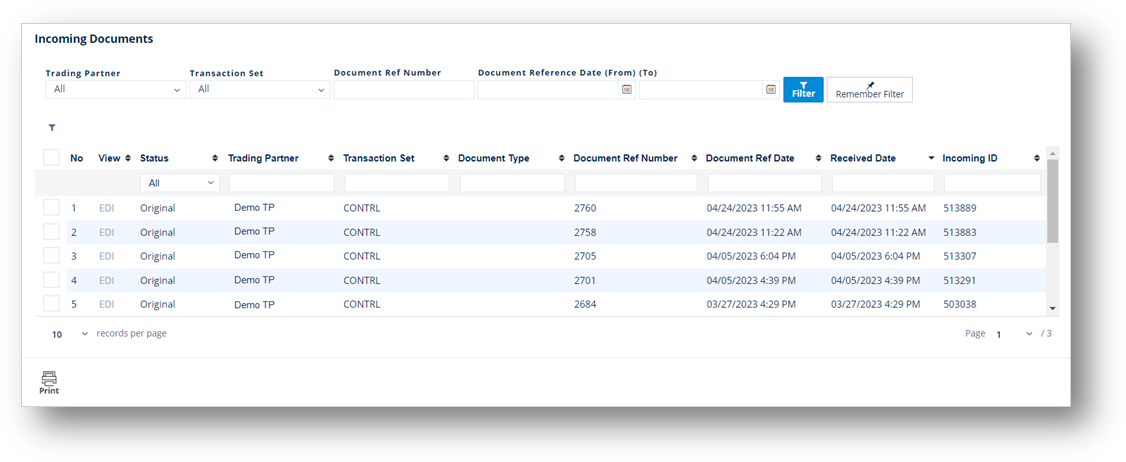
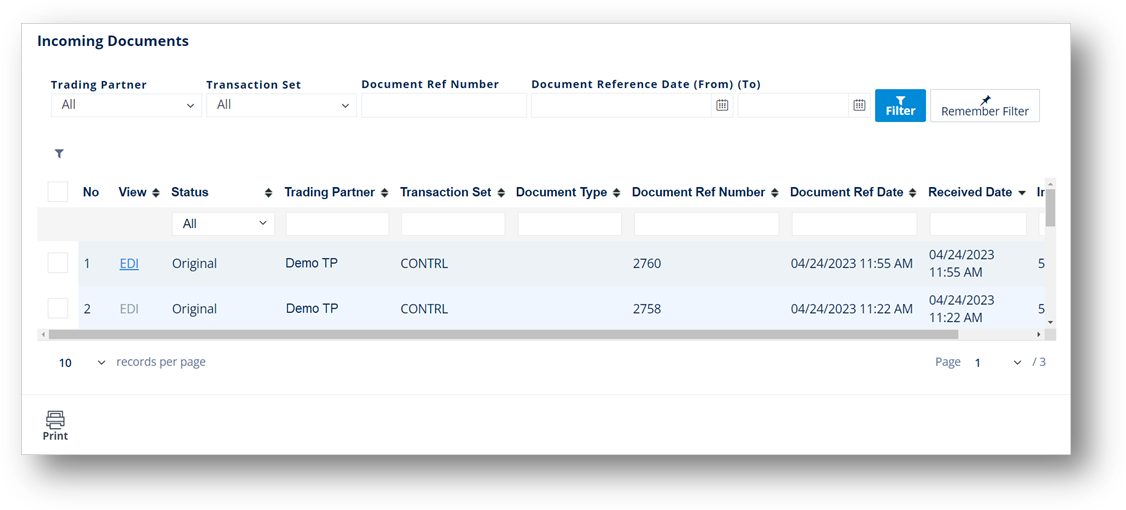
The Incoming Documents window allows you to view, print, and track EDI documents that have been received by the Trading Partner. The most common use of these windows is to reprint and review documents from Trading Partners. Incoming Documents may also be used to find documents that are only partially processed.
1. On the menu pane, click Incoming Documents.
2. On the Incoming Documents screen, use the Filter to search for the records that you want to view.
1. On the menu pane, click Incoming Documents.
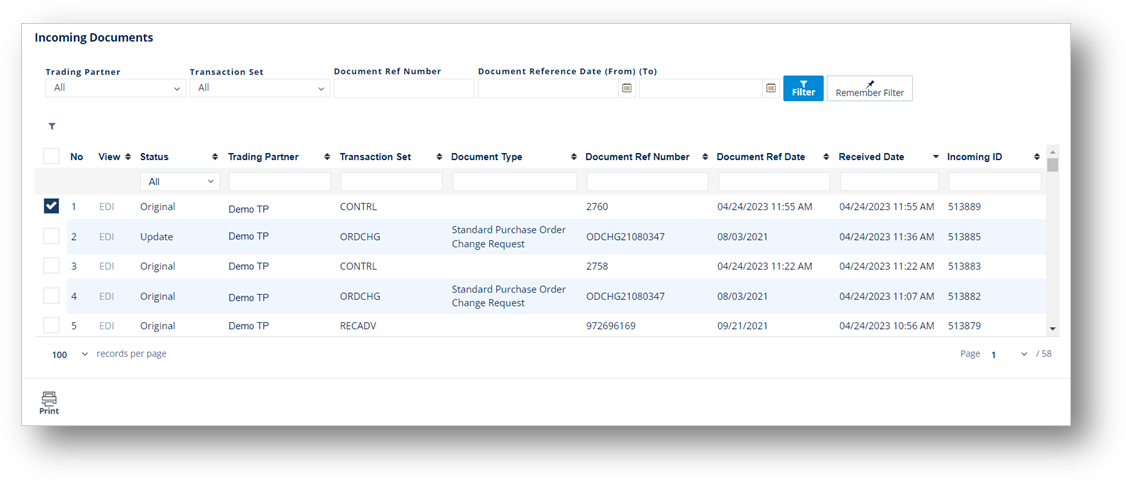
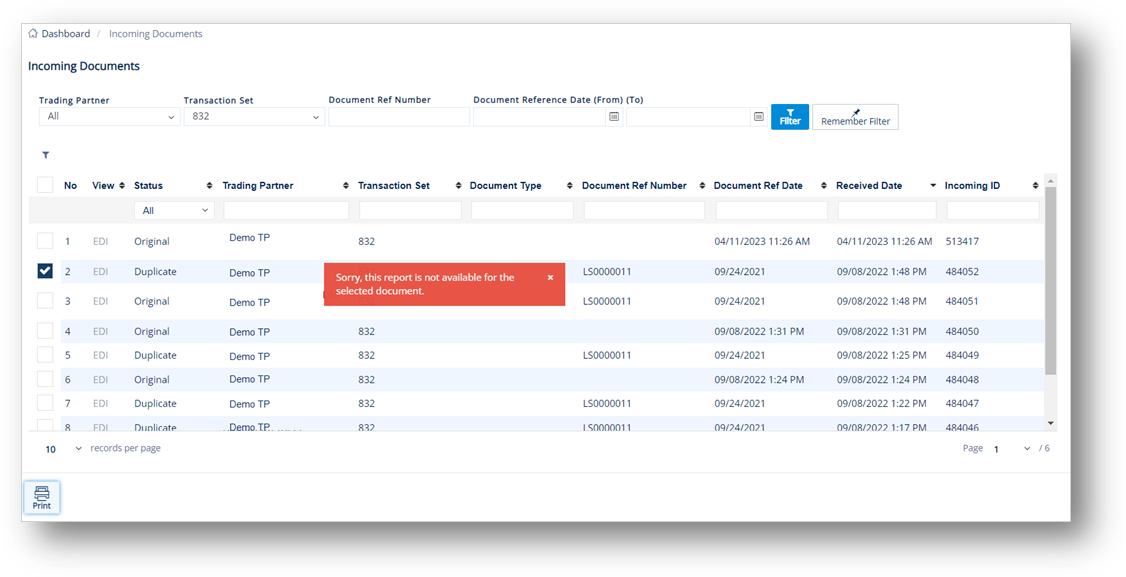
2. On the Incoming Documents screen, select the document that you want to print.
3. Click the Print icon.
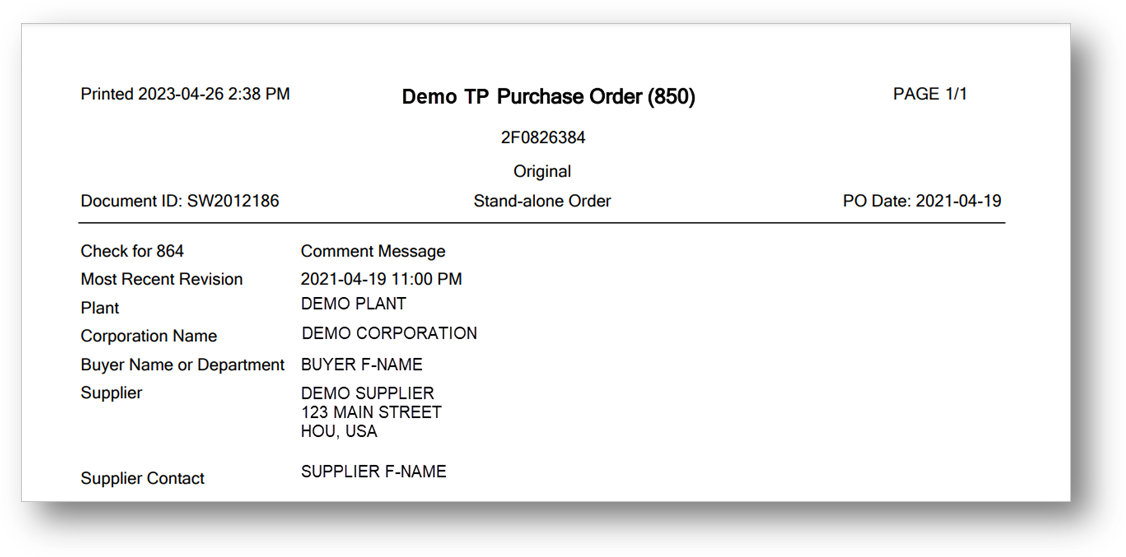
The Print View is displayed.
Note
· If you print a record with no data in the View column, an error message will be displayed.
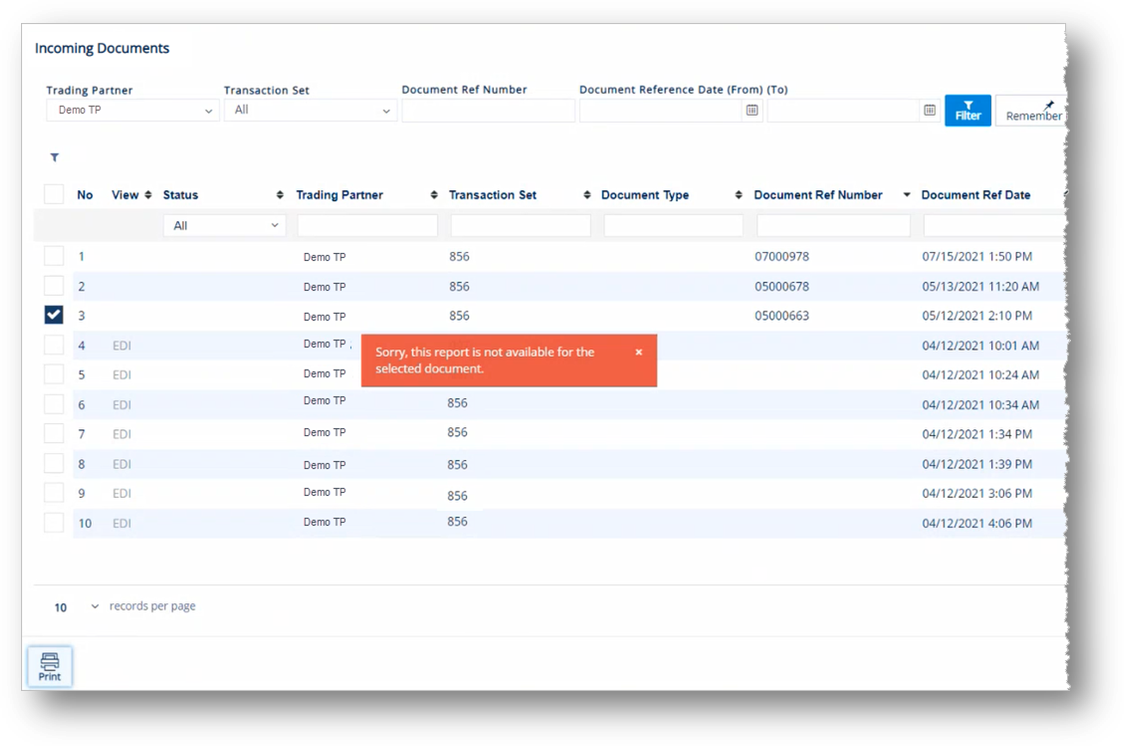
· If you print a record with an unsupported Transaction Set, an error message will also be displayed. In this example, it is the 832 transaction set.
1. On the menu pane, click Incoming Documents.
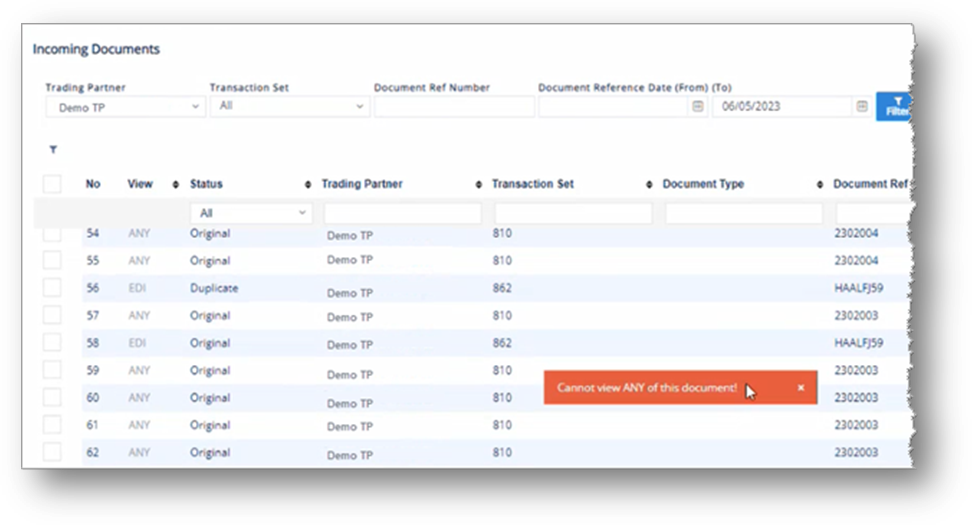
2. On the Incoming Documents screen, click the ANY link in the View column of the document that you want to view.
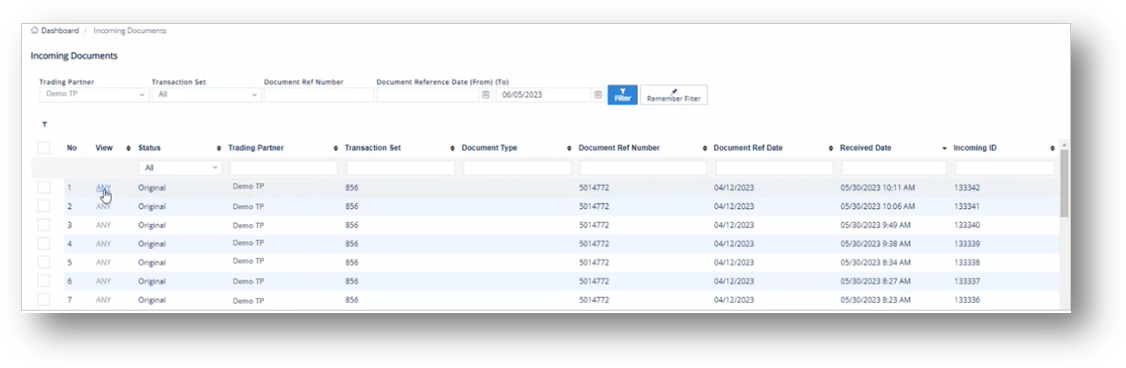
The View ANY window displays the raw data for the selected incoming document.
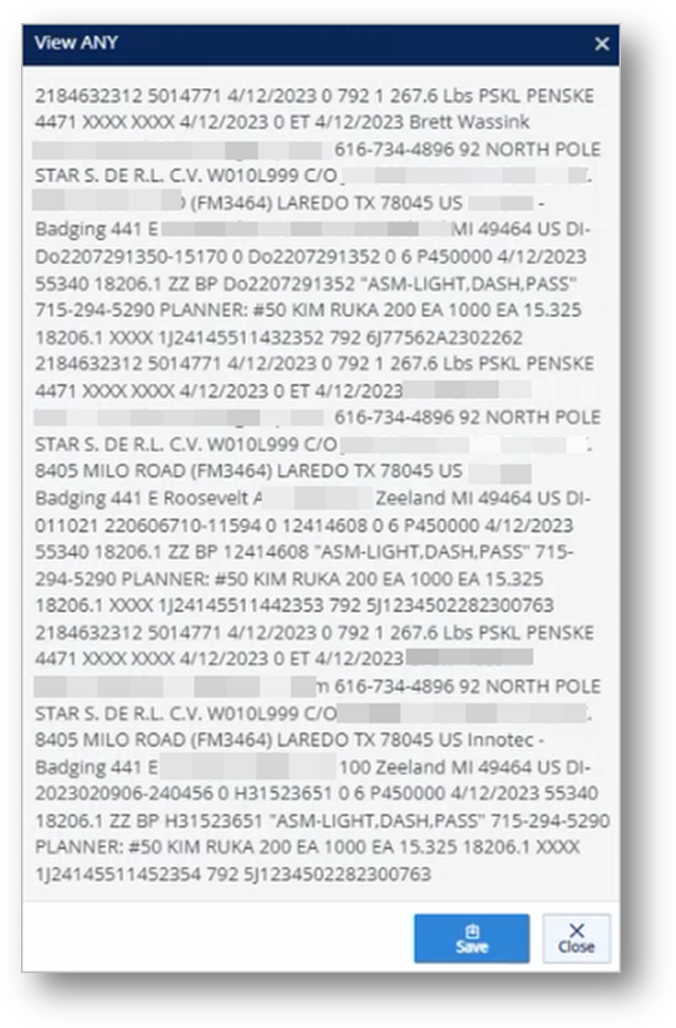
3. Click Save to download the original file.
|
|
NOTE TrueAuto does not support the View ANY feature for files that existed prior to the Q2/2023 quarterly release. An error message will be displayed accordingly.
|
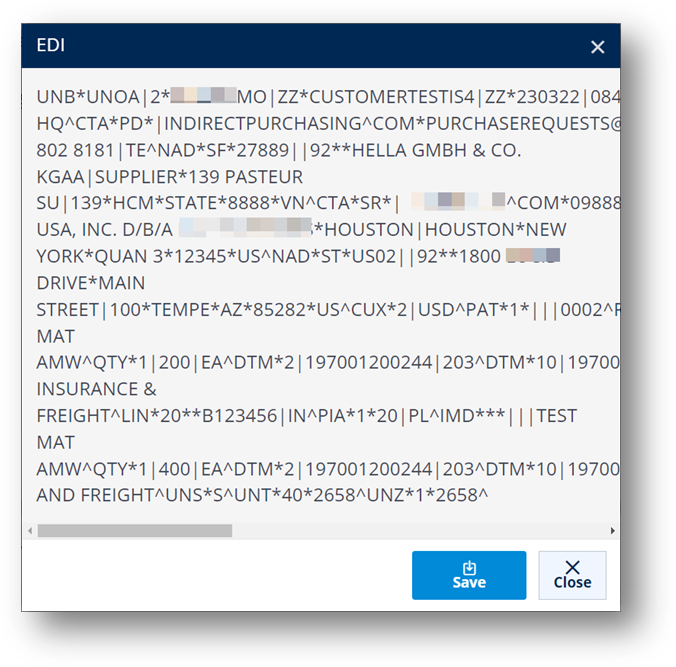
The View EDI feature allows you to view an incoming document in raw EDI format.
1. On the menu pane, click Incoming Documents.
2. On the Incoming Documents screen, click the EDI link in the View column of the document that you want to view.
The EDI window displays the raw EDI for the selected incoming document.
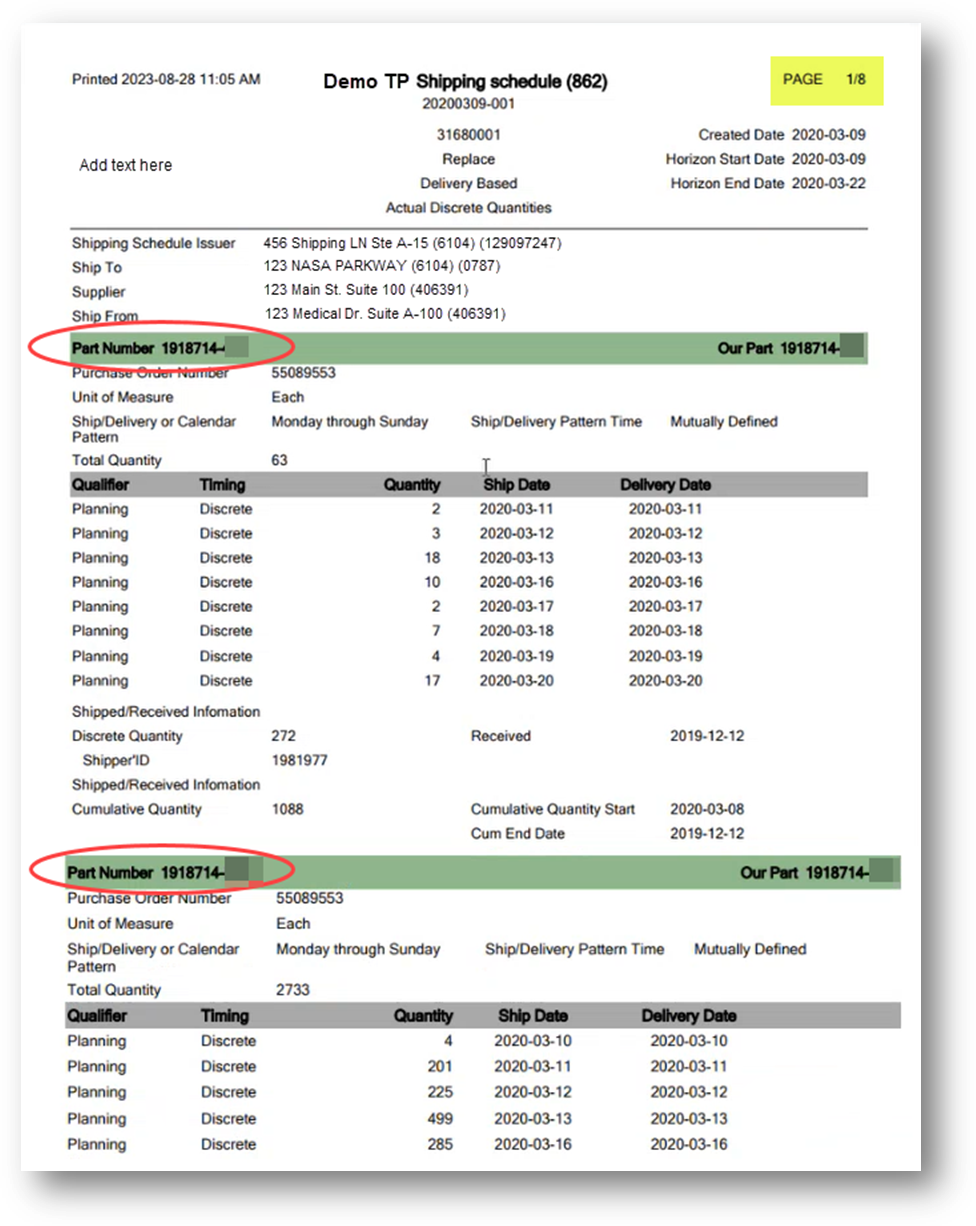
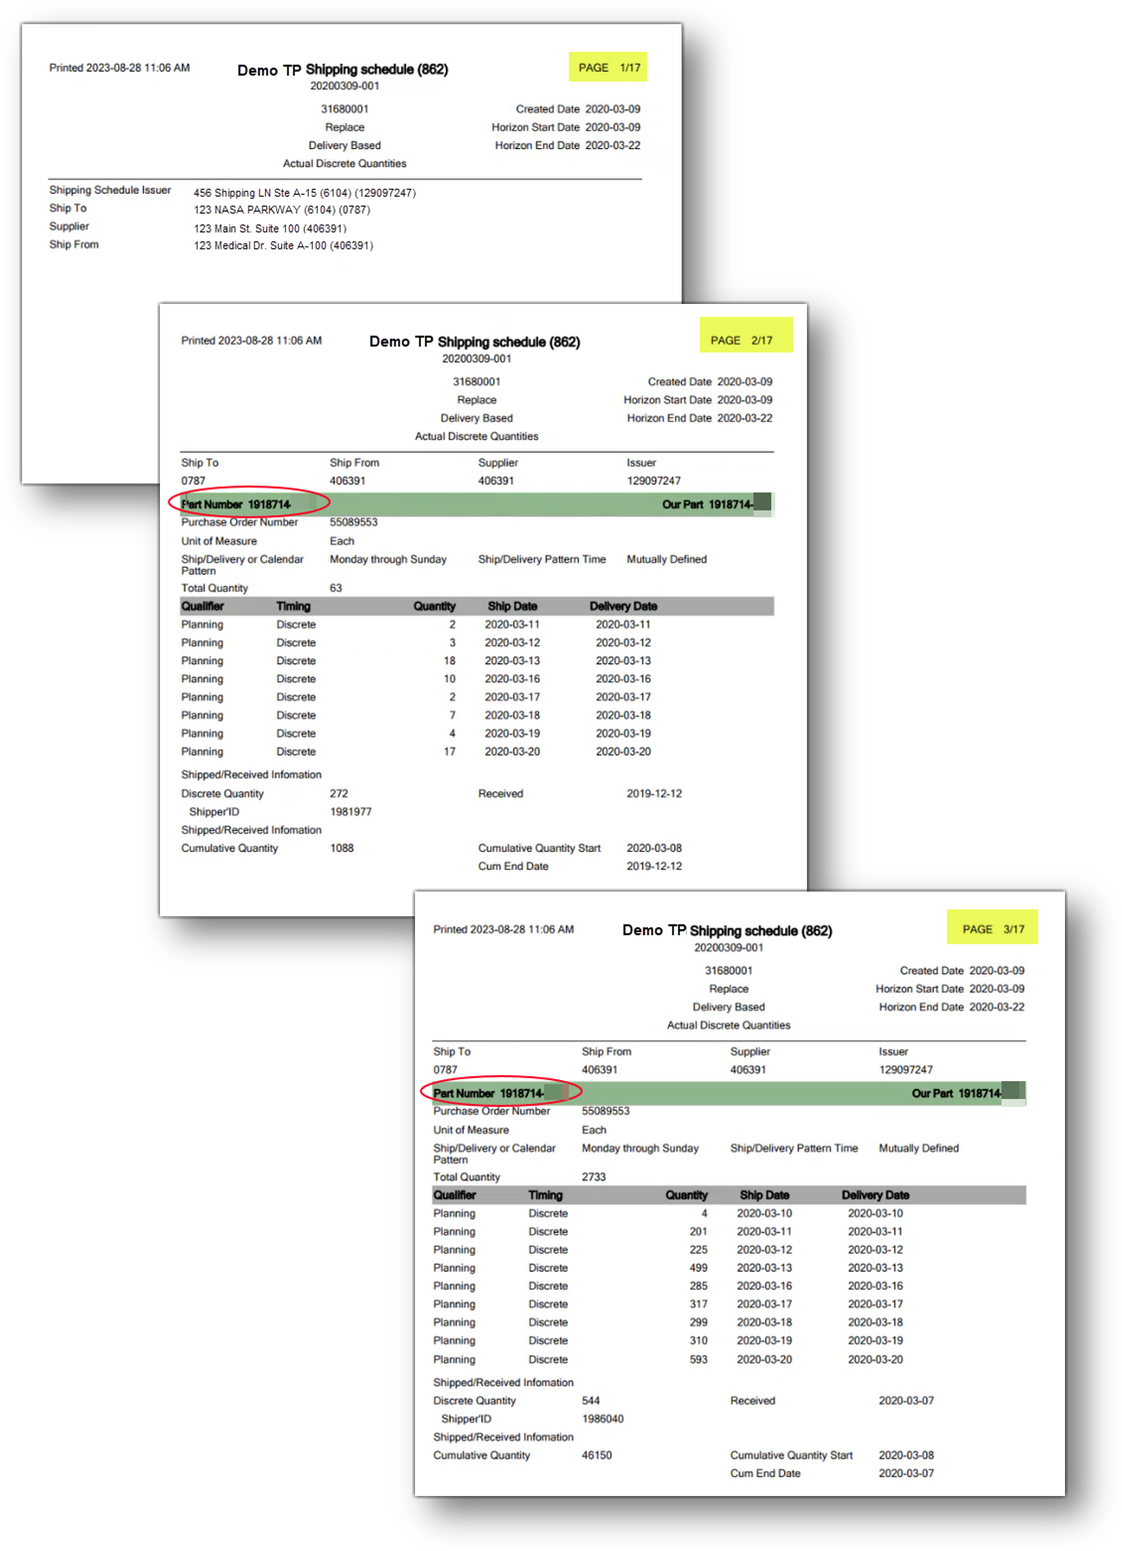
In general, an Incoming Document report displays all information, which is continuously listed from page to page.
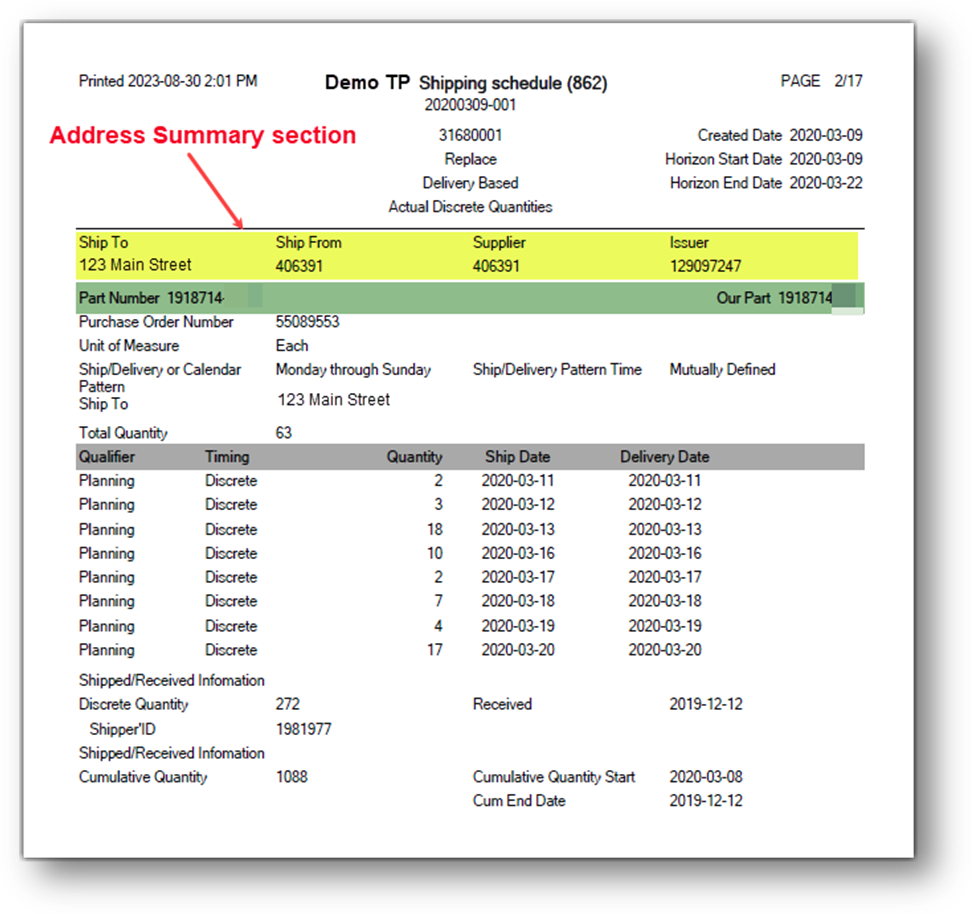
With the Page Break feature, you can print a report separated by Part Number, on which the information for each Part Number will be started on a new page. This helps the report to be presented in a professional and organized manner, making it easier for you to read, understand, and print EDI data for each Part Number.
1. On the menu pane, click Incoming Documents.
2. On the Incoming Documents screen, select the document that you want to print.

3. Click the Print icon.
The Print View is displayed. In the following examples, two report options are shown.
· Part Numbers are continuously listed from page to page.
· The Header and GENERAL information such as Shipping Schedule Issuer, Ship To, Supplier, and Ship From are displayed on the first page of the report.
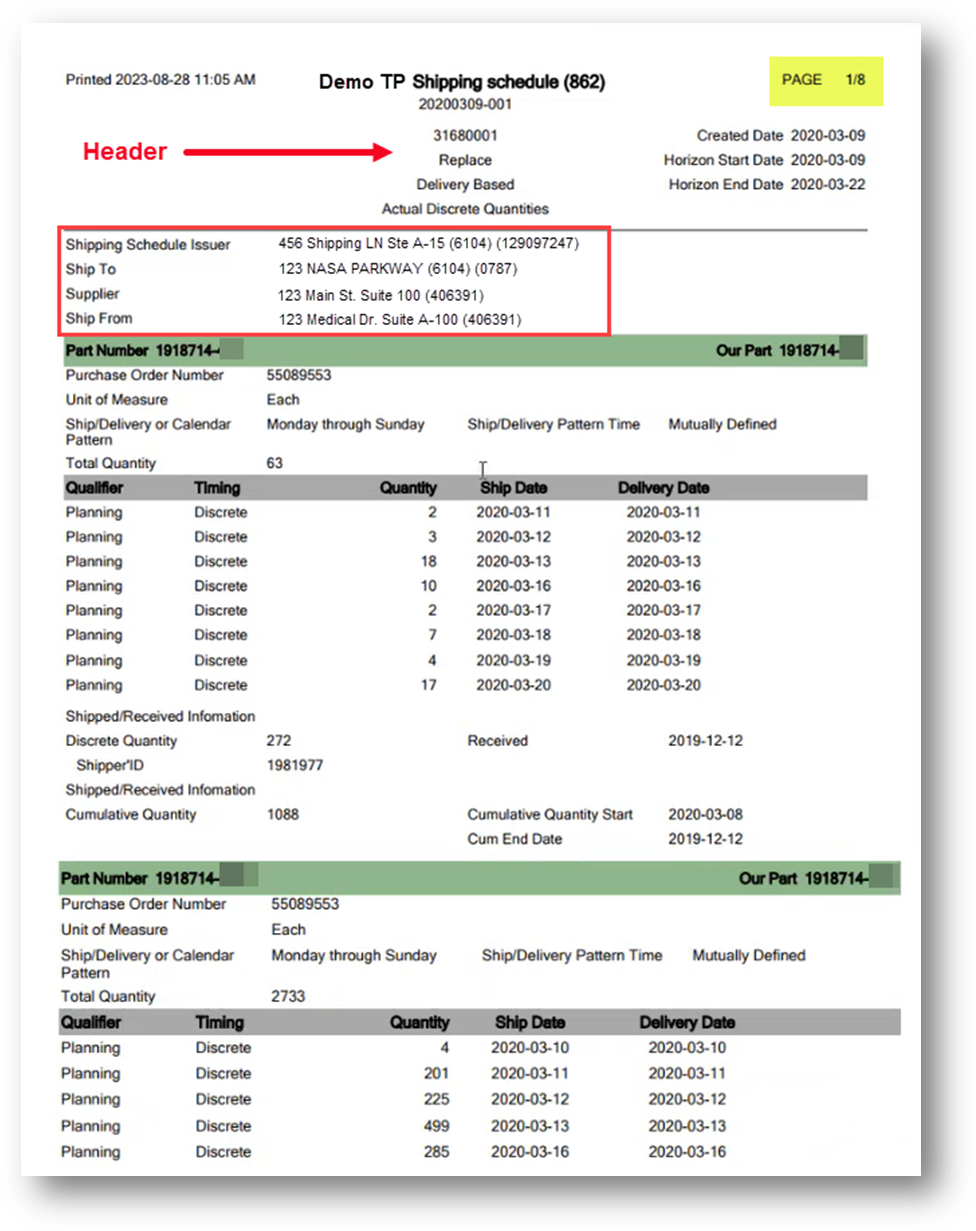
· Each Part Number’s details are displayed on a new page.
· The Address Summary section contains the address information of Ship To, Ship From, Supplier, and Issuer. If there is any SPECIFIC address information available, it will be displayed in the Address Summary section for that Part. Otherwise, it will show the corresponding GENERAL address information of Issuer, Ship To, Ship From, and Supplier from the Header, if any.
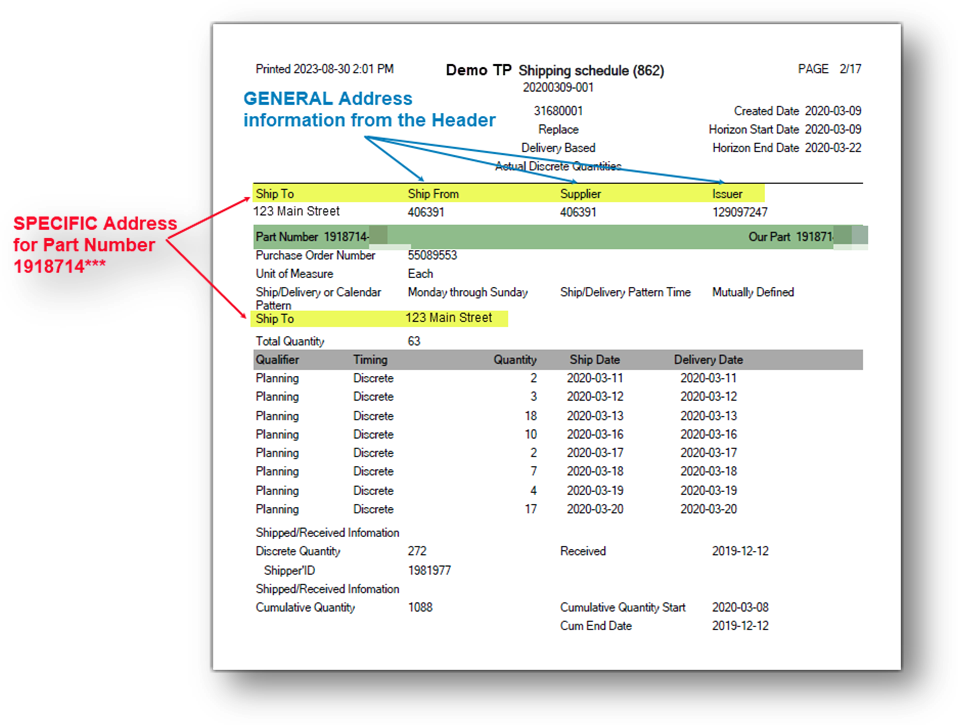
· The Header is displayed at the top of each page.