Invoices
An EDI Invoice, known in X12 as an 810 and in EDIFACT as an INVOIC, can be created in TrueAuto if that Trading Partner has an 810 Outgoing Form. If your Trading Partner does not require EDI invoices, you may still use TrueAuto’s invoices for traceability or paperwork.
Main Topics:
Work with Invoices
1. On the Customer Finance menu, click Invoices.
2. On the Customer Invoices screen, click the invoice that you want to view.
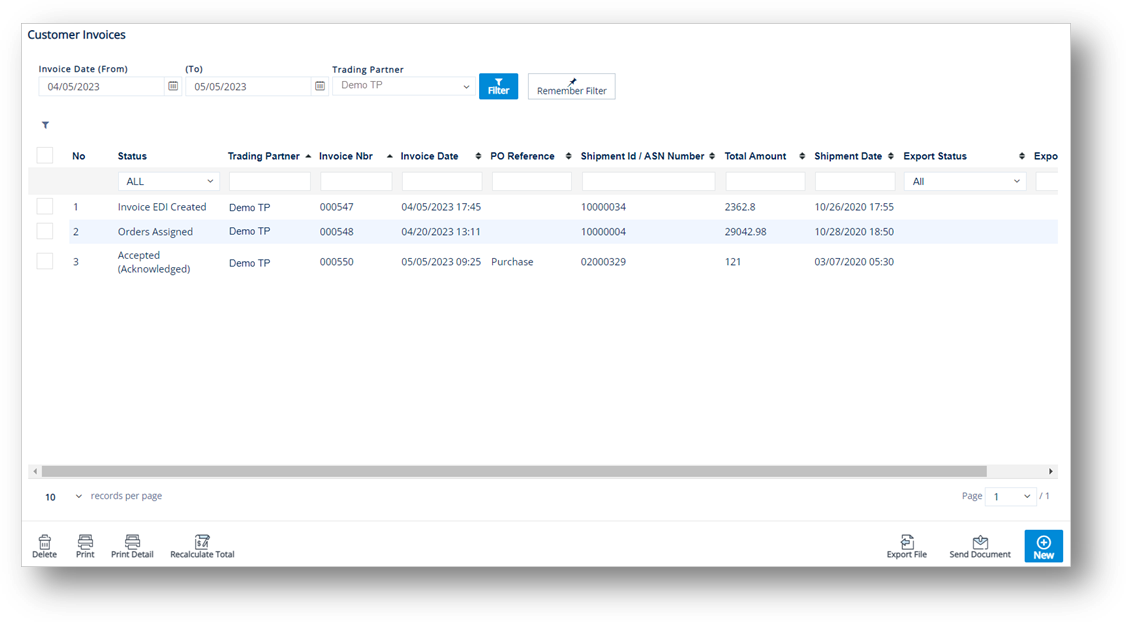
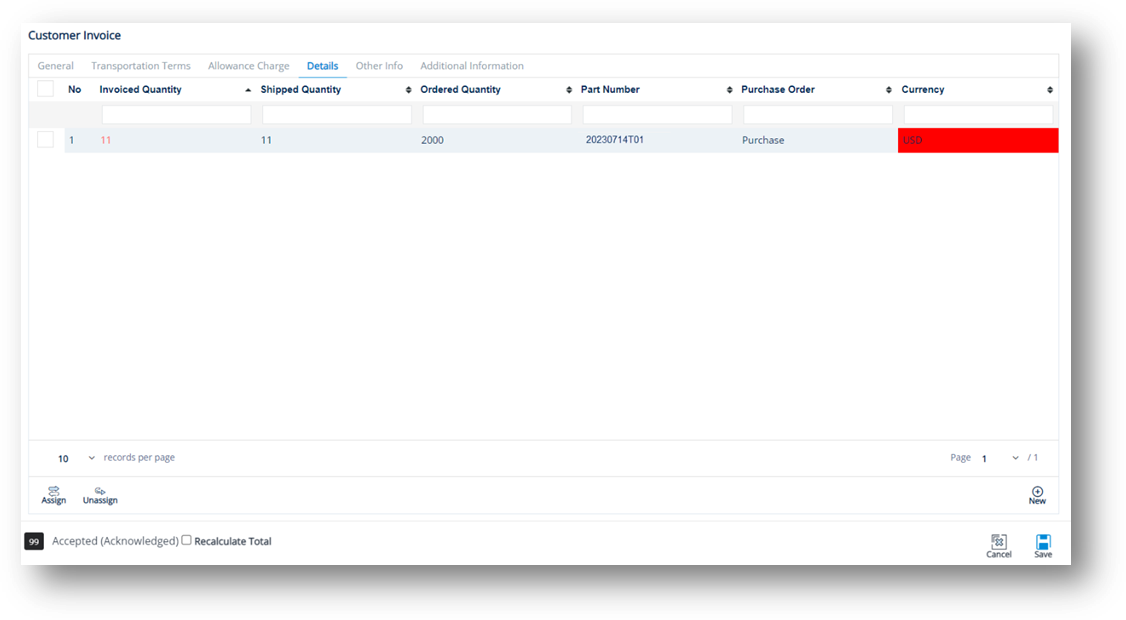
3. On the Customer Invoice screen, select the General, Terms, Allowance Charge, Details, or Other Info tabs to view the corresponding details.
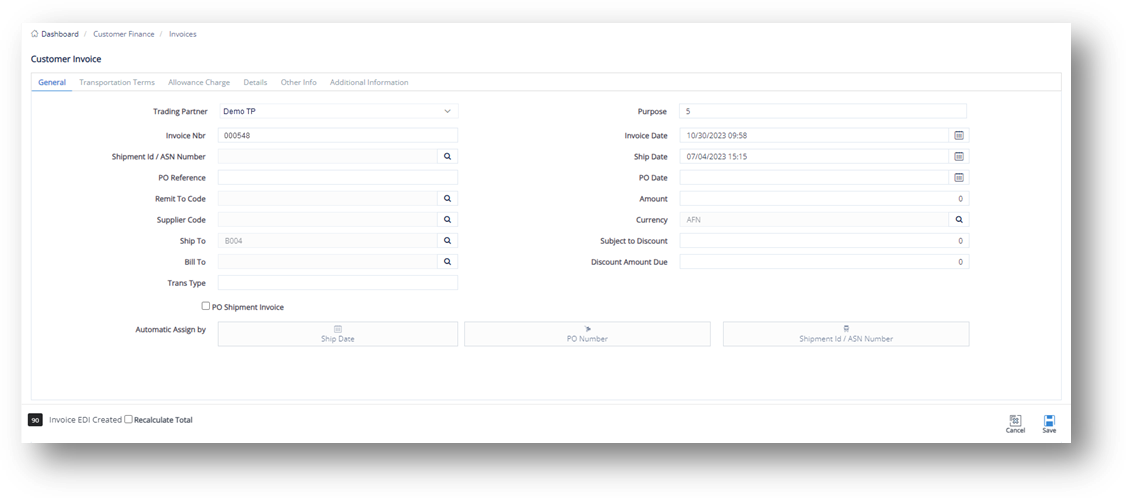
General tab
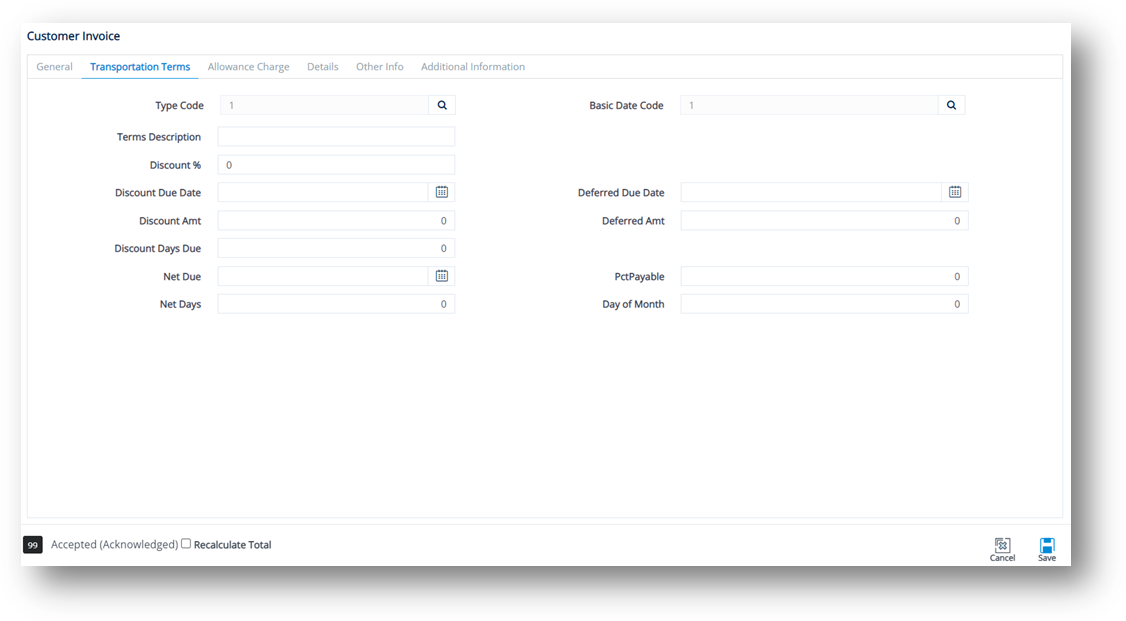
Terms tab
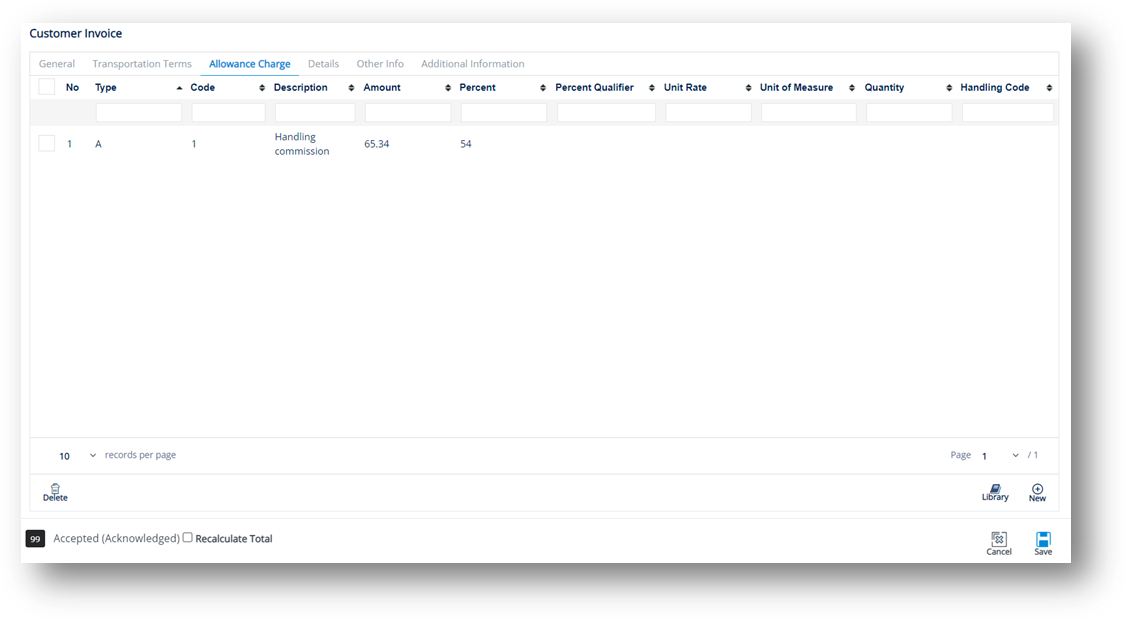
Allowance Charge tab
Details tab
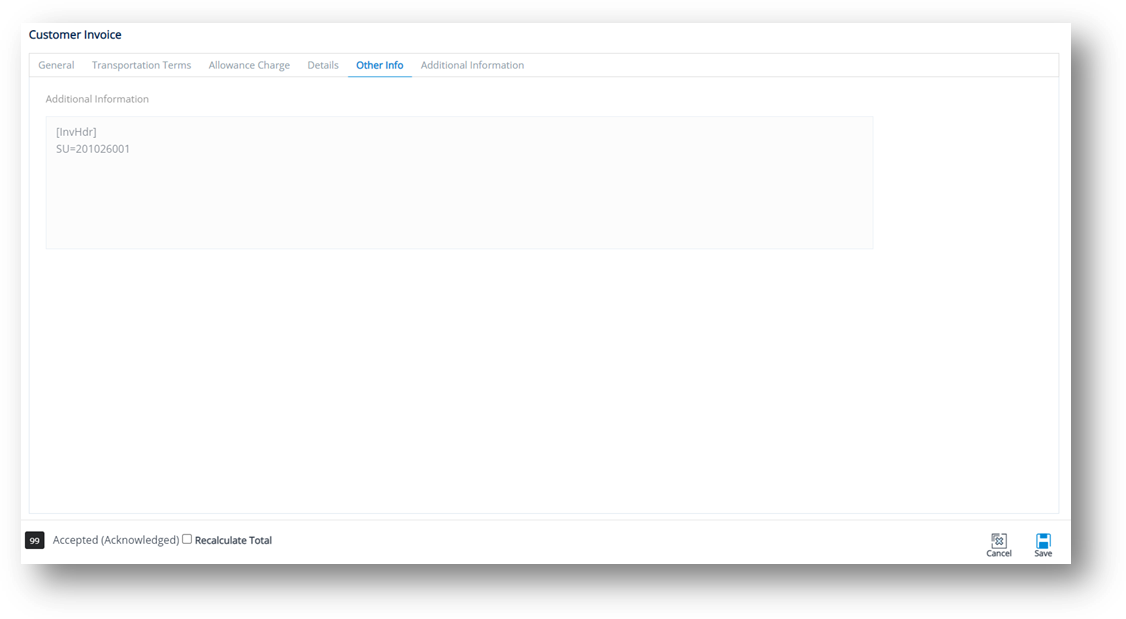
Other Info tab
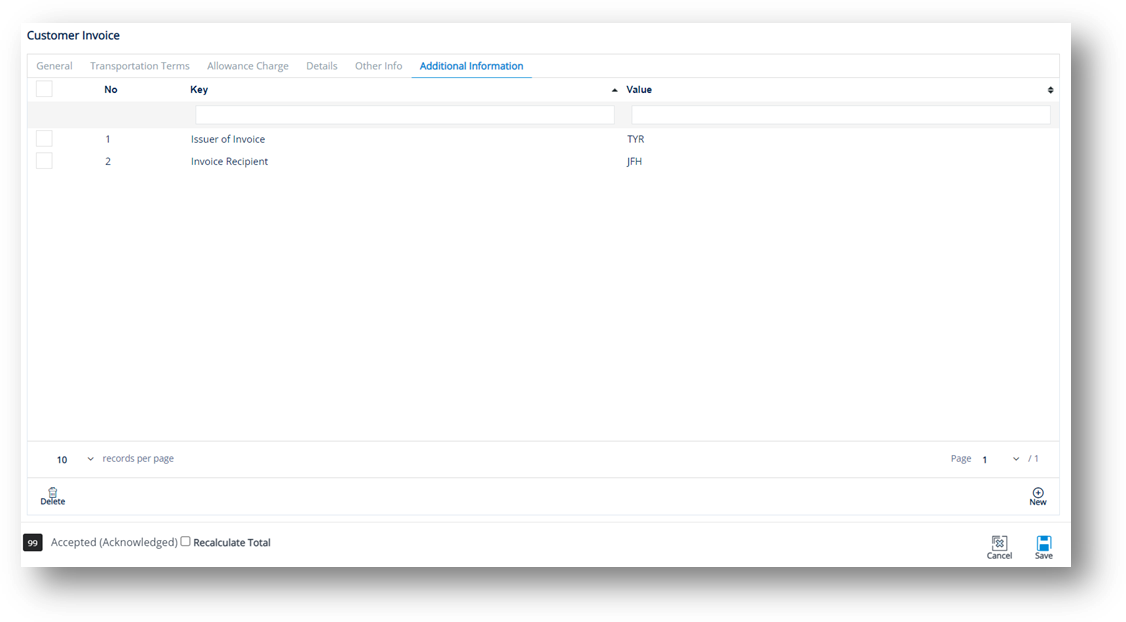
Additional Information tab
Work with Allowance Charge
To add a new Allowance/Charge or Tax to an Invoice
-
On the Customer Invoice screen, switch to the Allowance Charge tab.
-
On the Allowance Charge tab, click
 New.
New. -
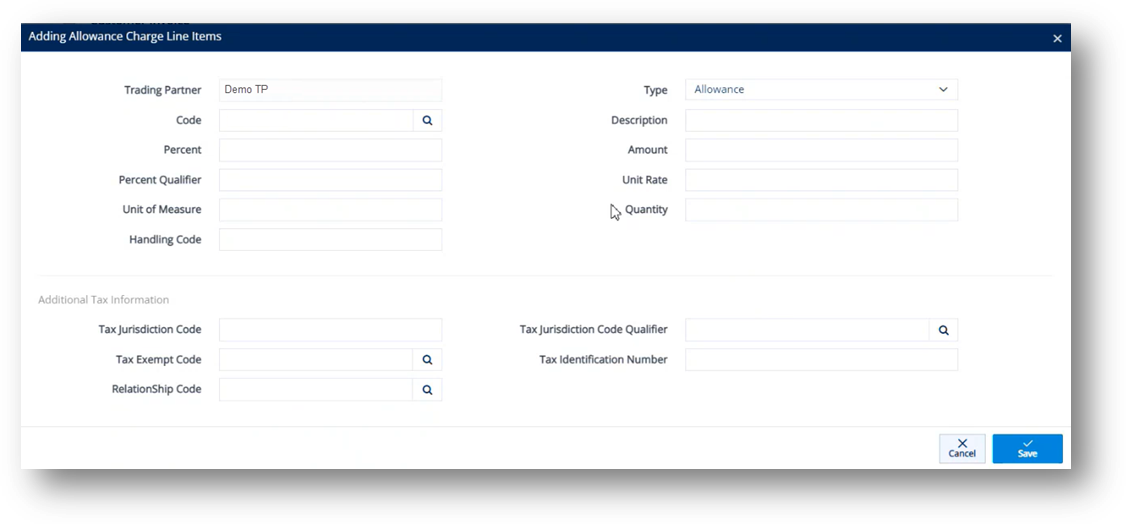
On the Adding Allowance Charge Line Items window, do the following:
-
Select a code by clicking the
 search icon in the Code field.
 -
On the Select Allowance Code window, select the Allowance or Charge Code.
-
Click
 Select.
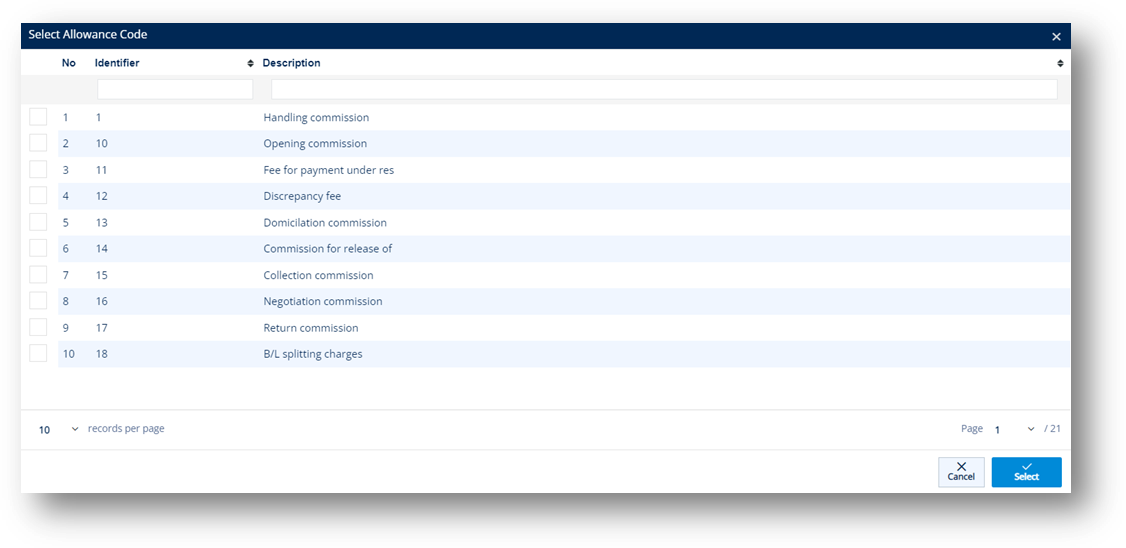
The selected Allowance or Charge Code is loaded in the Code field.
Note You can add more allowance or charge options to the Code dropdown list by referring to steps in Cross Reference Library.
-
Enter the Percent.
-
Select Allowance or Charge in the Type dropdown list.
-
Enter the Description.
-
Enter the Amount.
-
Scroll down to the Additional Tax Information section, and then enter the Tax Jurisdiction Code.
-
Select the Tax Exempt Code.
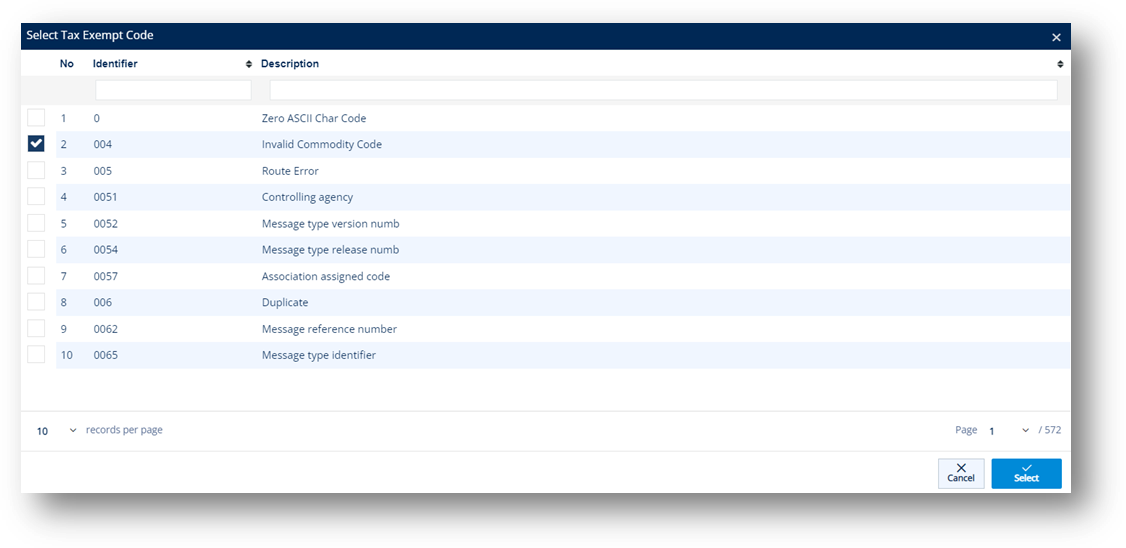
-
Select the Relationship Code.
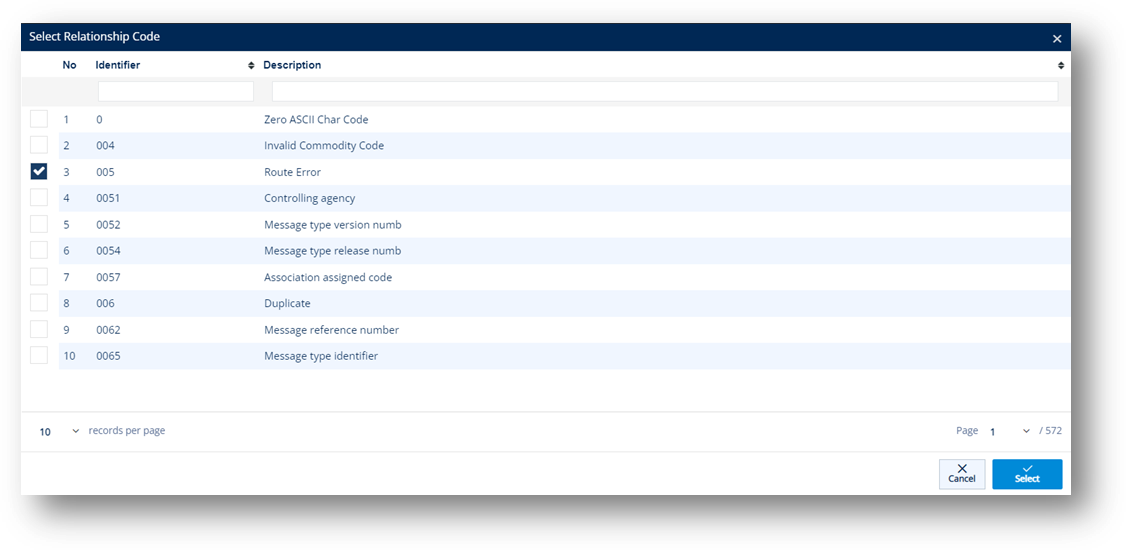
-
Select the Tax Jurisdiction Code Qualifier.
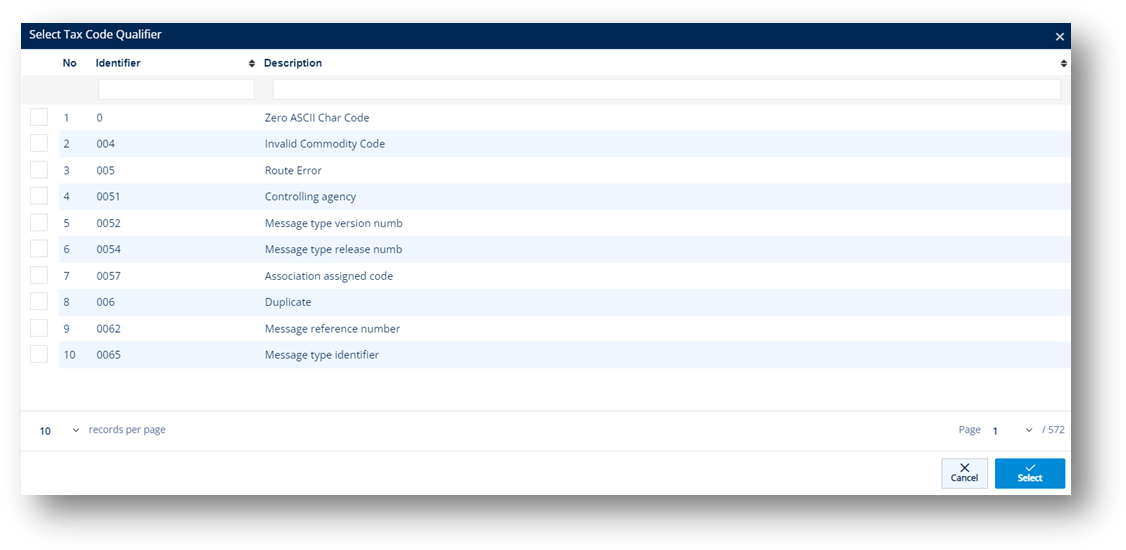
-
Enter the Tax Identification Number.
-
Click
 Save. A new Allowance or Charge is added to the Invoice.
To assign a configured Allowance or Charge to an Invoice
With the ![]() Library feature, you can assign a configured Allowance or Charge that is saved in the Library, to an Invoice. These configured records are set up in Trading Partner Parts, Ship To Cumulatives, and Addresses.
Library feature, you can assign a configured Allowance or Charge that is saved in the Library, to an Invoice. These configured records are set up in Trading Partner Parts, Ship To Cumulatives, and Addresses.
|
NOTE If Ship To Cumulatives, Trading Partner Parts, and Addresses whose Allowances or Charges have similar Types and Codes, only one record is available in the list based on the order of precedence of Ship To Cumulatives > Trading Partner Parts > Addresses. For example, if a Ship To Cumulative record and an Address record whose Allowance or Charge has the same Type = A, same Code = 1, only the Ship to Cumulative record is displayed in the list. |
If Invoice is selected in the Use On dropdown list
For this case, the Allowance or Charge record will be saved in Invoices > Allowance Charge.
1. On the Customer Invoice screen, switch to the Allowance Charge tab.
2. On the Allowance Charge tab, click ![]() Library.
Library.
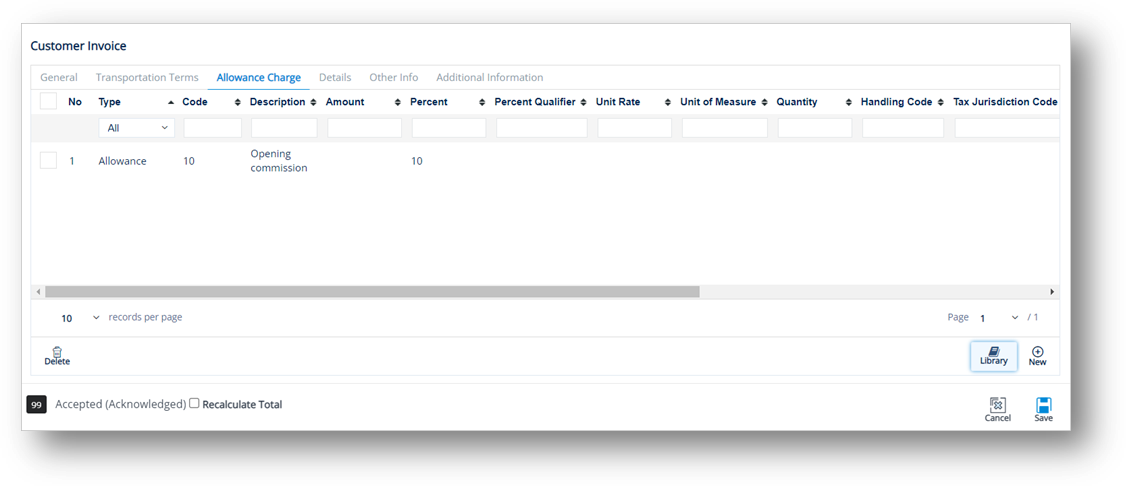
3. On the Adding Allowance Charge Configuration window, select the Allowance or Charge you want to use.
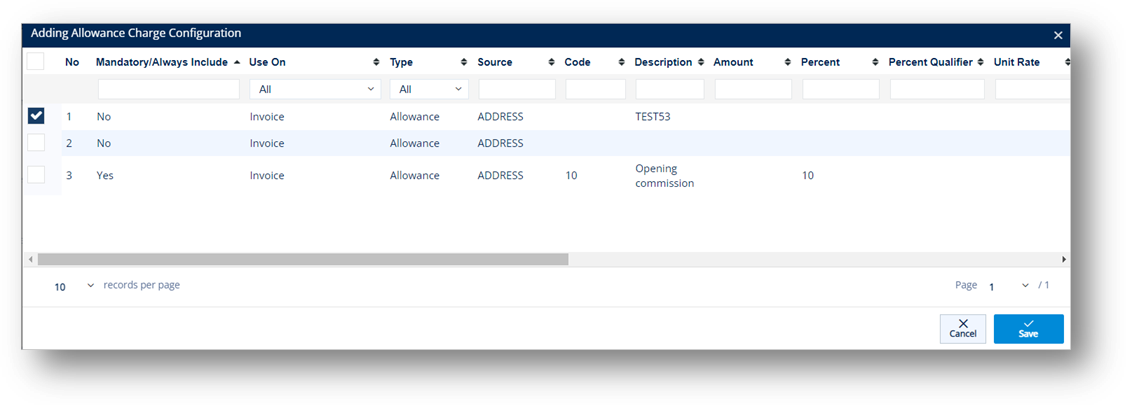
-
Click
 Save.
Save.
The Allowance or Charge is added to the Invoice.
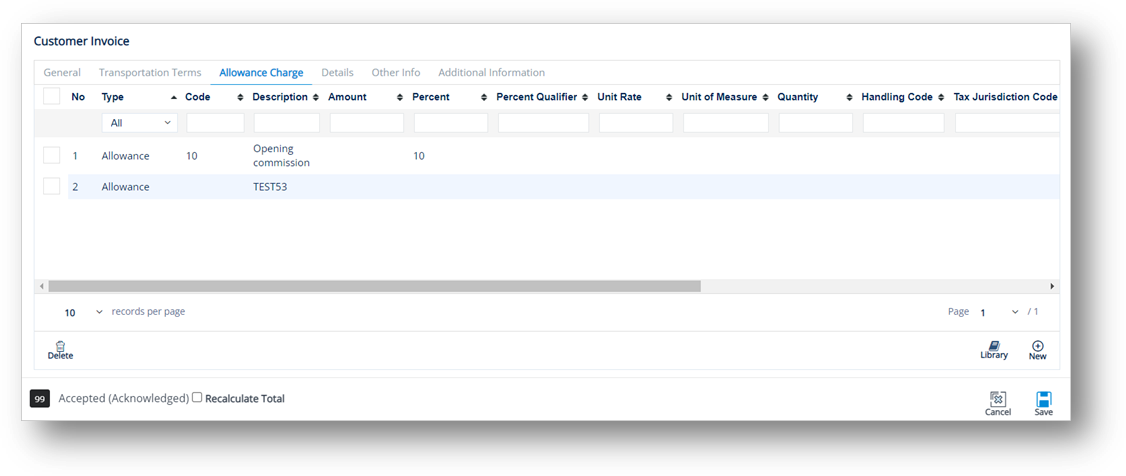
If Line Item is selected in the Use On dropdown list
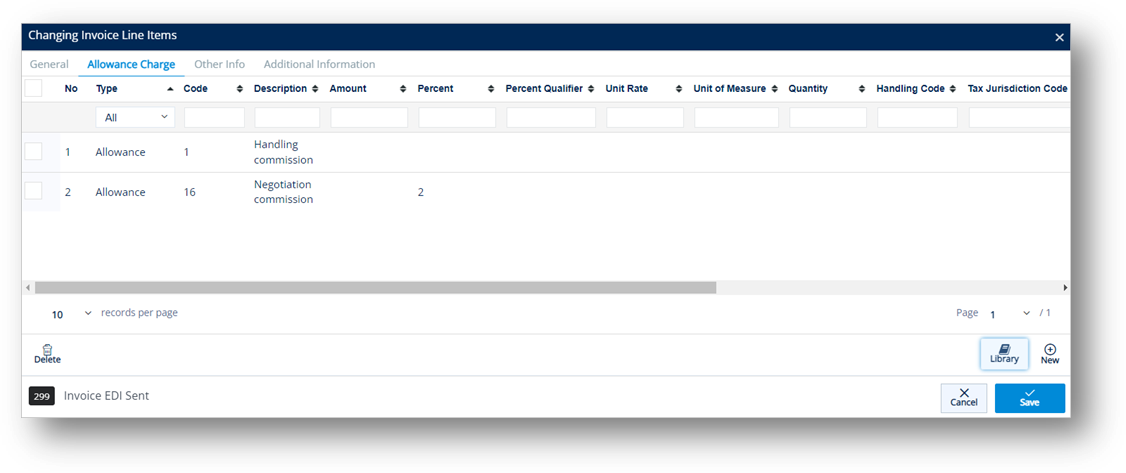
In this case, the Allowance or Charge record will be saved in Invoices > Details > Allowance Charge.
1. On the Customer Invoice screen, switch to the Details tab.
2. On the Details tab, click the Invoice that you want to view.
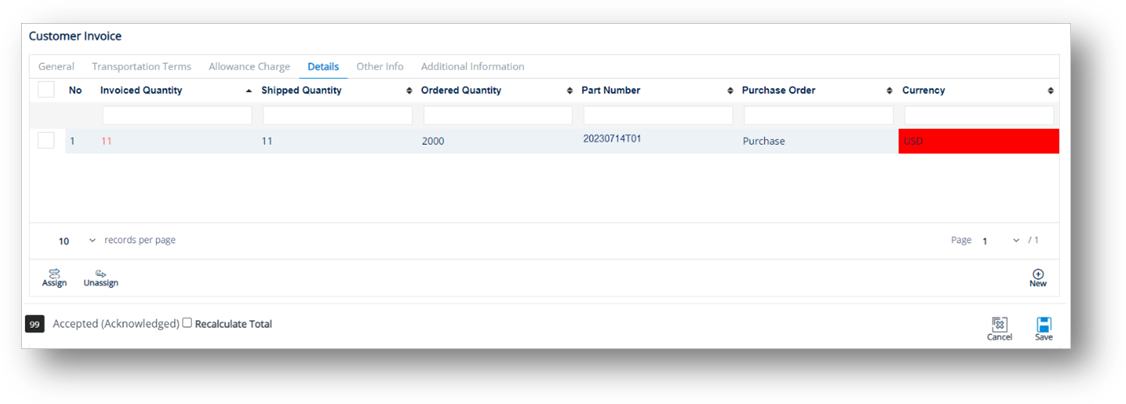
3. On the Changing Invoice Line Items window, switch to the Allowance Charge tab, and then click ![]() Library.
Library.
4. On the Adding Allowance Charge Configuration window, select the Allowance or Charge that you want to use.
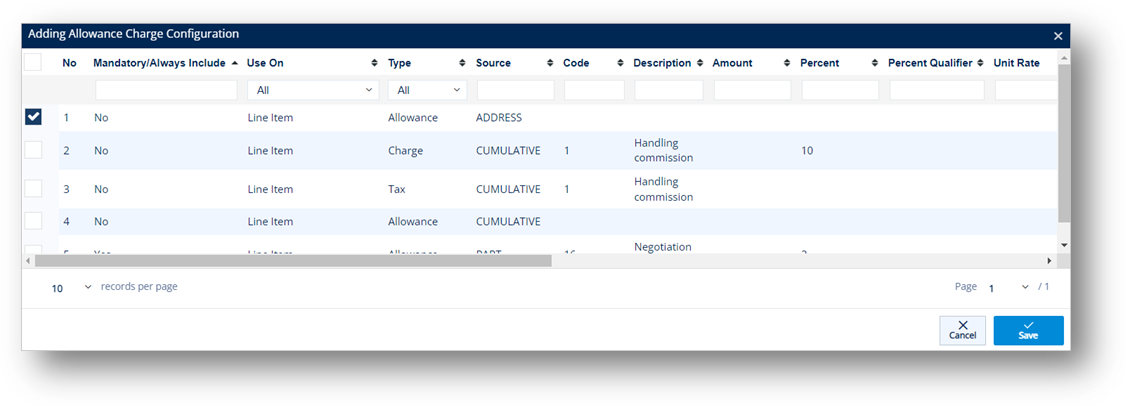
For more details, refer to the NOTE mentioned above.
-
Click
 Save.
Save.
The Allowance or Charge is added to the Invoice.
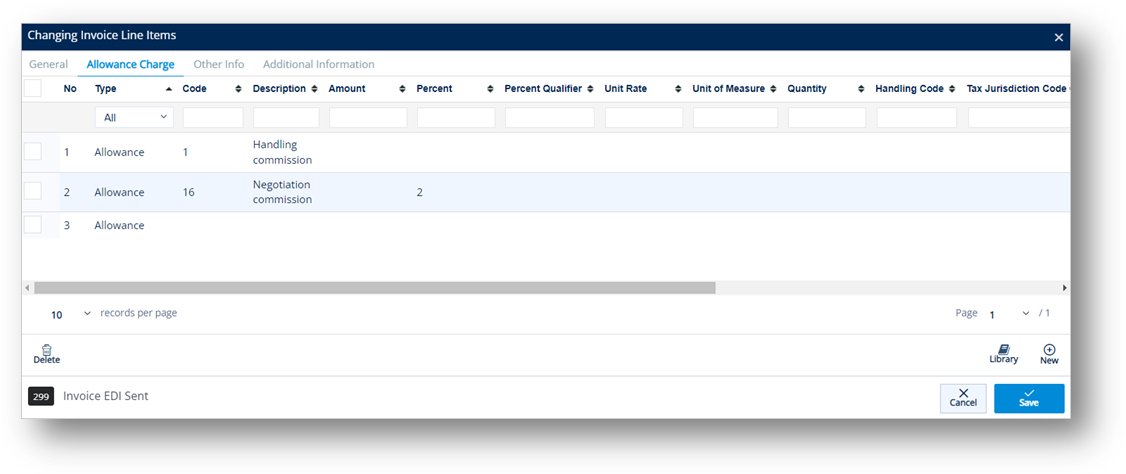
Explanation on how the Amount field is calculated on the Customer Invoice (Total Invoice Amount)
This section describes the steps on how the Amount field on the Customer Invoice screen is automatically calculated, as follows:
Amount = The Total Sum of Line Items Amount + Sum of Allowance Charge Header + Tax Amount
Customer Invoice > Total Sum of Line Items Amount including Allowance/Charge/Tax at Line items
The Total Sum of Line Items Amount = the Sum of (Base Amount of Line Item +/- Amount of Allowance Charge Line Items)
Base Amount of Line Item = Invoiced Quantity * Unit Price
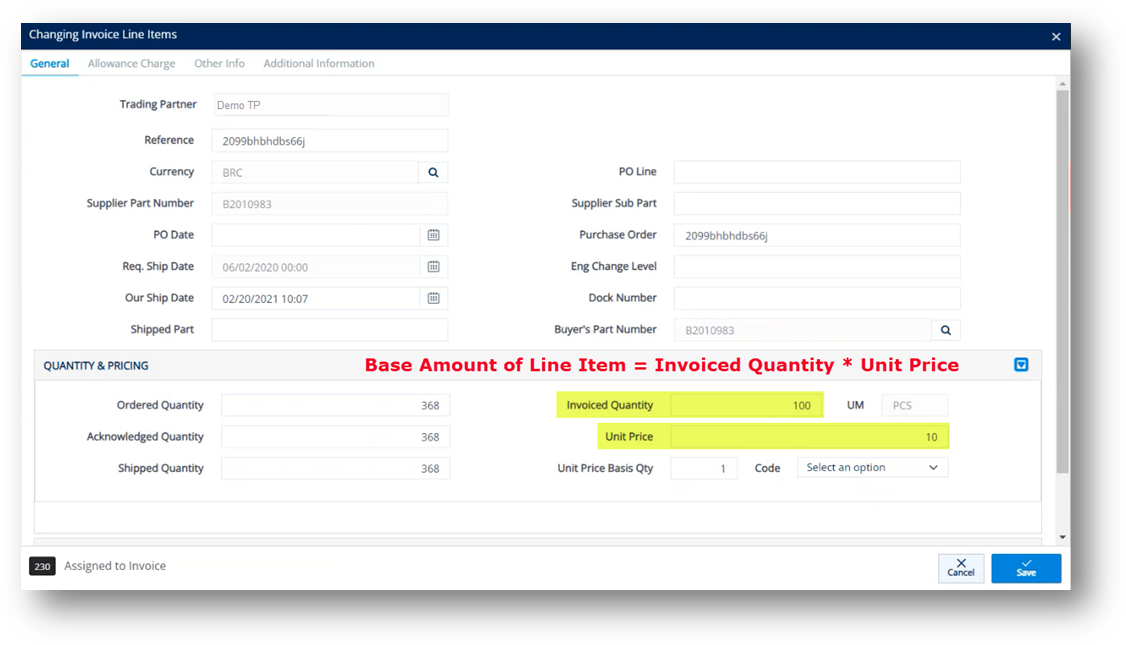
Amount of Allowance Charge Line Items
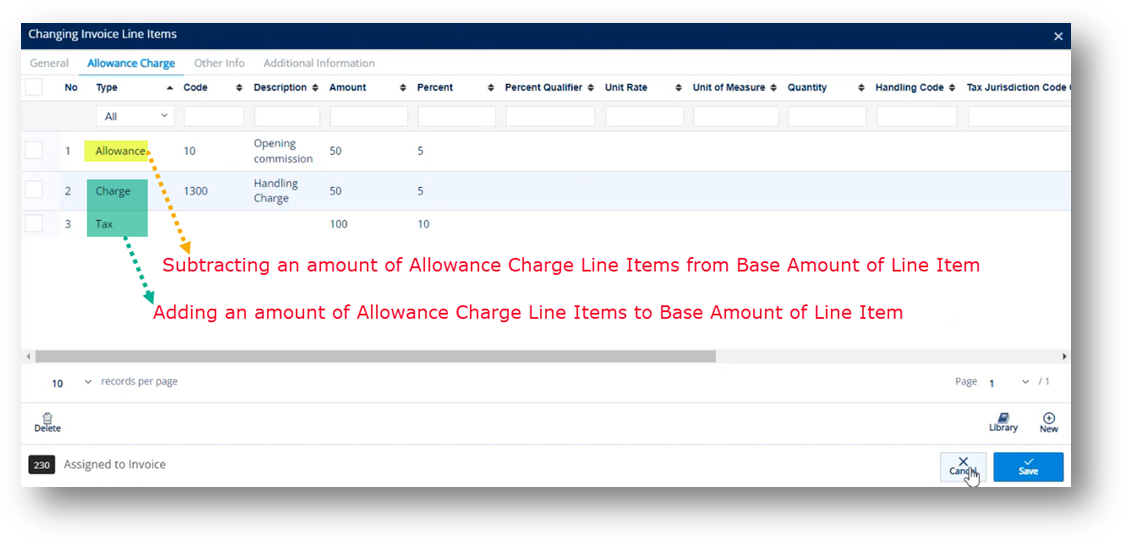
Adding/Subtracting the amount of Allowance Charge Line Items to/from Base Amount of Line Item will be decided by Type.
Allowance: Subtracting the amount of Allowance Charge Line Items from the Base Amount of Line Item.
Charge and Tax: Adding the amount of Allowance Charge Line Items to the Base Amount of Line Item.
Customer Invoice > Allowance Charge: Sum of Allowance Charge Header
There are 2 cases:
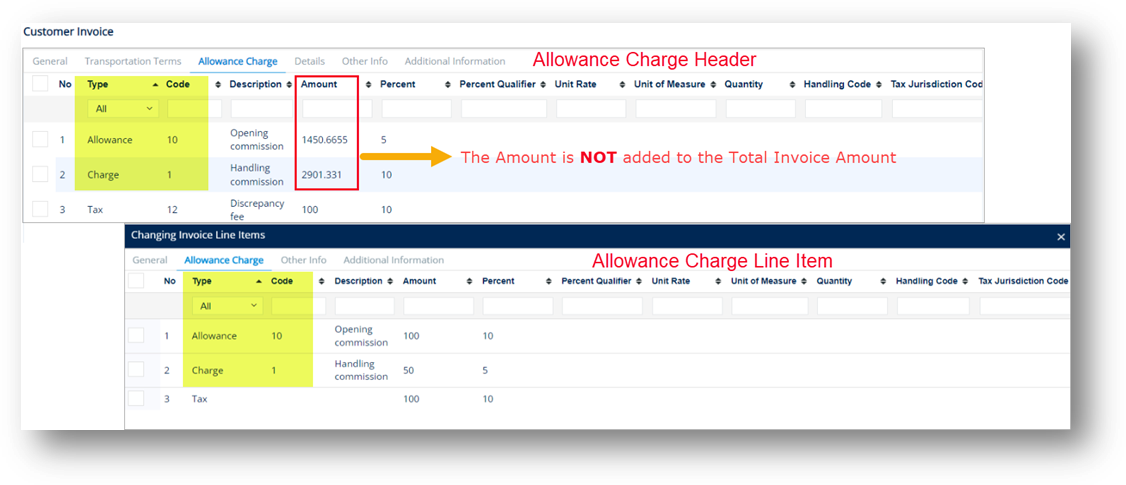
If the Type and Code fields in Allowance Charge Header are similar to the ones in Allowance Charge Line Item, the Amount of Allowance Charge Header will be skipped (NOT added to the Total Invoice Amount).
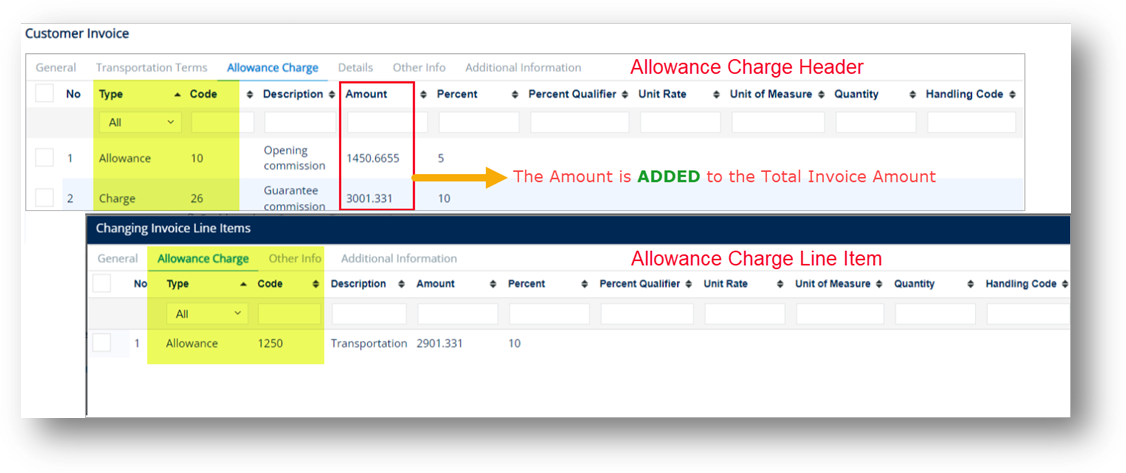
If the Type and Code fields in Allowance Charge Header are different from the ones in Allowance Charge Line Item, the Amount of Allowance Charge Header will be added to the Total Invoice Amount.
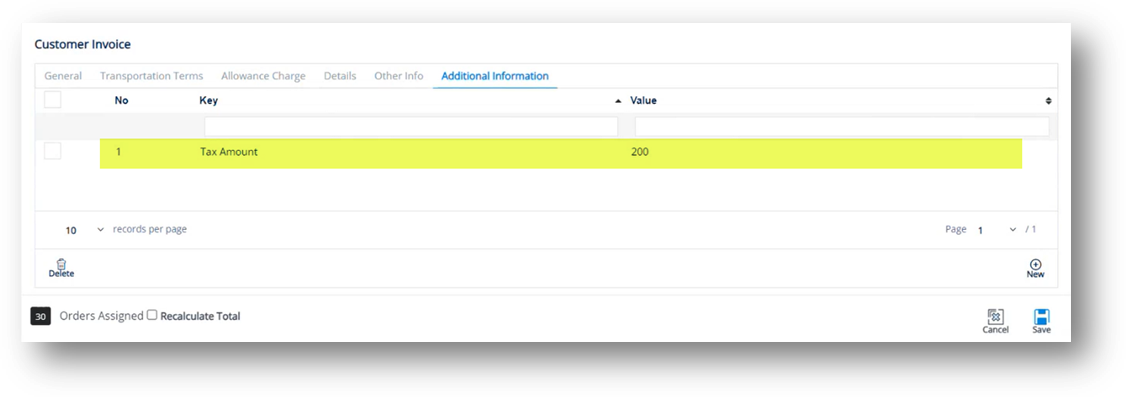
Customer Invoice > Additional Information: Tax Amount
The Tax Amount field will also be checked. If there is a value in this field, the Tax Amount field will be added to the Total Invoice Amount.
Work with Additional Address Information
An invoice includes several types of addresses such as Ship To, Ship From, Remit To Code, and Bill To. Apart from these standard fields, the additional invoice addresses are taken from incoming documents to the Other Info tab.
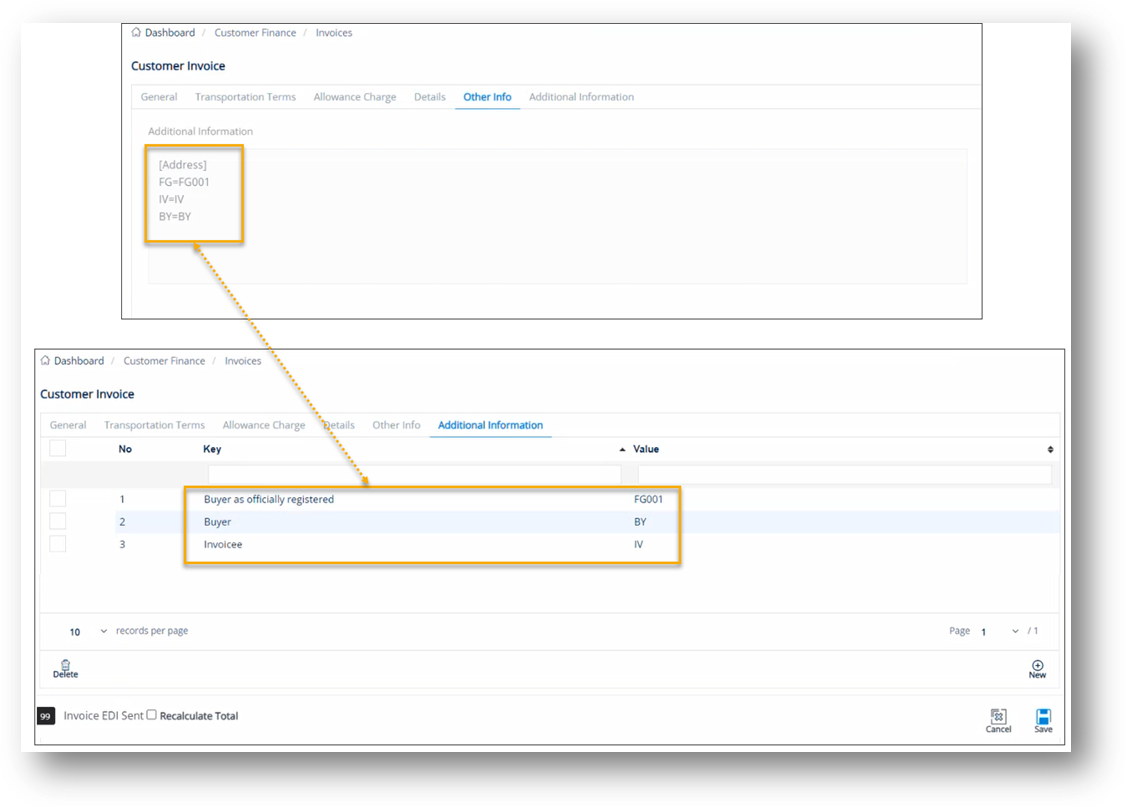
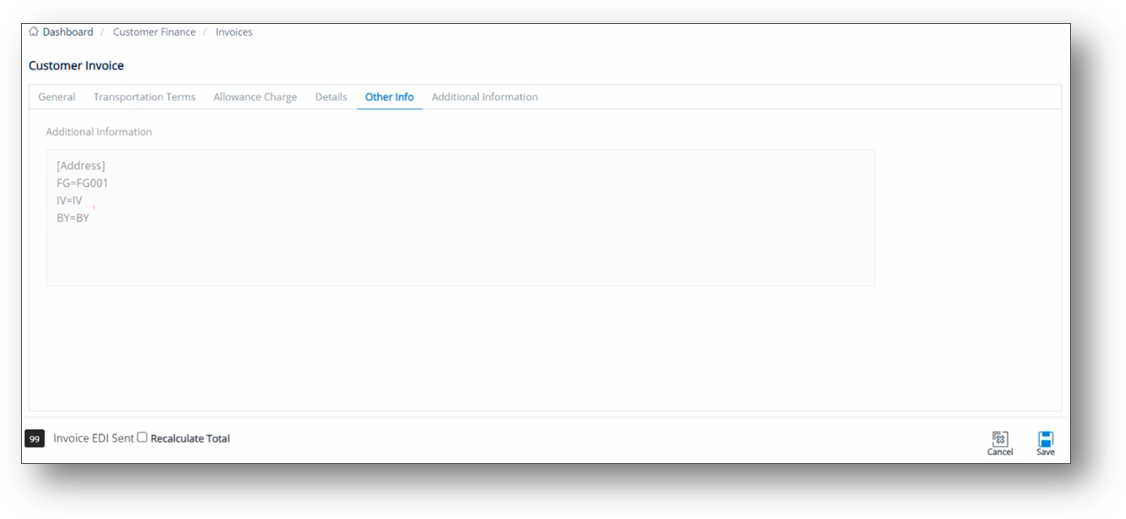
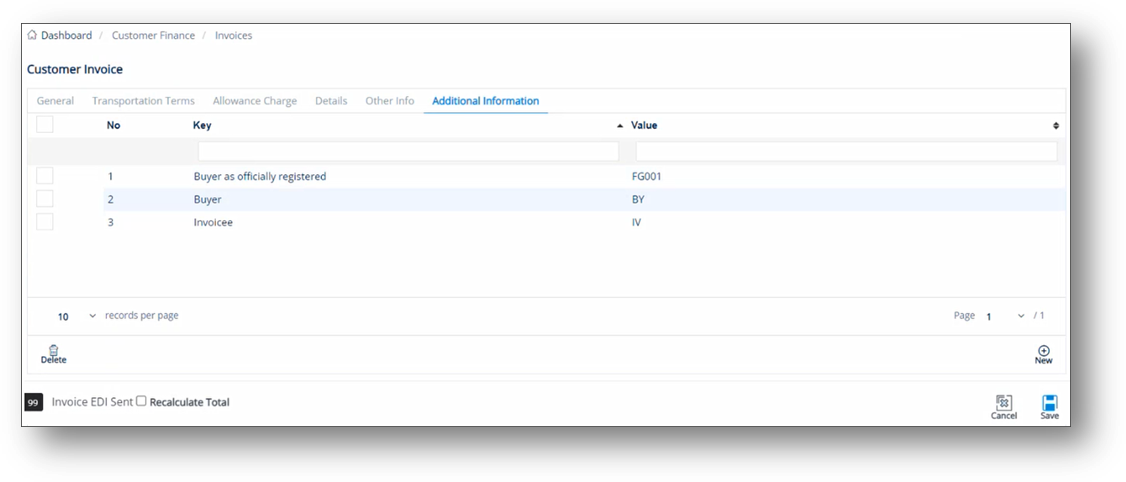
While the imported data on the Other Info tab is read-only, the corresponding data on the Additional Information tab can be customized. The Codes (such as FG, IV, and BY) on the Other Info tab can be converted into editable Keys on the Additional Information tab right after being imported successfully into the system.
Example:
|
Code Type on the Other Info tab |
Key imported into the Additional Information tab |
|
FG |
Buyer, as officially registered. |
|
IV |
Invoicee (recipient of the invoice). |
|
BY |
Buyer. |
1. On the Customer Invoice screen, click the Other Info tab to view the imported additional invoice addresses, which are in read-only mode.
2. Switch to the Additional Information tab. You will see that the additional invoice addresses are automatically converted into editable Keys.
3. Open the record that you want to modify.
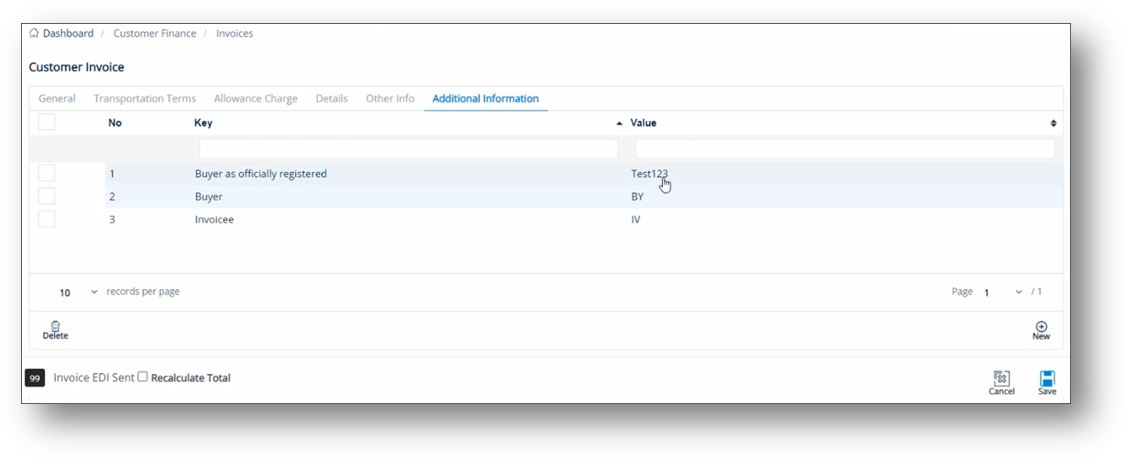
4. On the next window, change the value in the box, and then click ![]() Save.
Save.
Before

After

The Value is updated.
5. Click Save to save the changes to the invoice.
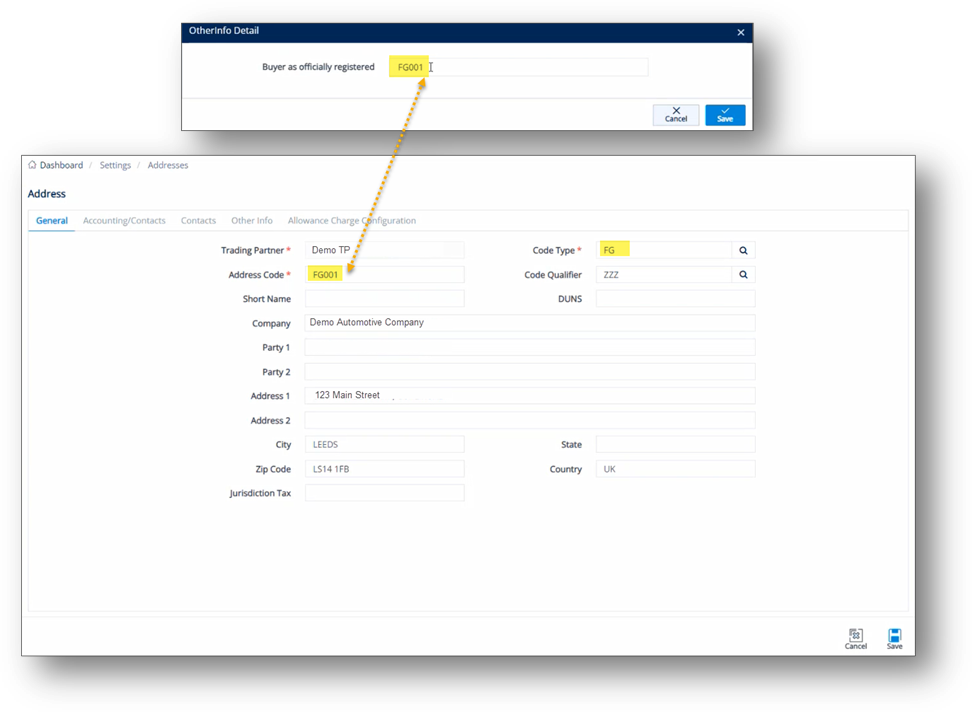
Note On the Additional Information tab, the Address Value corresponds to an Address Code in TrueAuto. See the examples below:
FG001 Value corresponds to the “FG001” Address Code.
Test123 Value corresponds to the “Test123” Address Code.
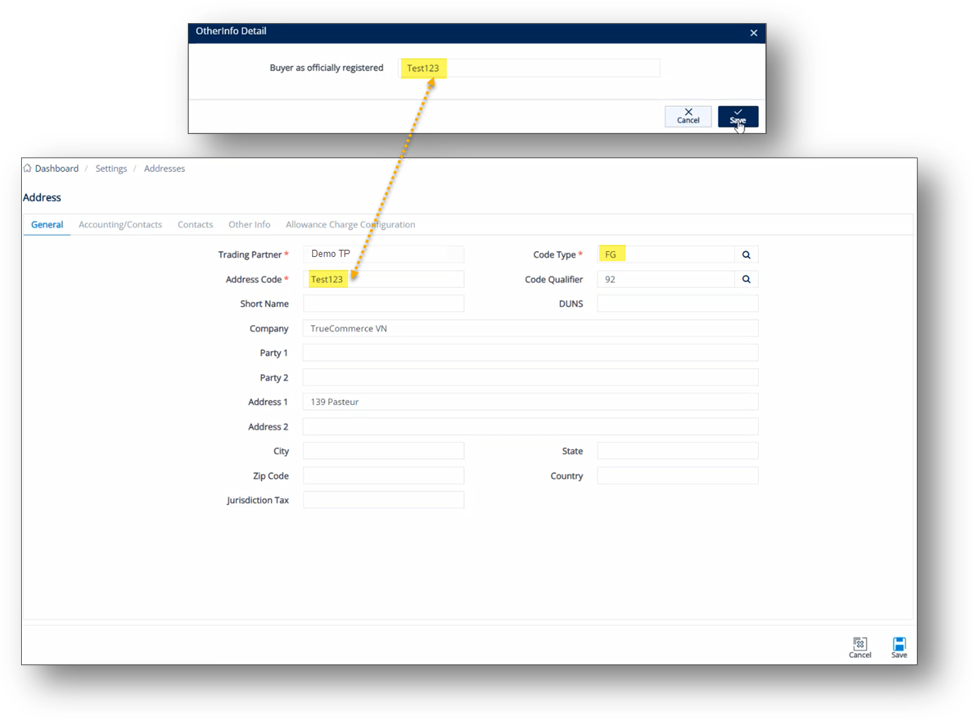
For the details of the Address Value on the Additional Information tab, refer to the Settings > Addresses menu. If the Address Code has NOT been set up, the exported invoice will have “null” data for that Address.
Print Detail
1. On the Customer Finance menu, click Invoices.
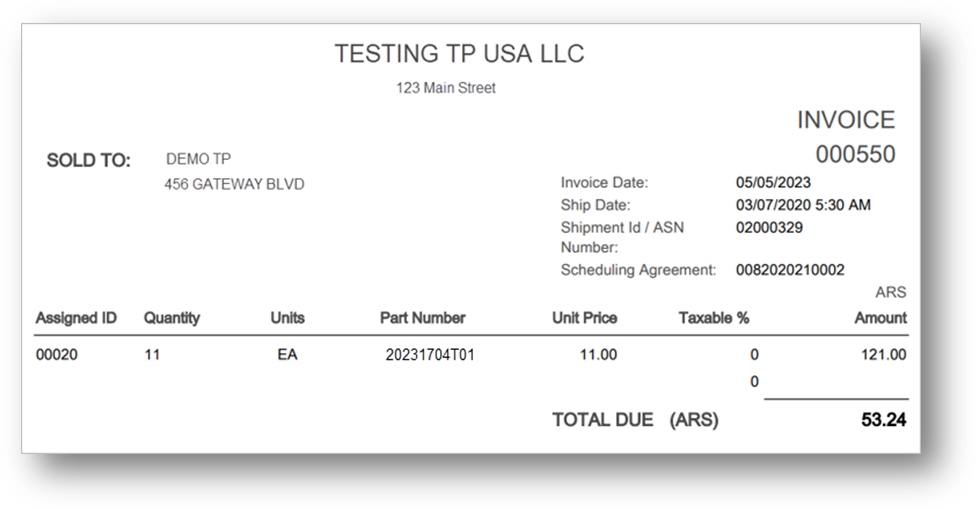
2. On the Customer Invoices screen, select the invoice, and then click ![]() Print Detail.
Print Detail.
The Invoice report is displayed.
Recalculate Total
1. On the Customer Finance menu, click Invoices.
2. On the Customer Invoices screen, select the invoice, and then click ![]() Recalculate Total.
Recalculate Total.
3. On the confirmation window, click OK.
Create an Invoice
-
On the Customer Finance menu, click Invoices.
-
On the Customer Invoices screen, click
 New.
New. -
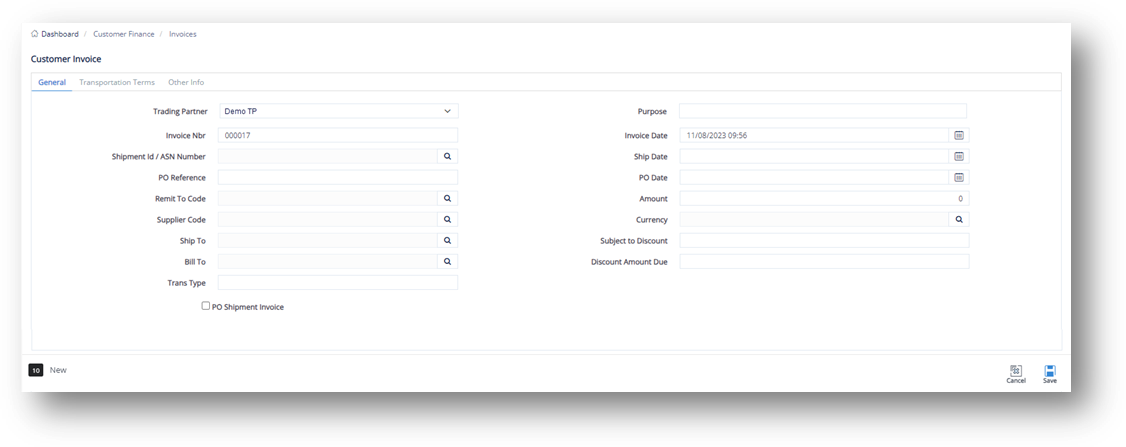
On the Customer Invoice screen, fill out the form. Use the following Field Definitions.
-
When you’re finished, click
 Save.
Save.
Field Definitions-General
|
Field |
Definition |
|
Trading Partner |
The Trading Partner code. |
|
Purpose |
Indicates the invoice’s purpose code. |
|
Invoice Nbr |
The invoice number. |
|
Invoice Date |
The date when the invoice was generated. |
|
Shipment Id |
The ASN number. |
|
Ship Date |
The date when the order was shipped. |
|
PO Reference |
The purchase order record. |
|
PO Date |
The date when the purchase order was created. |
|
Remit to Code |
The address code for remittance. |
|
Amount |
This field is calculated from the Line Item totals. |
|
Supplier Code |
The Supplier Code assigned by the Trading Partner. |
|
Currency |
The currency code. |
|
Ship To |
The Ship To code representing the customer’s address. |
|
Bill To |
The Bill To code representing the recipient’s address. |
|
Subject to Discount |
The amount on the invoice on which a discount will be applied. |
|
Trans Type |
The type of transaction (850, 855, or 860). |
|
Discount Amount Due |
The percentage amount of the discount that is due. |
|
PO Shipment Invoice |
Indicator if this invoice is for a PO shipment. |
|
Life Cycle |
This field is for internal processing and should never be changed. |
Field Definitions-Terms
|
Field |
Definition |
|
Type Code |
The code used for this type of invoice. |
|
Basis Date Code |
The code used for the method of applying the VAT (Value Added Tax) to the price at which the goods or services will be invoiced. |
|
Terms Description |
The terms of the deal and available methods of payment. |
|
Discount % |
The allowed percentage that will be deducted from the invoice. |
|
Discount Due Date |
The date when the discount is due. |
|
Deferred Due Date |
The due date on which the invoice payment is delayed. |
|
Discount Amt |
The percentage amount of the discount. |
|
Deferred Amt |
The amount of the invoice that will be delayed. |
|
Discount Days Due |
The number of days in which the allowed discount is due. |
|
Net Due |
The balance of the invoice that is due, after calculating discounts and/or other charges, fees, allowances, etc. |
|
Pct Payable |
The percent of Invoice Payable. |
|
Net Dates |
The dates when the net balance is due, for example Net 10, Net 15, Net 30, etc. This means that the balance is due in 10, or 15, or 30 days after the date of the invoice. |
|
Day of Month |
The day of the month on which the invoice is due. |
Field Definitions-Other Info
Additional information that is used in specific sections of the invoice, for example Purchase Order dates.
Send a Document
Use the Send Document feature to send an 810 Invoice to your trading partner.
1. On the Customer Finance menu, click Invoices.
2. On the Customer Invoices screen, select the invoice that you want to send, and then click ![]() Send Document.
Send Document.
3. On the notification window, click OK.
The Status of the document becomes Document Created.
Delete an Invoice
1. On the Customer Finance menu, click Invoices.
2. On the Customer Invoices screen, select the invoice that you want to remove, and then click ![]() Delete.
Delete.
3. On the confirmation window, click OK.
|
NOTE Firm Orders that were on this invoice will now be available for invoicing again. |
Export Invoices
With the Export feature, Trading Partners that do not use the EDI system can export the Invoices to their own ERP system. The following sections describe how to export single or multiple Invoices on the Customer Invoices screen.
1. On the Customer Finance menu, click Invoices.
TIP Use the Filter panel to search for invoices.
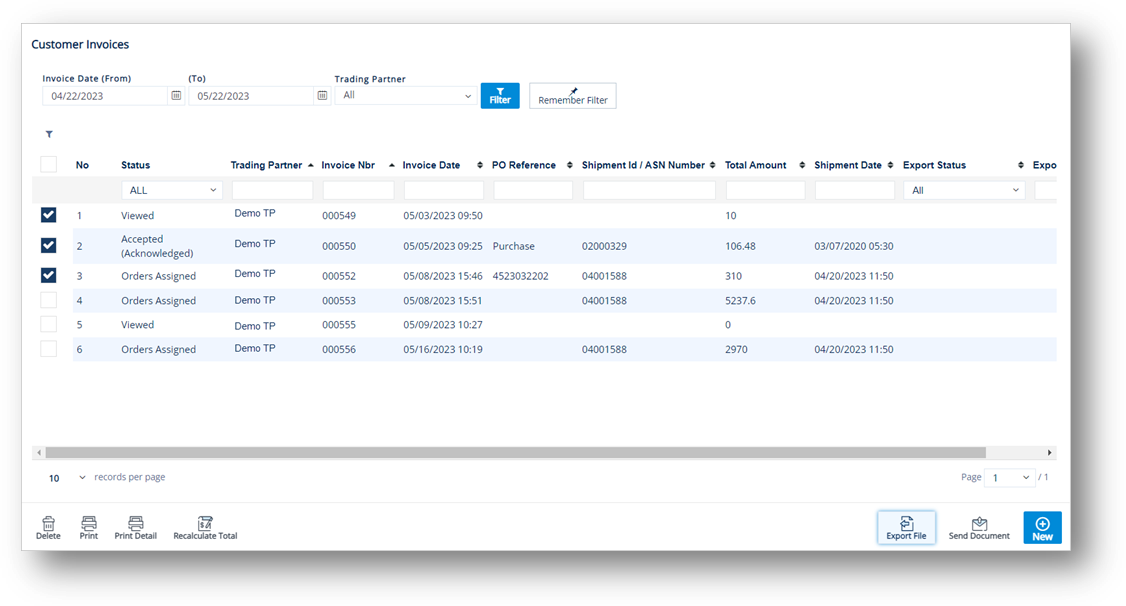
2. On the Customer Invoices screen, select the invoice that you want to export.
Note Refer to the Field Definitions at the end of this section.
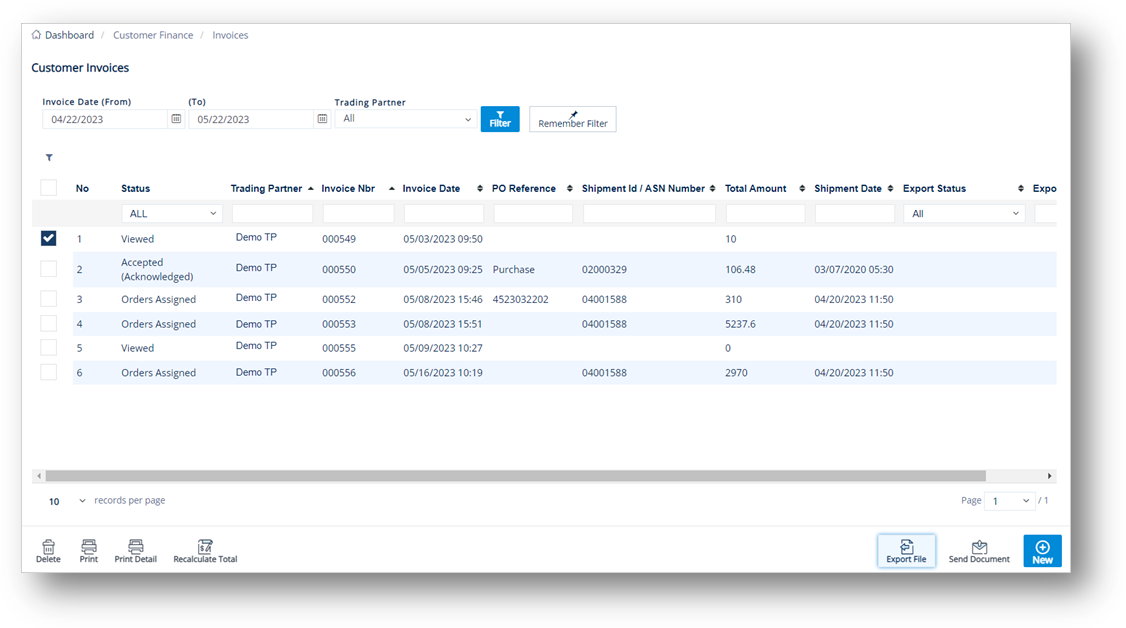
3. Click ![]() Export File.
Export File.
TIP If needed, you can select multiple invoices to export.
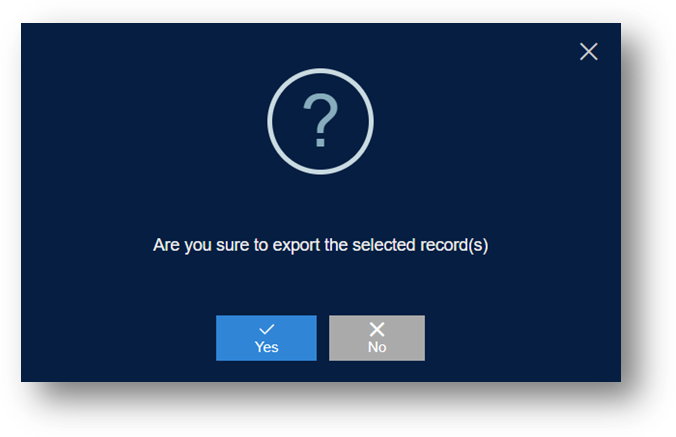
4. On the confirmation message, there are two options, do one of the following:
Click Yes to export the selected record.
The notification window shows that the record has been processed successfully.
Note The notification pop-up window will show the number of records that have been processed successfully, out of those selected.

Click No to cancel the export of the selected record.
The notification window will show if an exception occurred during the export process.

Field Definitions
|
Field |
Definition |
|
Export Status |
The export status of an invoice. The status can be one of these values: Exporting, Exported Successfully, and Export Failed. Exporting: The system confirms that the Exporting requests from the selected records have been received and are being verified for their readiness (validating the invoice information, etc.) for exporting. Exported Successfully: The system confirms that the invoice has been successfully exported. Export Failed: The export process failed. |
|
Export Date |
The date and time when the invoice was exported. NOTE This column is only displayed if the invoice is in the Exported Successfully status. |