Demand Schedules
The Demand Schedules screen maintains order demands from suppliers. You can add either forecast or firm releases with part numbers, ship dates, and the like.
Main Topics:
Work with Demand Schedules
1. On the Supplier Demand Mgt menu, click Demand Schedules.
2. On the Supplier Demand Schedules screen, click the item that you want to view.
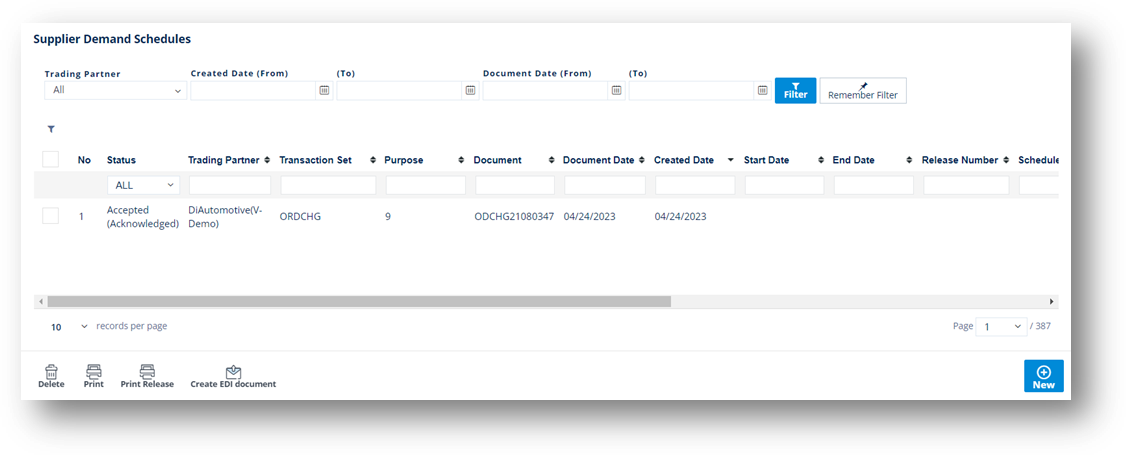
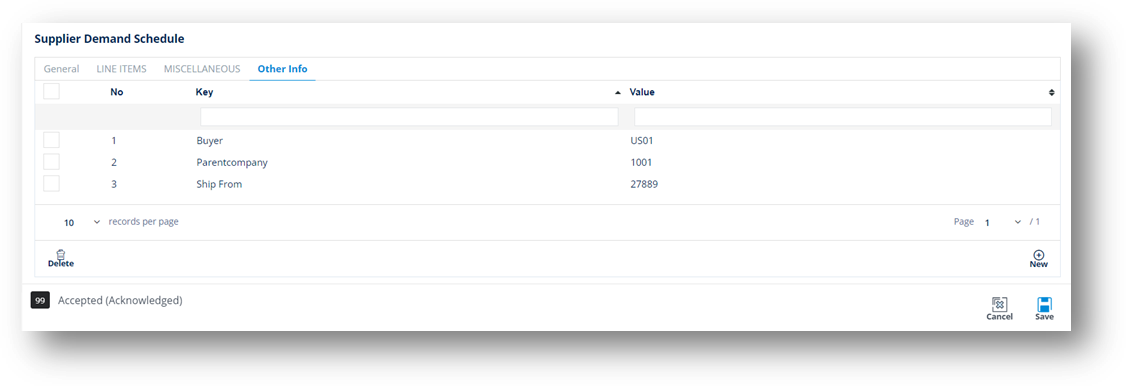
3. On the Supplier Demand Schedule screen, select the General, LINE ITEMS, MISCELLANEOUS, or Other Info tabs to view the corresponding details.
General tab
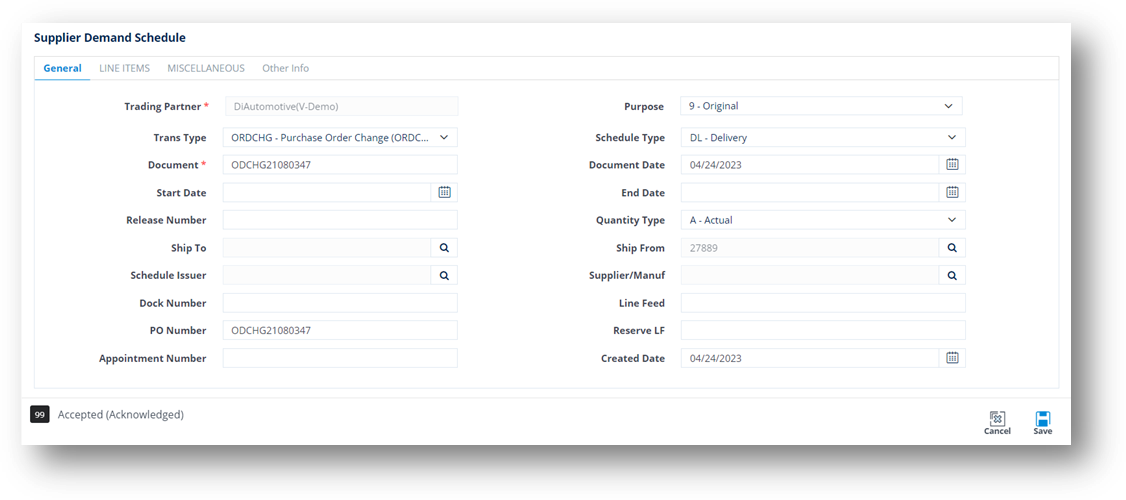
LINE ITEMS tab
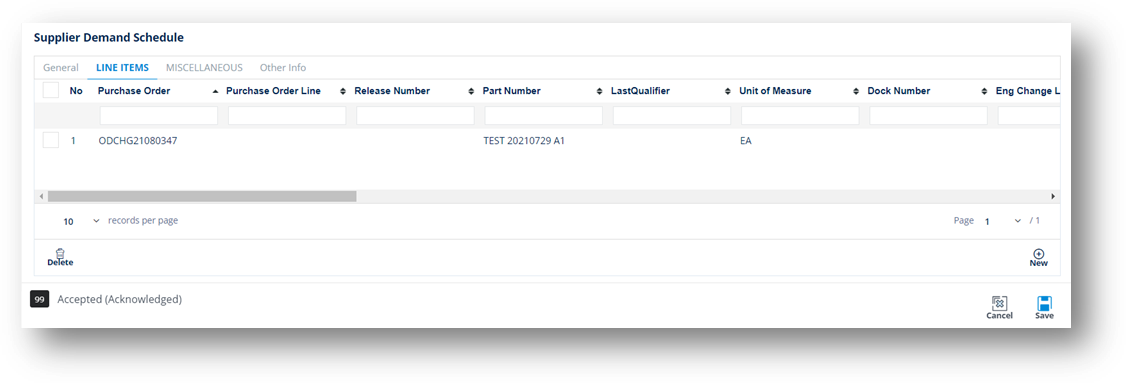
MISCELLANEOUS tab
Other Info tab
Work with Line Items
To view a Line Item
1. On the Line Items tab, click the line item whose details you want to view.
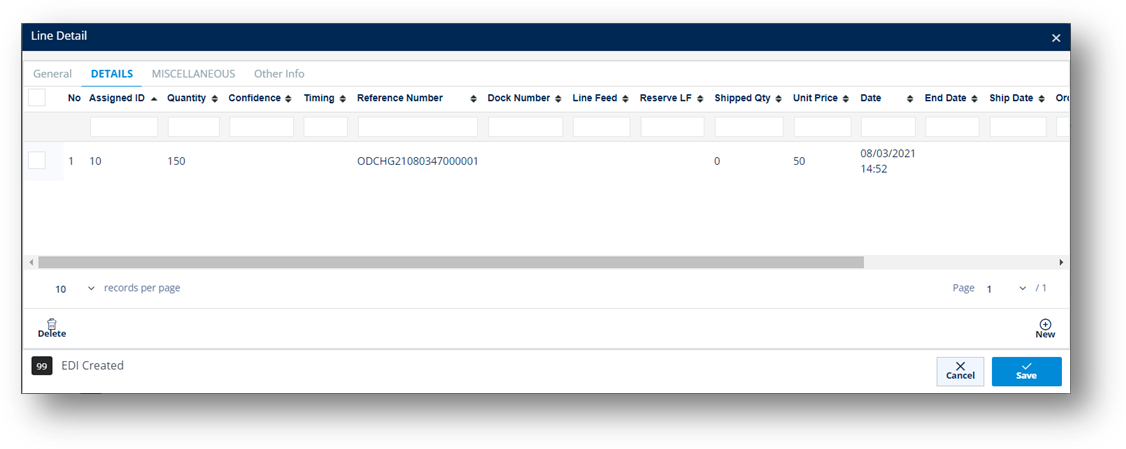
2. On the Line Detail window, switch to the GENERAL, DETAILS, MISCELLANEOUS, and Other Info tabs to view the corresponding data.
Line Detail-General tab
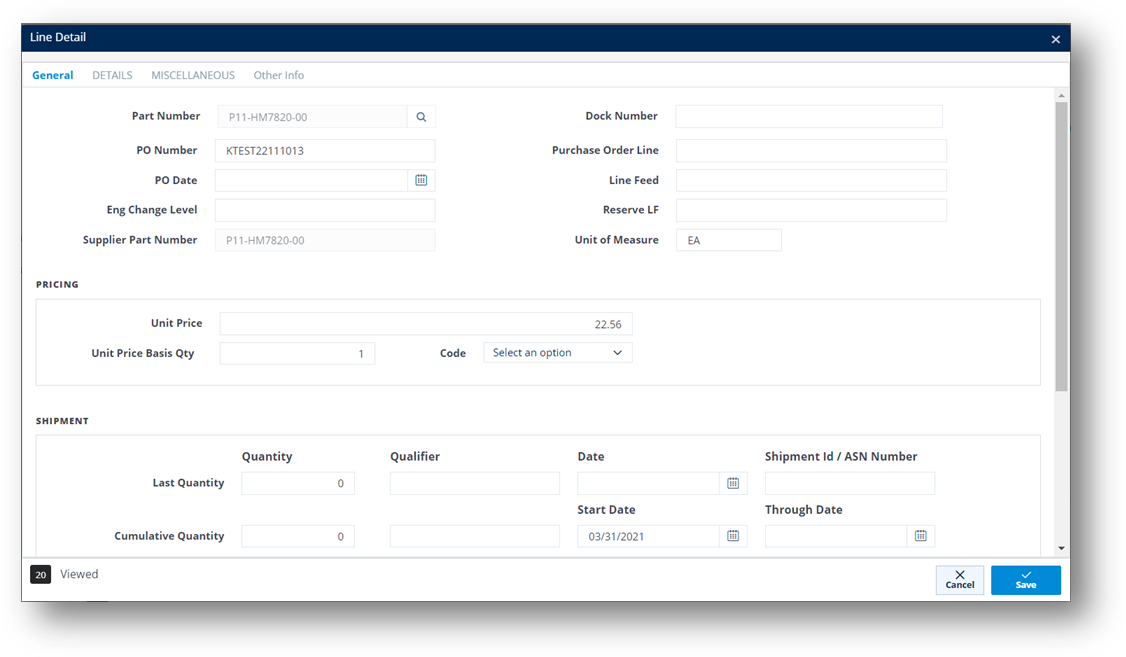
TIP You can scroll down to view more fields on the General tab.
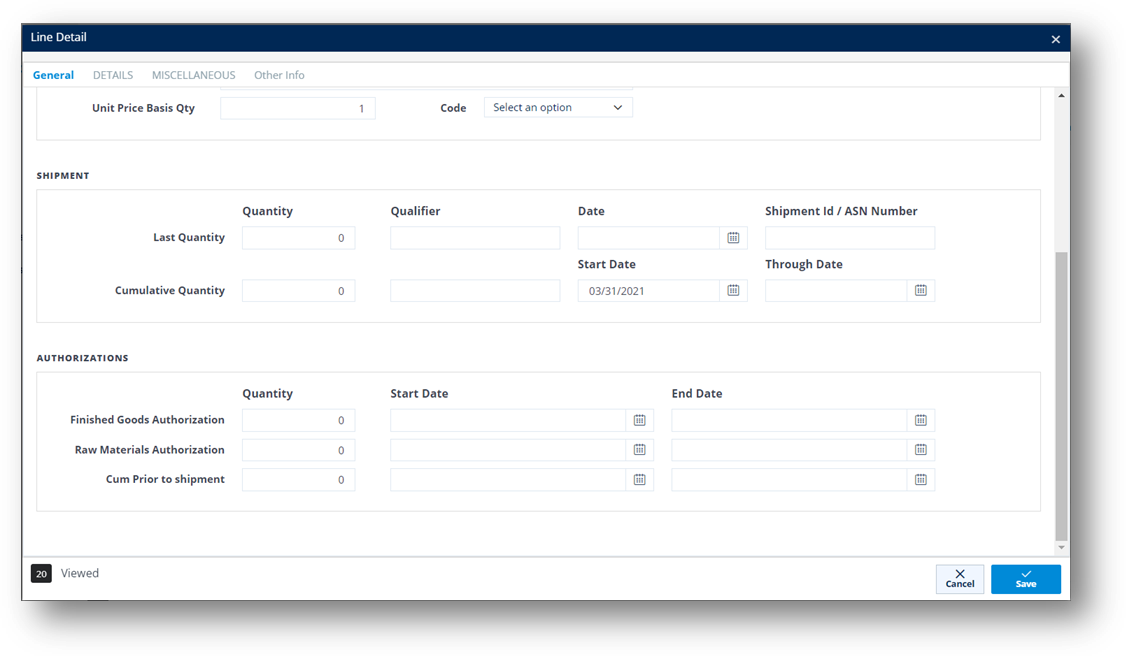
Line Detail-DETAILS tab
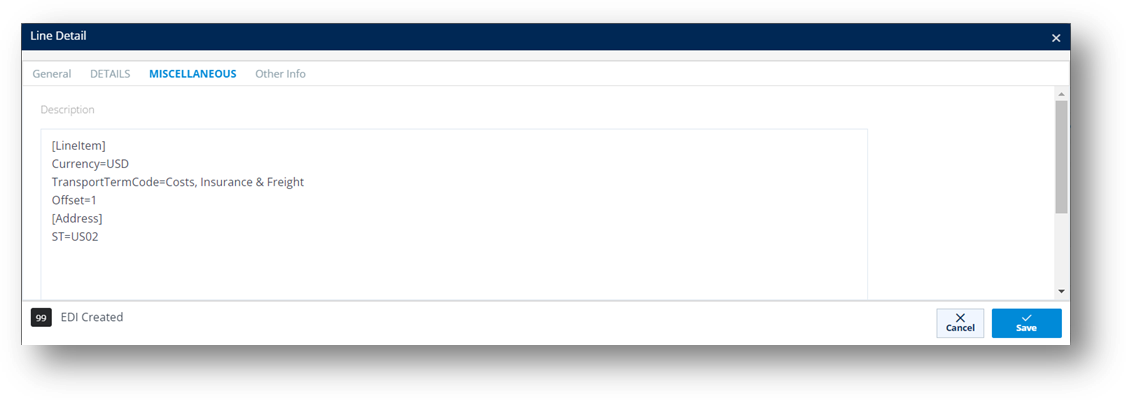
Line Detail- MISCELLANEOUS tab
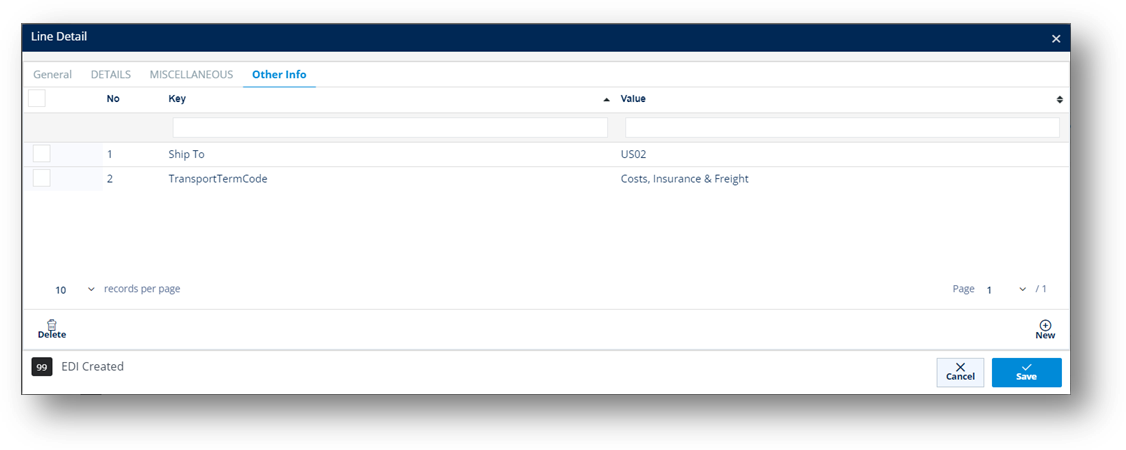
Line Detail- Other Info tab
Field Definitions- Line Detail-GENERAL
|
Field |
Definition |
|
Part Number |
The part number of this item. |
|
PO Number |
The PO reference number of this shipment, if applicable. |
|
Eng Change Level |
The engineering/design change code for the part ordered. |
|
Supplier Part Number |
The supplier’s part number. |
|
Dock Nbr |
Dock number this part will be sent to, if applicable. |
|
Line Feed |
Production Line Feed for this part. |
|
Reserve LF |
Reserve Line Feed for this part. |
|
Unit of Measure |
Unit of measure used. |
|
SHIPMENT |
Last Quantity: Qualifier for the quantity in the following field – choose if the quantity was shipped or received from this Trading Partner. Shipment Id: Shipment identifier or ASN number. Qualifier: Type of shipment: Cumulative Quantity: Qualifier for the cumulative quantity shipped/received from this Trading Partner. Start Date: Start date of this cumulative quantity. Thru Date: Cumulative quantity through this date. |
|
Timing |
Timing of the shipment: |
|
Quantity |
Quantity according to the last ASN. |
|
Date |
Date of the last ASN. |
|
Reference Number |
The release authorization number on the shipment. |
Print a Schedule
The Print button will print a report for the selected schedules.
-
On the Supplier Demand Mgt menu, click Demand Schedules.
-
On the Supplier Demand Schedules screen, click
 Print.
 -
On the Choose Reports to Print window, do the following:
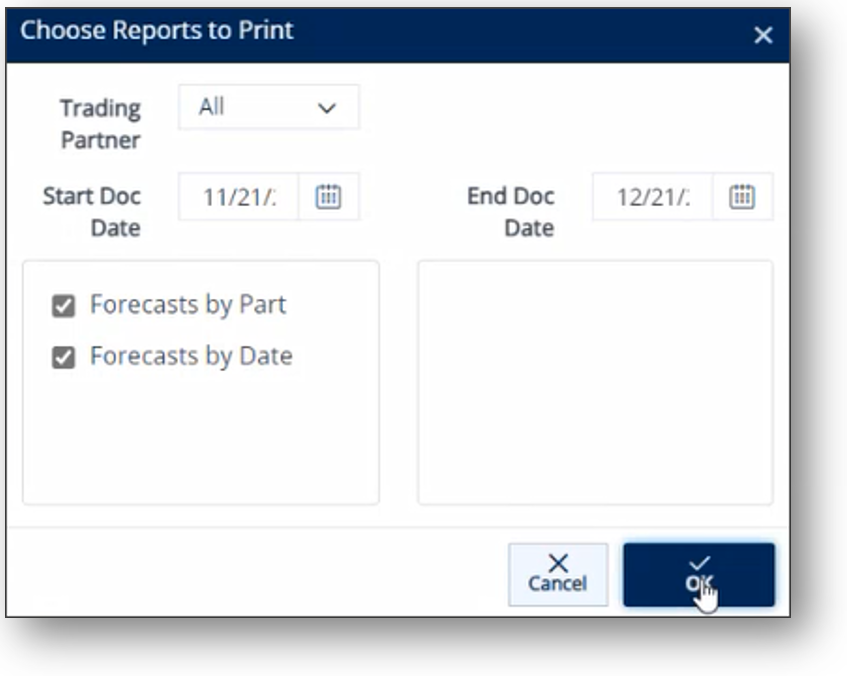
a. Select the date in the Start Doc Date dropdown list.
b. Select the date in the End Doc Date dropdown list.
c. Select one of the following options, and then click ![]() OK.
OK.
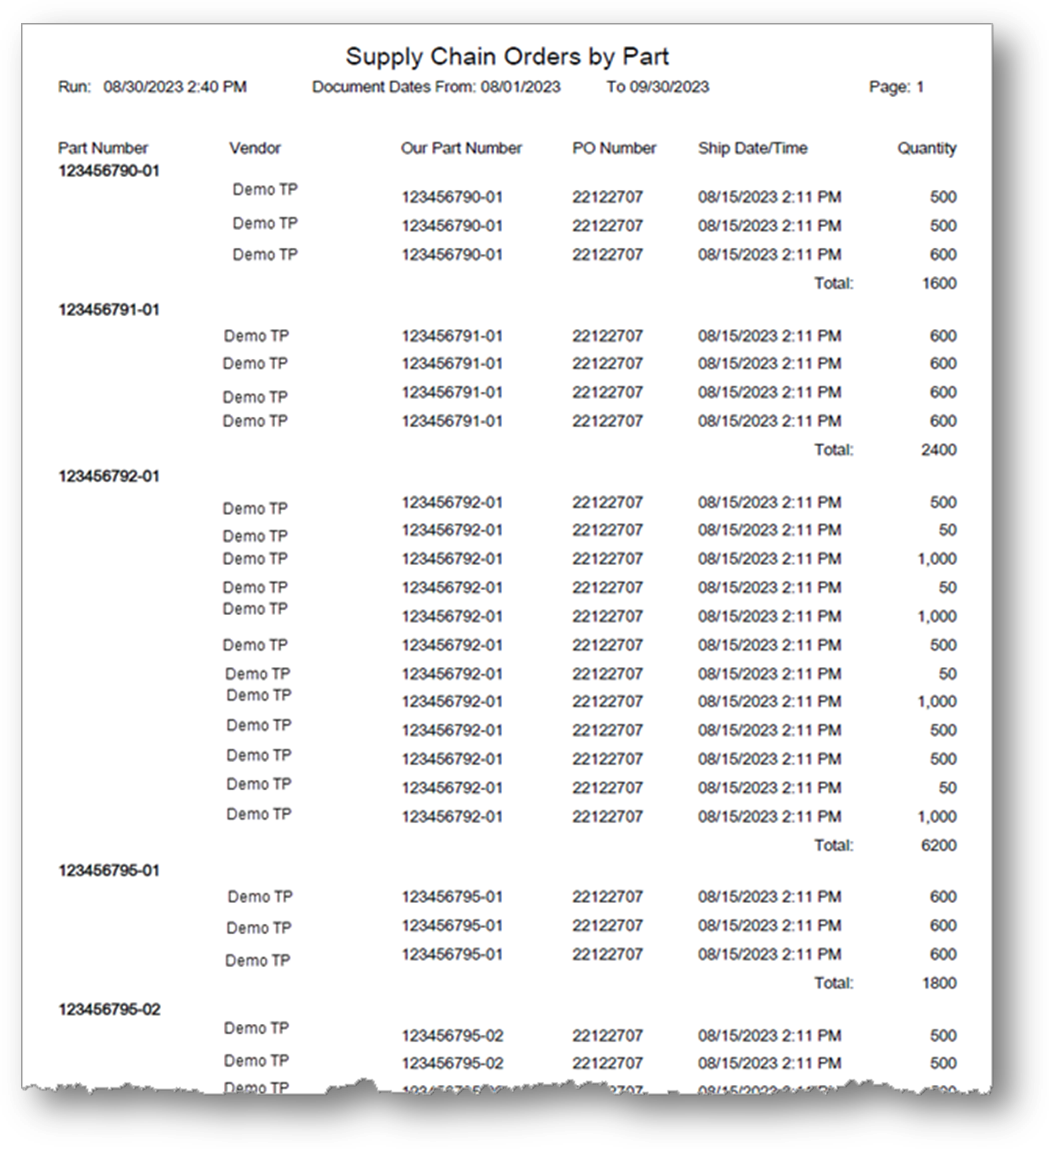
· Select the Forecasts by Part checkbox if you want to print the Forecast Report, grouped by Parts.
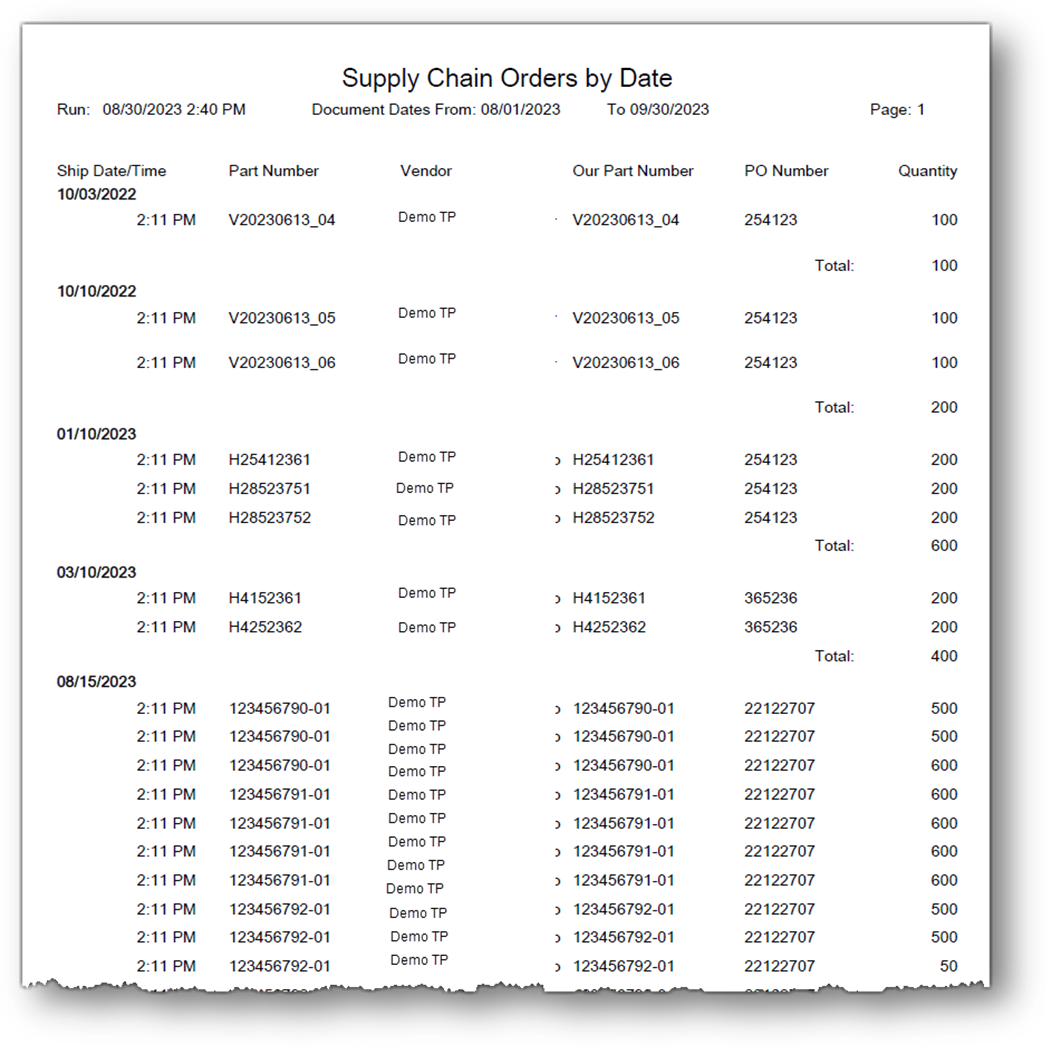
· Select the Forecasts by Date checkbox if you want to print the Forecast Report, grouped by Date.
4. On the confirmation message, click OK to review and print the report.
Forecasts by Part Report
Forecasts by Date Report
Print a Release
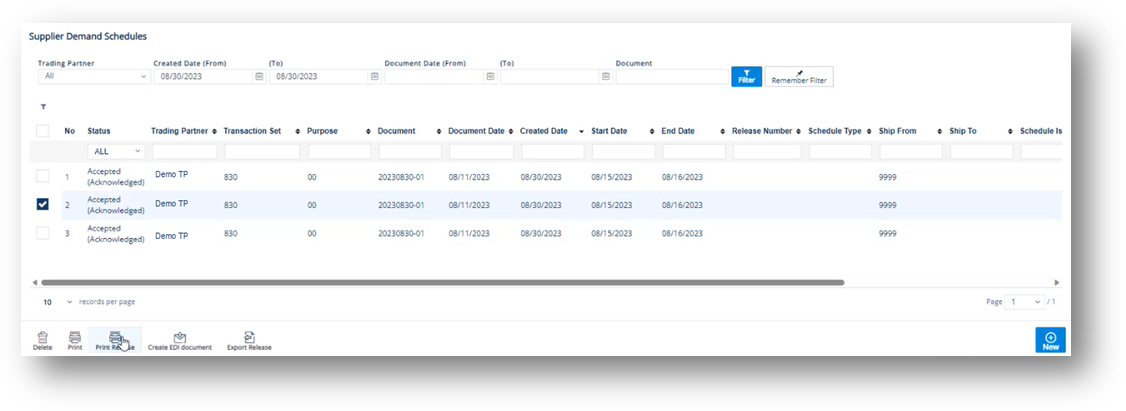
The Print Release button will print a report for the selected schedules.
1. On the Supplier Demand Mgt menu, click Demand Schedules.
2. On the Supplier Demand Schedules screen, select the release that you want to print.
3. Click ![]() Print Release.
Print Release.
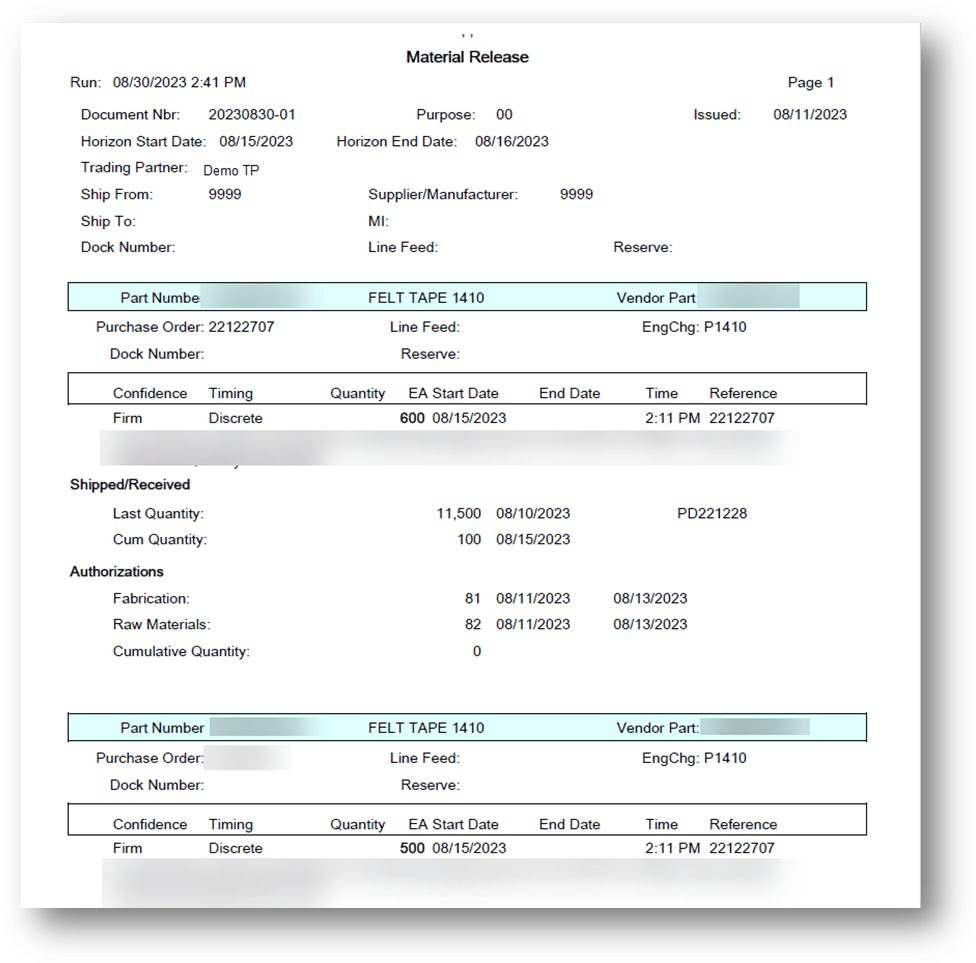
4. On the confirmation message, click OK to review and print the report.
Export a Release
The Export Release button will export a report for one or multiple schedules to an Excel spreadsheet for external use.
1. On the Supplier Demand Mgt menu, click Demand Schedules.
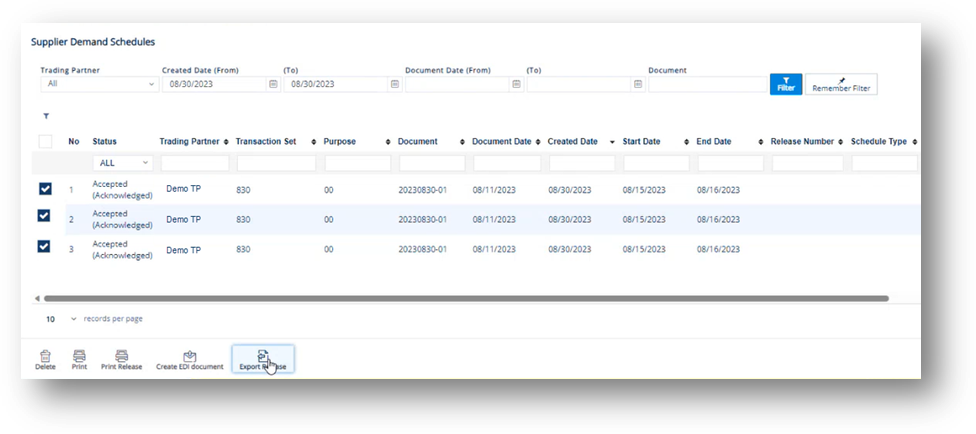
2. On the Supplier Demand Schedules screen, select the release that you want to export.
3. Click ![]() Export Release.
Export Release.
Note If needed, you can select multiple schedules to export.
The Demand Schedule Excel file is downloaded.
If you export one Schedule, the Excel file will contain only data from that Schedule. The file name of the Excel file is saved as Name of Trading Partner + Document Reference Number + Demand Schedule + Timestamp (Unix format).

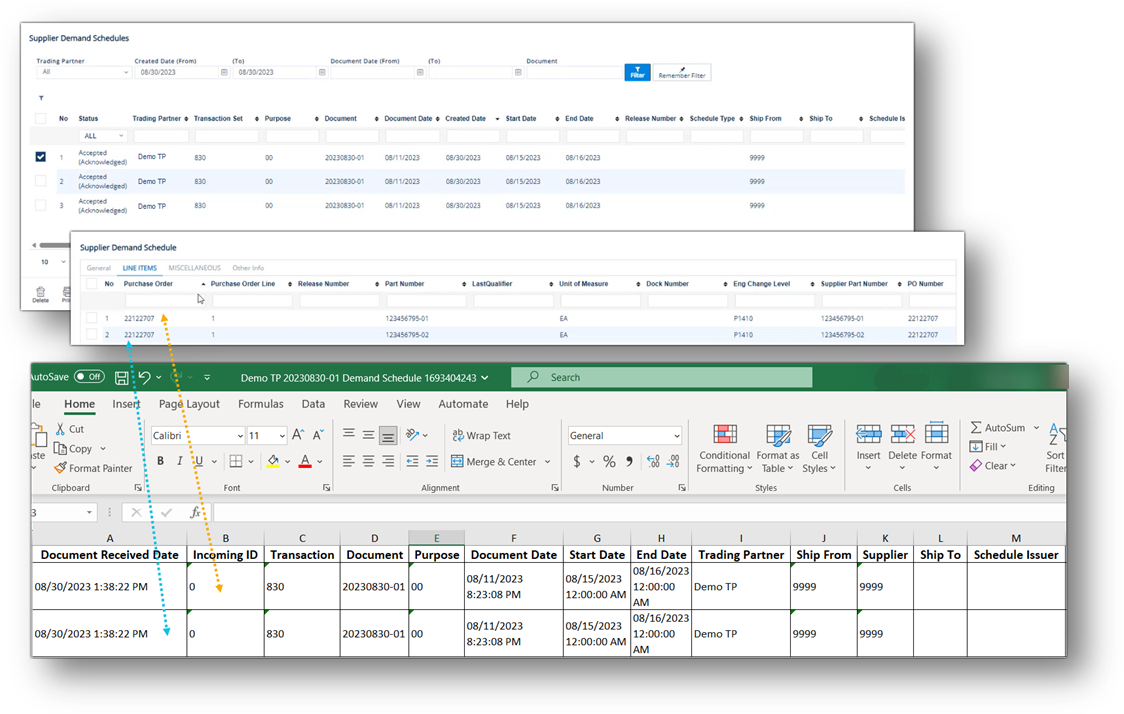
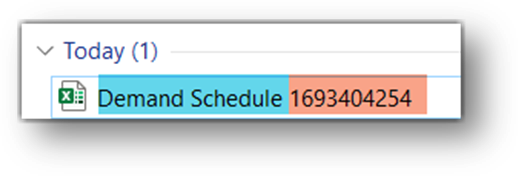
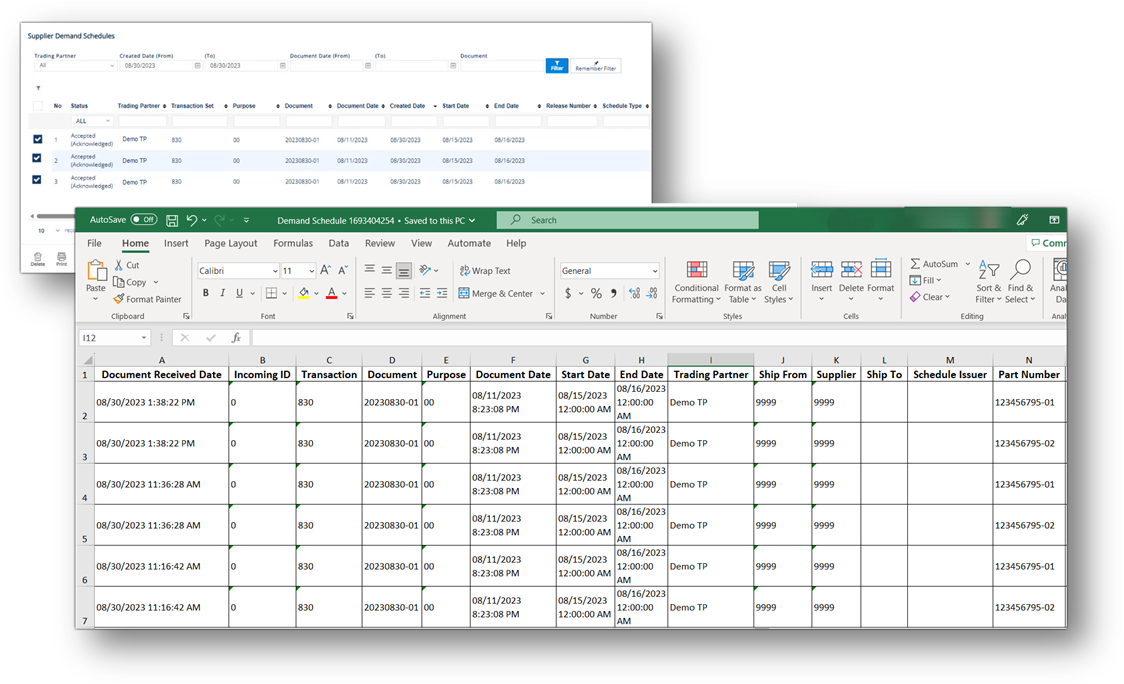
If you export multiple Schedules, the Excel file will contain data of all selected Schedules. The file name of the Excel file is saved as Demand Schedule + Timestamp (Unix format).
Create EDI Document
1. On the Supplier Demand Mgt menu, click Demand Schedules.
2. On the Supplier Demand Schedules screen, select the release.
3. Click ![]() Create EDI Document.
Create EDI Document.
4. On the confirmation window, click OK.
Create a Demand Schedule
-
On the Supplier Demand Mgt menu, click Demand Schedules.
-
On the Supplier Demand Schedules screen, click
 New.
New. -
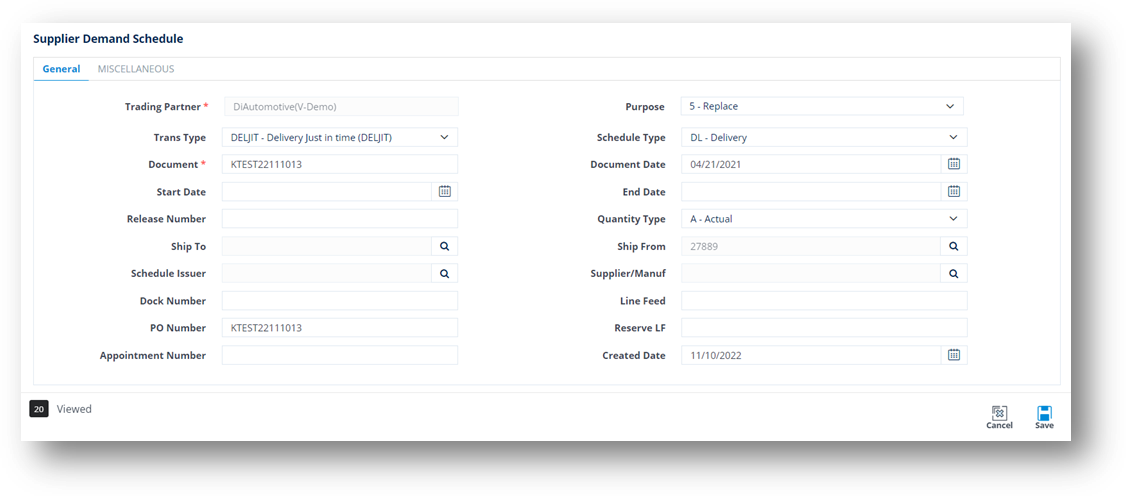
On the Supplier Demand Schedule screen, fill out the form. Use the following Field Definitions.
-
When you’re finished, click
 Save.
Save.
Field Definitions
|
Field |
Definition |
|
Trading Partner |
The Trading Partner ID code. |
|
Purpose |
Indicates the release’s purpose code: 00: Original Common item: Id=R; Code=SCHPU; Setting=value from above. |
|
Trans Type |
The type of transaction. 830 defines Material Release or Planning Schedule. |
|
Schedule Type |
Indicates the basis of dates in shipments: DL: Delivery based dates Common item: Id=R; Code=SCHTY; Setting=value from above. |
|
Document |
Release number to uniquely identify this schedule. The default is today’s date and time (YYMMDDHHMMSS). |
|
Document Date |
The date when the schedule was created. The default is today’s date. |
|
Start Date |
If applicable, the shipment release start date. The default is today’s date. |
|
End Date |
If applicable, the shipment release end date. The default is 7 days out. |
|
Release Nbr |
The number of the material release document. |
|
Quantity Type |
Indicates the basis of quantity values in shipments: A: Actual quantity, no calculations required to determine how much product to send. Common item: Id=R; Code=QTYQU; Setting=value from above. |
|
Ship To |
Location to which shipment was sent. Common item: Id=O; Code=ST; Setting=Ship To code. |
|
Ship From |
Location from which shipment will be sent. Common item: Id=O; Code=SF; Setting=Ship From code. |
|
Schedule Issuer |
The Material Release Schedule Issuer. |
|
Supplier/Manuf |
Supplier or Manufacturer of the product or part. Common item: Id=O;Code=SU; Setting=supplier’s code. |
|
Dock Nbr |
Dock number this part will be sent to, if applicable. |
|
Line Feed |
Production Line Feed for this part. |
|
PO Number |
Purchase Order reference number, if applicable. |
|
Life Cycle |
These codes provide the schedule status. Do not change this field. 10: New Schedule, user has not verified content. |
Delete a Demand Schedule
1. On the Supplier Demand Mgt menu, click Demand Schedules.
2. On the Supplier Demand Schedules screen, select the schedule that you want to remove, and then click ![]() Delete.
Delete.
3. On the confirmation window, click OK.