Contacts
With the Contacts feature, you can manage all the contact points in TrueAuto. Each contact point has their details (name, type, phone number, email, and fax) for communication about product issues and/or company branches.
This section provides instructions on how to add a new Contact. The Contact records can be assigned to the Trading Partner Parts and/or Addresses, depending on your needs. Once the Contact records are assigned, you can view the assigned information on the corresponding tabs.
Main Topics:
Add a Contact
1. On the Settings menu, click Contacts.
2. On the Contacts screen, click ![]() New.
New.
3. On the General tab,
a. Select the Trading Partner in the dropdown list.
b. Fill out the Name, Type Name, Phone, Email, and Fax fields.
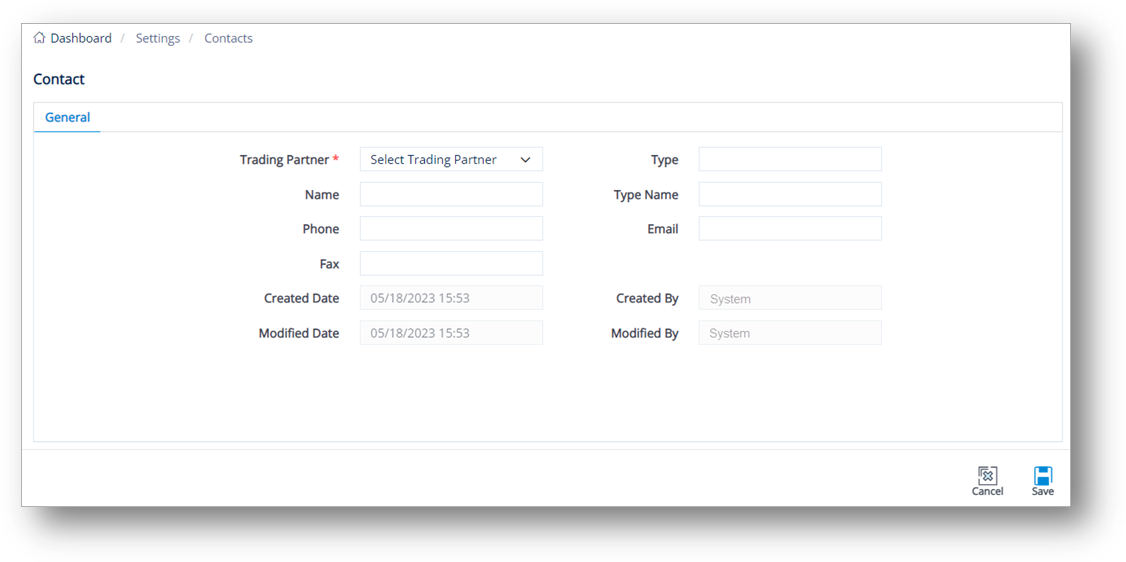
4. When you’re finished, click ![]() Save.
Save.
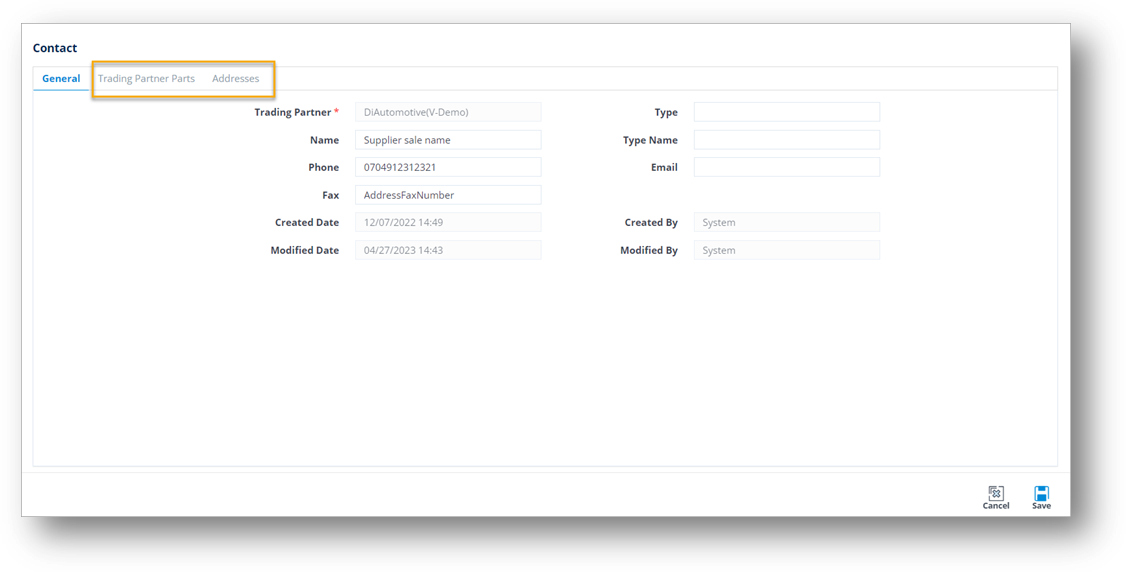
Once the new contact is saved successfully, the Trading Partner Parts and the Addresses tabs will be displayed.
Delete a Contact
1. On the Settings menu, click Contacts.
2. On the Contacts screen, select the record that you want to remove, and then click ![]() Delete.
Delete.
3. On the confirmation message, click OK.
View Linked Trading Partner Parts
The Trading Partner Parts tab lists all the Trading Partner Parts that the Contact is assigned to. The assigned contact will be the contact point for the linked parts/products. For more information, refer to the steps on how to Assign a Contact to a Trading Partner Part.
To view the Trading Partner Parts that are linked to a Contact, follow these steps:
1. On the Settings menu, click Contacts.
2. On the Contacts screen, select the record that you want to view.
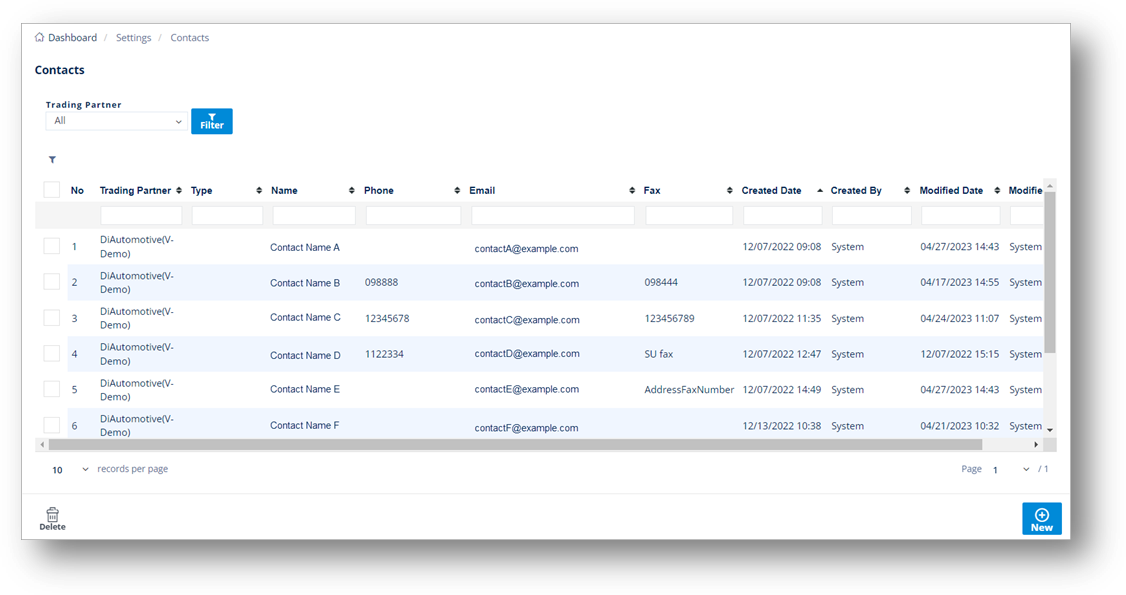
3. On the Contact screen, switch to the Trading Partner Parts tab.
The linked Trading Partner Part information is displayed.

Assign a Contact to a Trading Partner Part
This section describes the steps on how to assign a Contact to a Trading Partner Part. You can later view the Parts information on the Contacts screen > Trading Partner Parts tab.
1. On the Settings menu, click Trading Partner Parts.
2. On the Trading Partner Parts screen, open the record that you want to view.
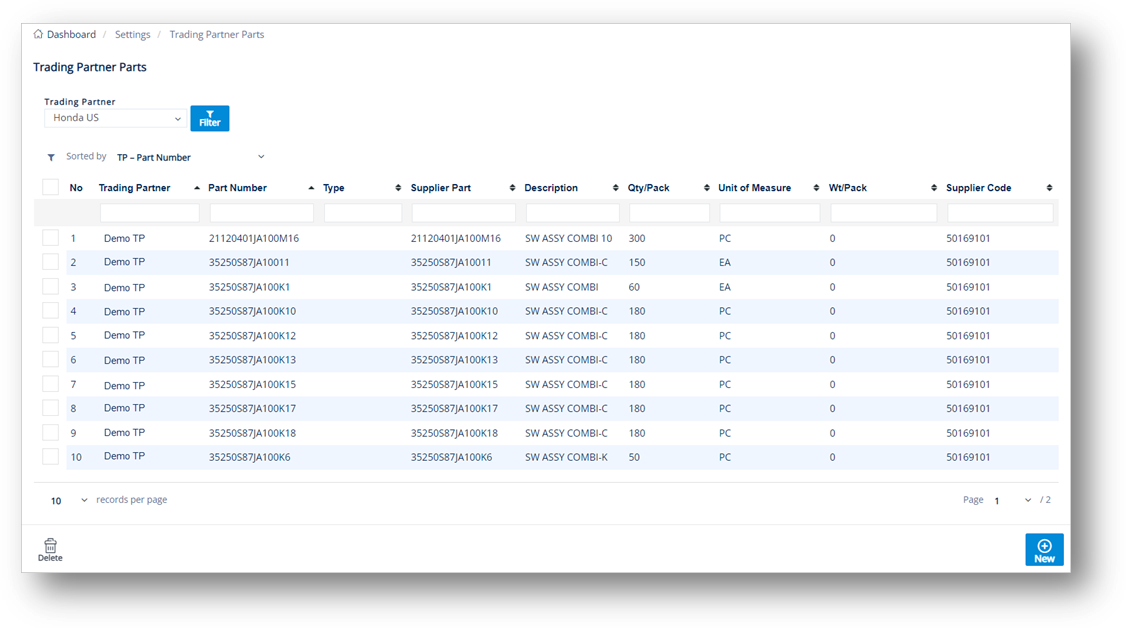
3. On the Trading Partner Part screen, switch to the Contacts tab.
4. On the Contacts tab, click Assign.
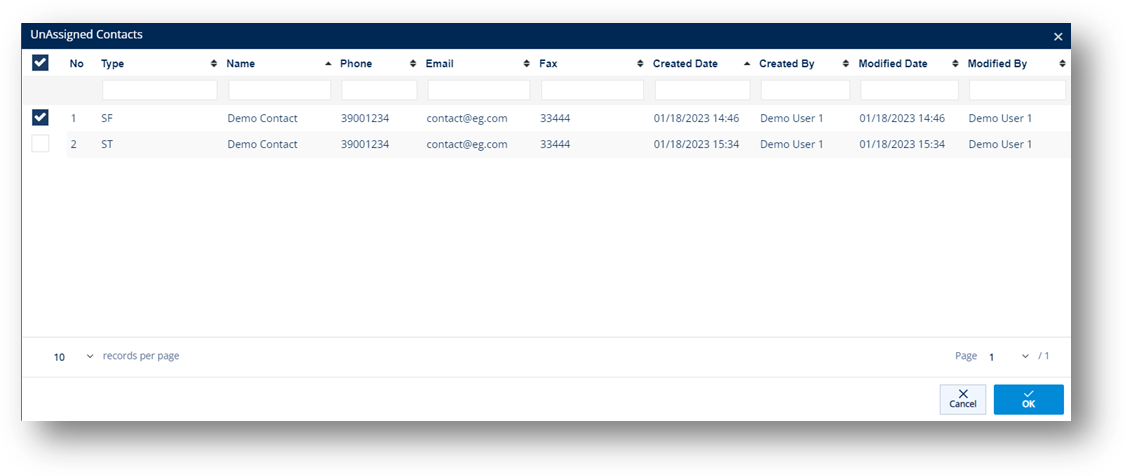
5. On the UnAssigned Contacts window, select the checkbox of the Contact that you want to assign to the Trading Partner Part, and then click ![]() OK.
OK.
6. When you’re finished, click ![]() Save.
Save.
To unassign a Contact
1. On the Trading Partner Part screen > Contacts tab, select the Contact that you want to unassign from the Trading Partner Part, and then click ![]() Unassign.
Unassign.
2. On the confirmation message, click OK.
The connection between the Contact and the Trading Partner Part is removed.
View Linked Addresses
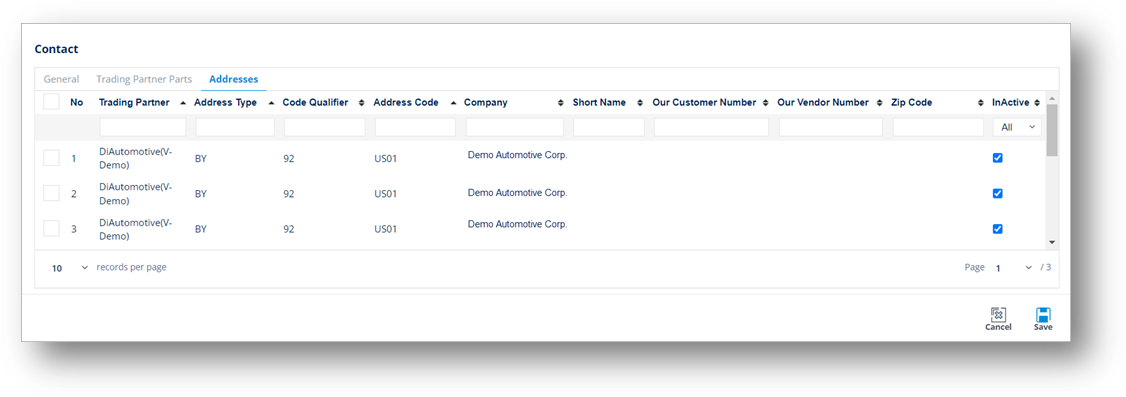
The Addresses tab lists all the company address information that the Contact is assigned to. For more information, refer to the steps on how to assign a Contact to an Address.
To view the Addresses that are linked to a Contact, do the following:
1. On the Settings menu, click Contacts.
2. On the Contacts screen, select the record that you want to view.

3. On the Contact screen, switch to the Addresses tab.
The linked Address information is displayed.
Assign a Contact to an Address
This section describes the steps on how to assign a Contact to an Address. You can later View the Address information on the Contacts screen > Addresses tab.
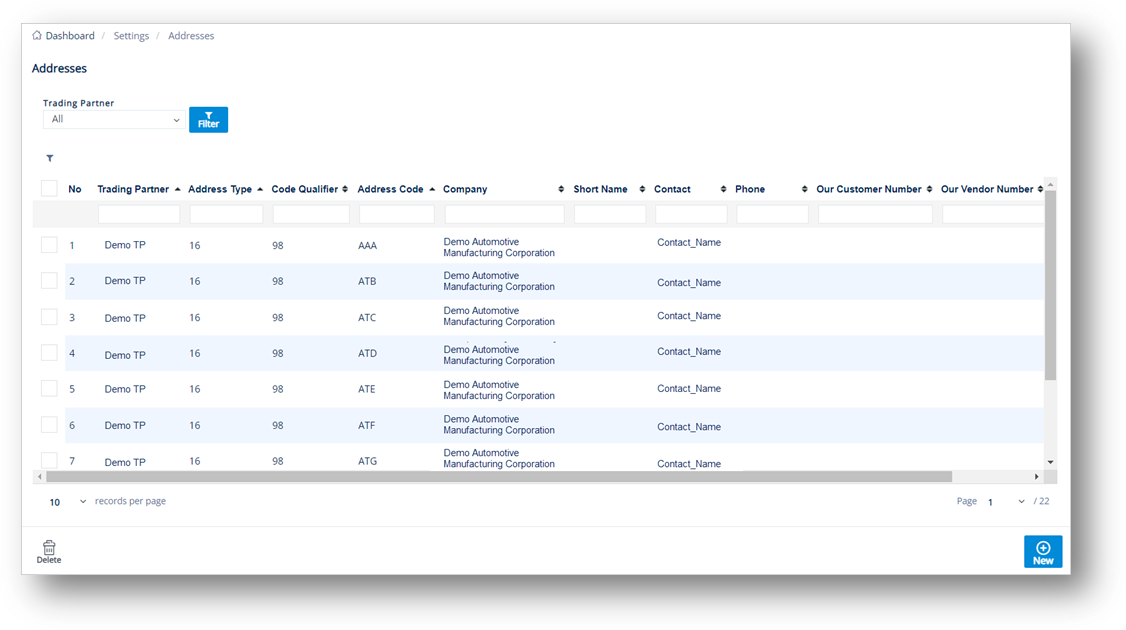
1. On the Settings menu, click Addresses.
2. On the Addresses screen, open the record that you want to view.
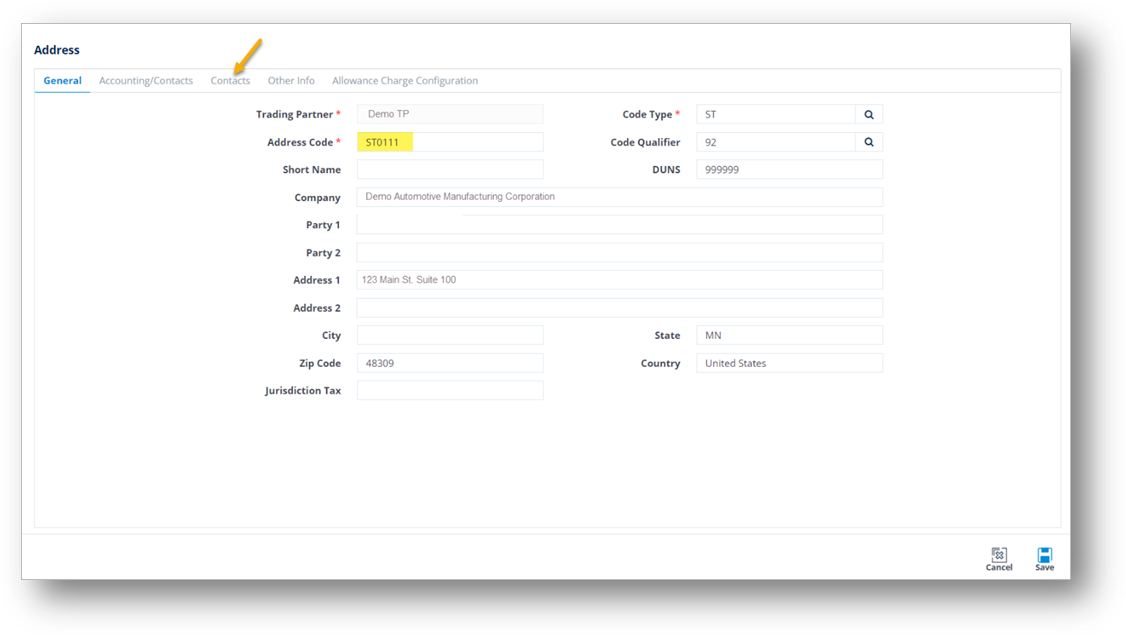
3. On the Address screen, switch to the Contacts tab.
In this example, the Address Code is ST0111.
4. On the Contacts tab, click Assign.
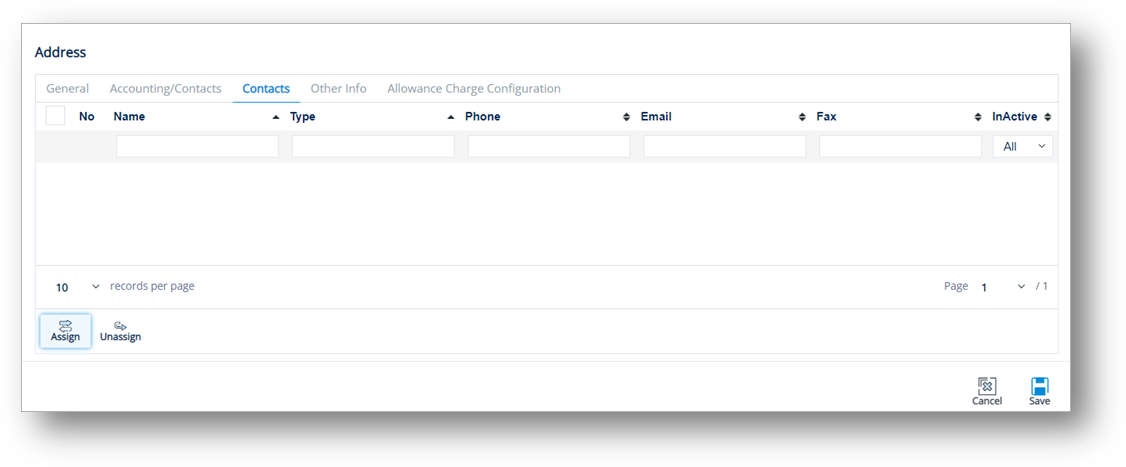
5. On the UnAssigned Contacts window, select the checkbox of the Contact that you want to assign to the Address, and then click ![]() OK.
OK.

6. When you’re finished, click ![]() Save.
Save.
To unassign a Contact
1. On the Address screen > Contacts tab, select the Contact that you want to unassign from the Address, and then click ![]() Unassign.
Unassign.
2. On the confirmation message, click OK.
The connection between the Contact and the Address is removed.