Trading Partner Profiles
Main Topics:
Work with Trading Partner Profiles
1. On the Settings menu, click Trading Partner Profiles.
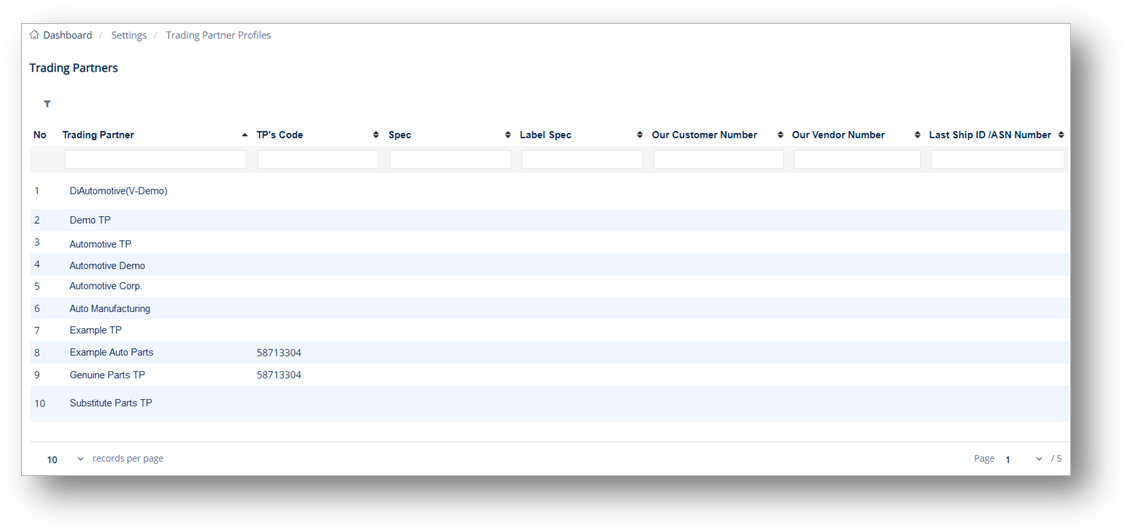
2. On the Trading Partners screen, select the record that you want to work with.
3. On the General tab, in the BARCODE DEFAULTS section, do the following:
a. Select the label template in the Container dropdown list.
b. Select the label template in the Master dropdown list.
c. Select the label template in the Mixed dropdown list.
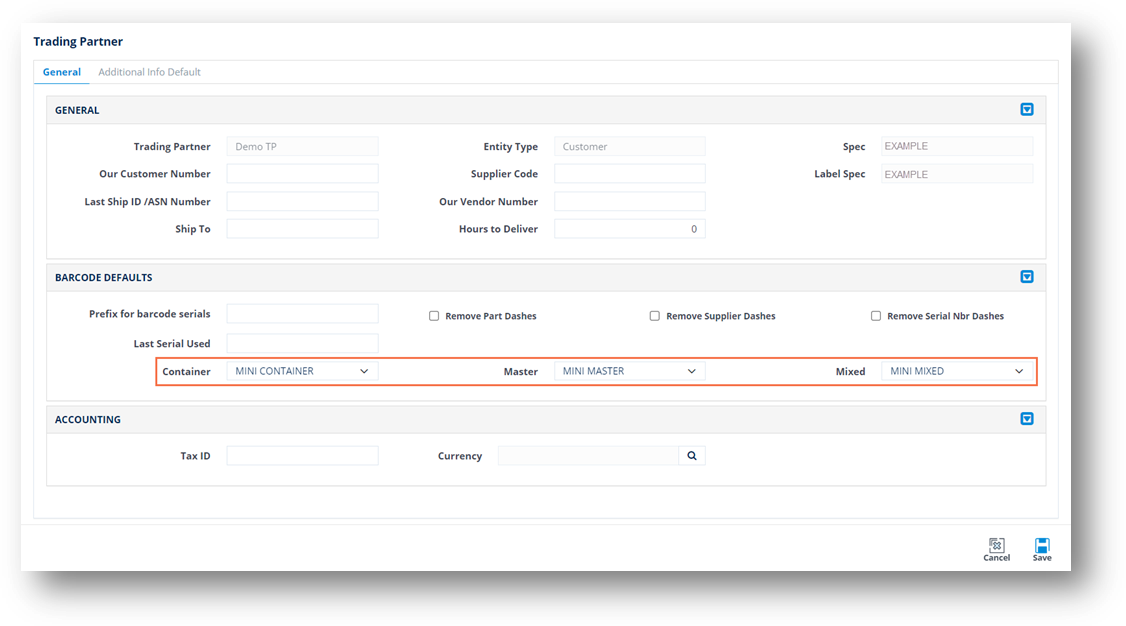
d. When you’re finished, click ![]() Save.
Save.
The selected templates will be applied to the label printing job. For the priority level, refer to the Priority Logic for Label Template Selection section.
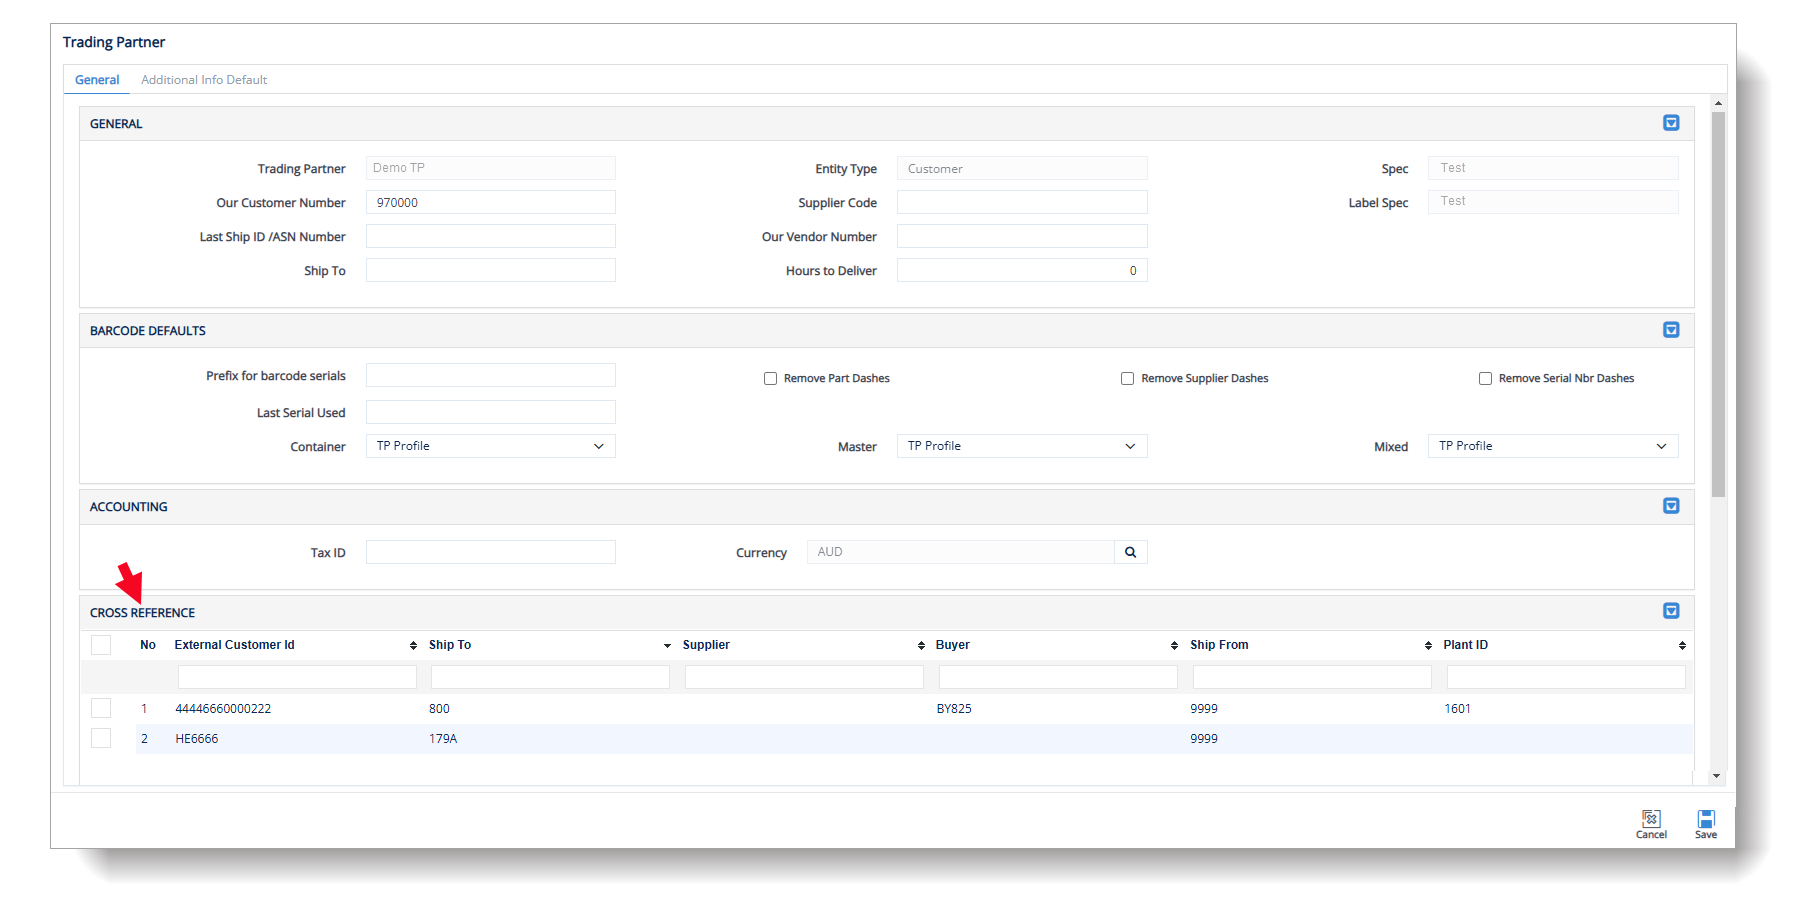
Look up Customers’ Cross Reference
Cross Reference fields are used to map equivalent data between different systems or modules. These fields allow users to link similar items, accounts, or transactions from different departments or external systems, ensuring consistency and accuracy. By maintaining these cross-references, businesses can streamline data integration, improve reporting accuracy, and ensure seamless communication between different systems or modules. They play a crucial role in data harmonization across the entire ERP landscape.
|
IMPORTANT NOTE To enable the Cross Reference feature, please discuss with the Customer Support team to request activation within the TrueAuto system. This functionality is a specialized feature that requires authorization and activation by the TrueAuto Administrator. |
Work with Additional Info Default
This section provides instructions on how to handle the Additional Info Default configurations in the Trading Partner Profiles. You can also set up the Default Value for the Additional Info Default record and change it later. Moreover, if the record is marked as Mandatory/Always Included, it will be automatically displayed on the Additional Information tab.
To set up a Default Value
1. On the Settings menu, click Trading Partner Profiles.
2. On the Trading Partners screen, select the record that you want to work with.

3. On the Trading Partner screen, switch to the Additional Info Default tab.
4. On the Additional Info Default tab, click ![]() New.
New.

The Additional Info Default Configurations screen shows the Additional Info Default records.
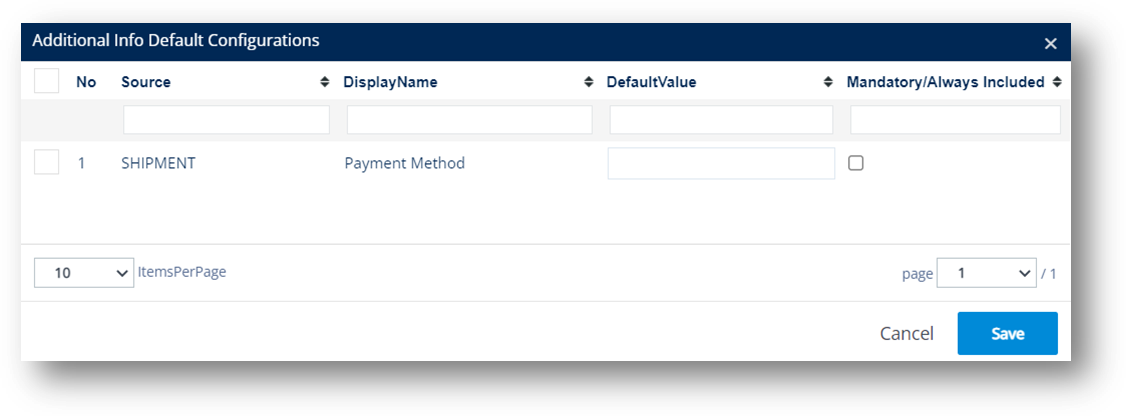
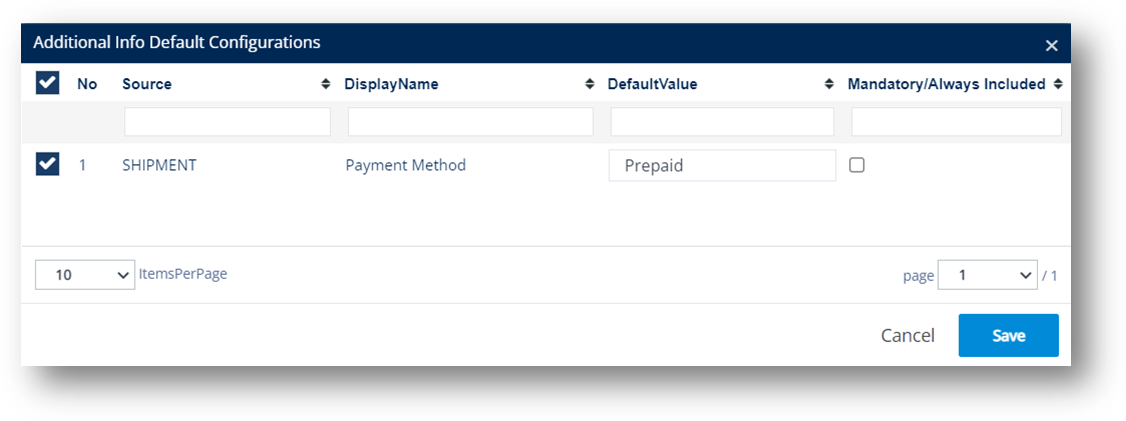
5. On the Additional Info Default Configurations screen, select the checkbox of the record that you want to add.
6. Enter the Default Value in the box.
In this example, the Default Value is Prepaid.
7. Click Save.
The new Additional Info Default record is added. In this example, its Mandatory/Always Included value is No.

Example 1
In this example, the default value of the Additional Info Default records is Prepaid and the Mandatory/Always Included checkbox is NOT selected.
Add an Additional Information record to a Customer Shipment
1. On the Settings menu, click Customer Shipments > Shipments.
2. On the Customer Shipment screen, fill out the form, and then click ![]() Save.
Save.
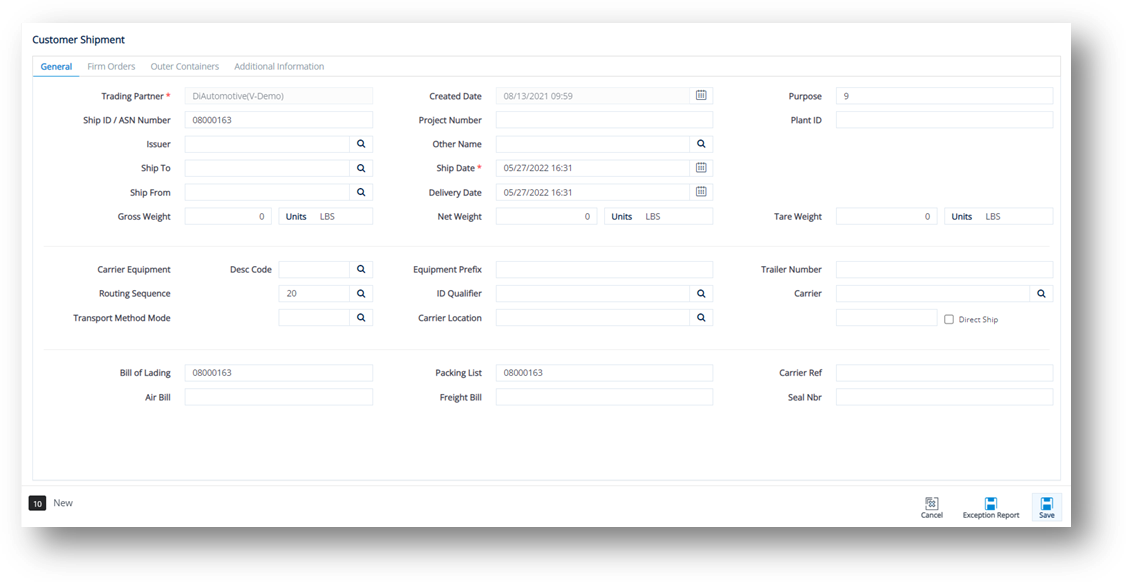
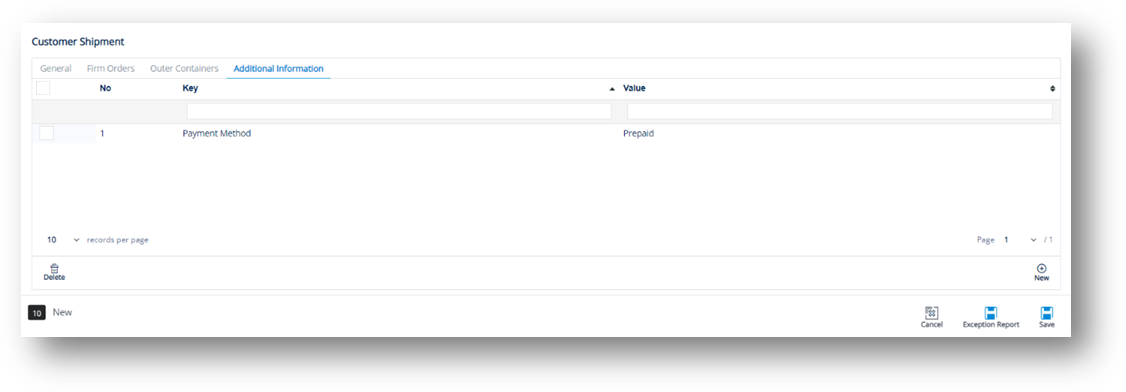
3. Switch to the Additional Information tab.
4. On the Additional Information tab, click ![]() New.
New.

5. On the Other Info Config window, select the record that you want to add, and then click ![]() Save.
Save.
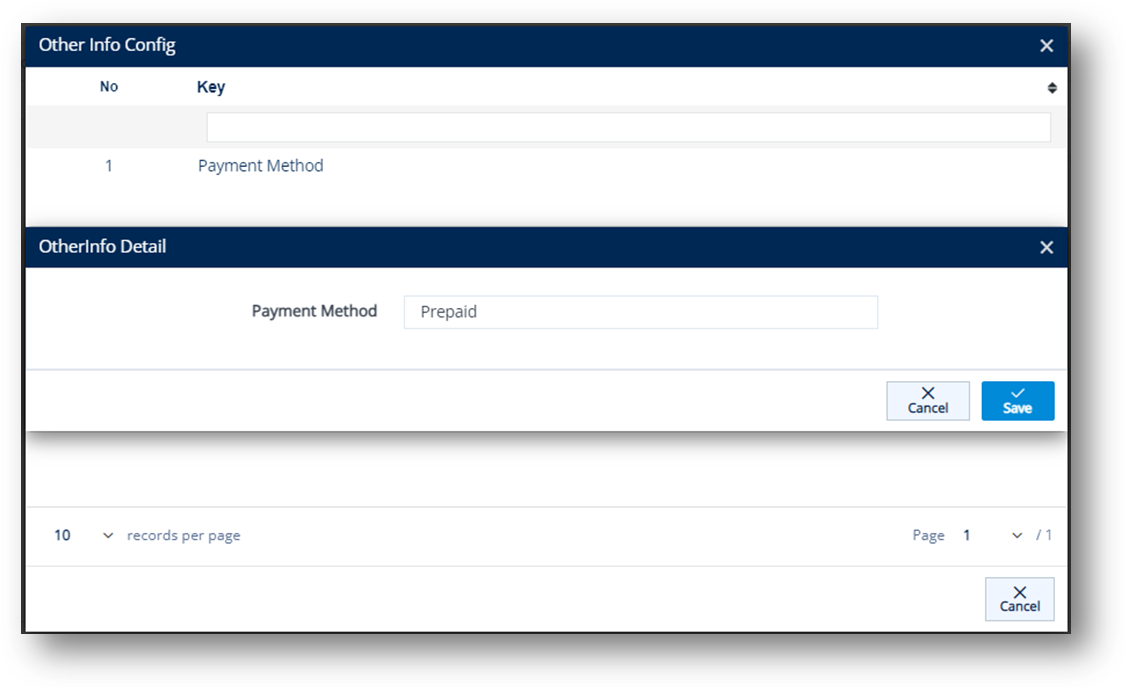
Note In this example, the default value of the Payment Method key is Prepaid. You can change it later, as needed.
6. When the record is added to the Additional Information tab, click ![]() Save to finish.
Save to finish.
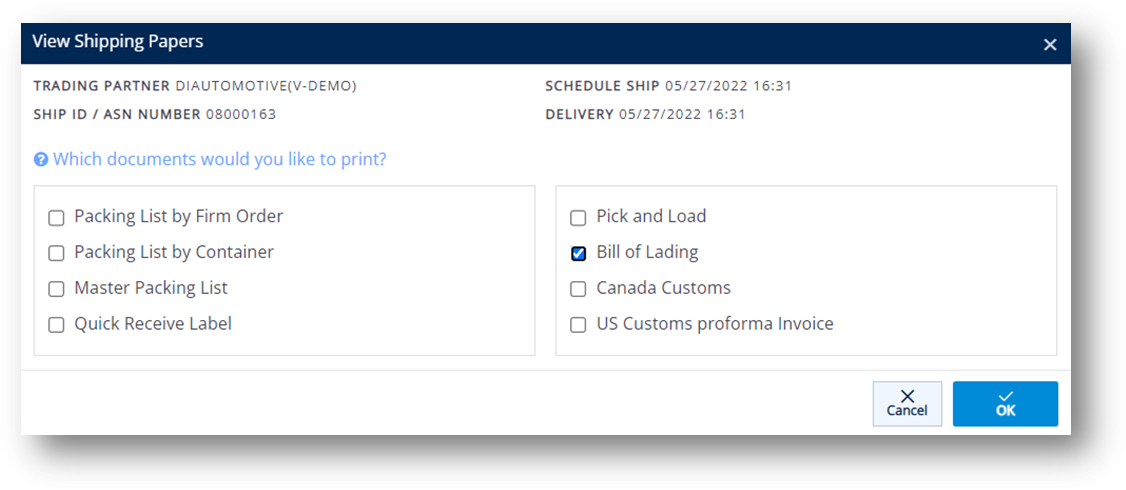
View Shipping Papers
1. On the Customer Shipments screen, select the record for which you want to print shipping documents.
2. Click ![]() Shipping Papers.
Shipping Papers.
3. On the View Shipping Papers window, select the documents that you want to print, and then click ![]() OK.
OK.
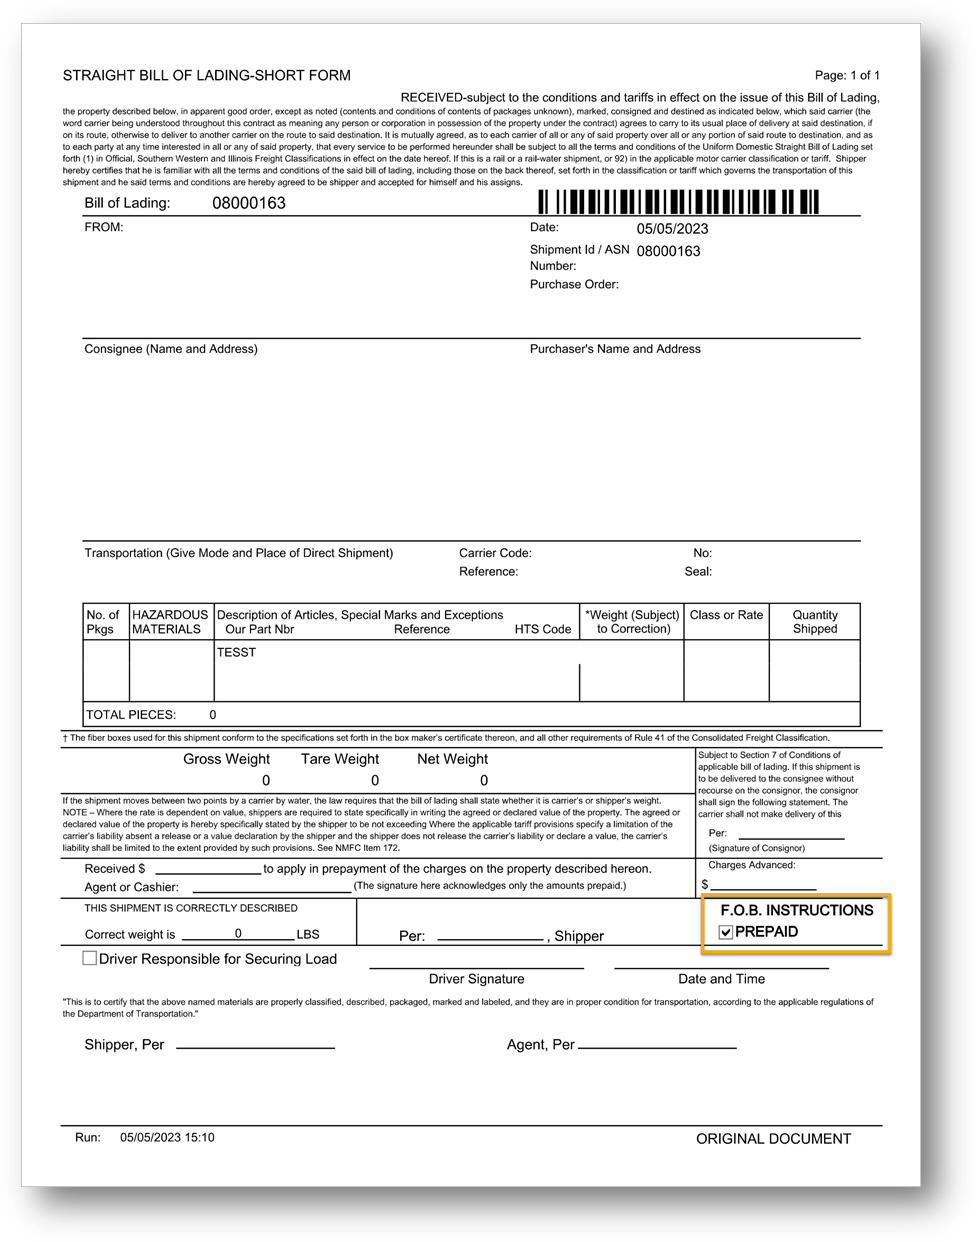
Example: Bill of Lading
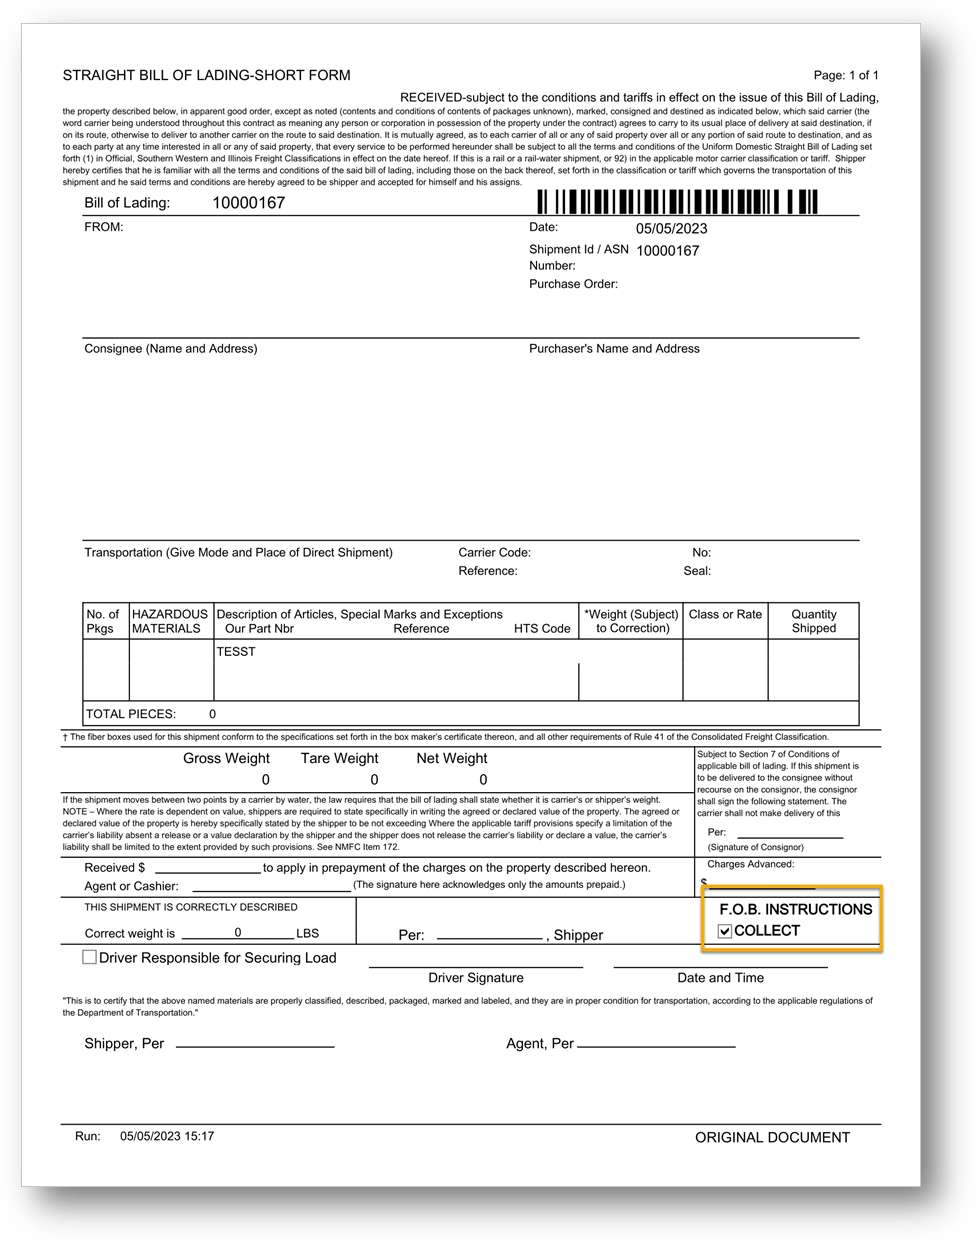
The Bill of Lading form displays the default value that you set up in Trading Partner Profile.
To set up an Additional Info Default record as Mandatory/Always Included
When the Mandatory/Always Included checkbox is selected, the Additional Info Default records will be automatically applied to the Additional Information tab of the new Customer Shipments upon creation.
1. On the Settings menu, click Trading Partner Profile.
2. On the Trading Partners screen, select the record that you want to work with.
3. On the Trading Partner screen > Additional Info Default tab, select the record.

4. On the Additional Config Trading Partner Detail screen, do the following:
a. Change the Default Value in the box as needed.
In this example, the Default Value is changed to Collect.
b. Select the Mandatory/Always Included checkbox.

5. Click Save.
The Mandatory/Always Included value of the new Additional Info Default record is Yes.

Example 2
In this example, the default value of the Additional Info Default record is Collect and the Mandatory/Always Included checkbox is selected.
The Additional Information record is automatically applied to a Customer Shipment
On the Customer Shipment window, switch to the Additional Information tab.
The Additional Info Default record is automatically applied because it has been set as mandatory. There is no need to click ![]() New to connect the values.
New to connect the values.

View Shipping Papers
Note For the steps on how to view a Bill of Lading, refer to Example 1 above.
