Trading Partner Parts
New part numbers are automatically added to TrueAuto during EDI processing. However, it is important for you to add any additional relevant information about the part. Trading Partners do not always send every detail about a part on demand schedules, therefore, you must identify any missing details and set defaults to help you automate paperwork and EDI.
Main Topics:
Work with Trading Partner Parts
1. On the Settings menu, click Trading Partner Parts.
2. On the Trading Partner Parts screen, click the part that you want to view.
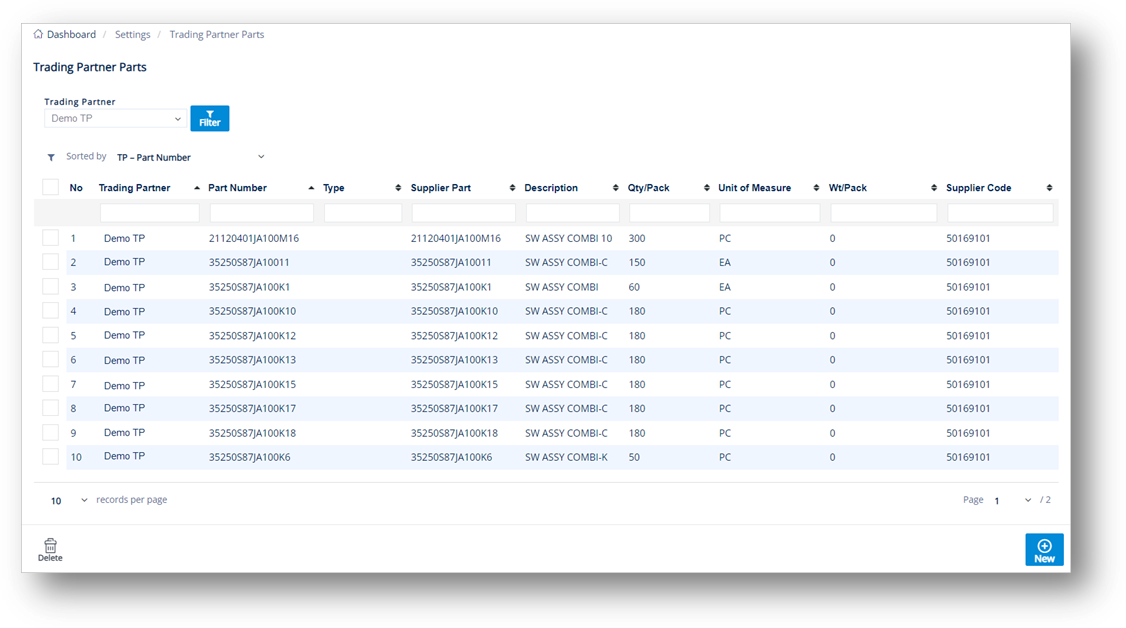
-
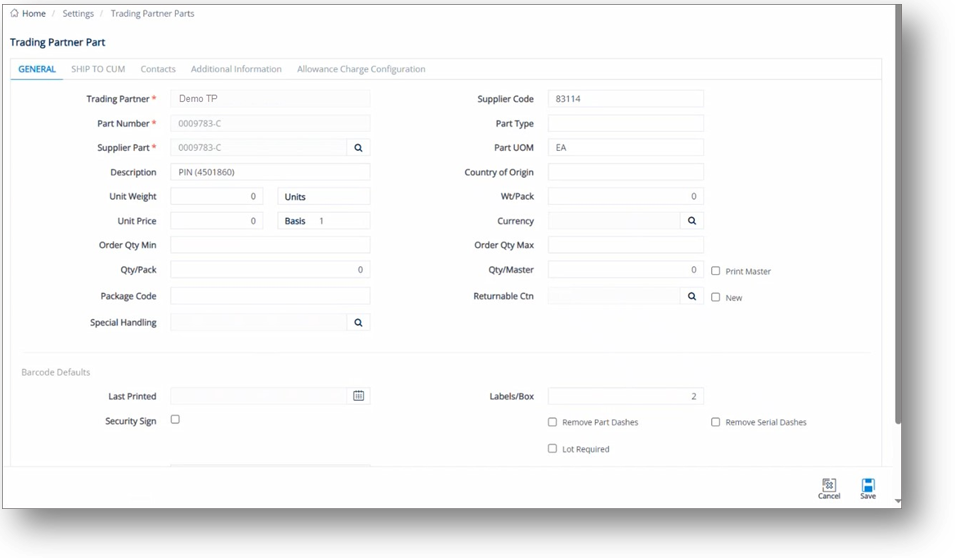
On the Trading Partner Part screen, select the GENERAL, LABEL FIELD VALUES, or SHIP TO CUM tabs to view the corresponding details.
GENERAL tab
LABEL FIELD VALUES tab
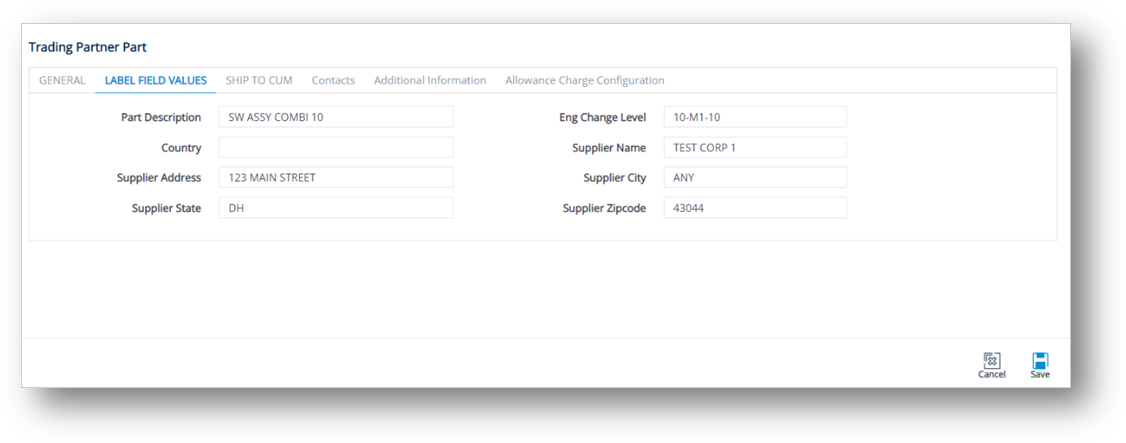
Label Field Values: As labels are printed, TrueAuto pulls the data from the label’s default information from these fields.
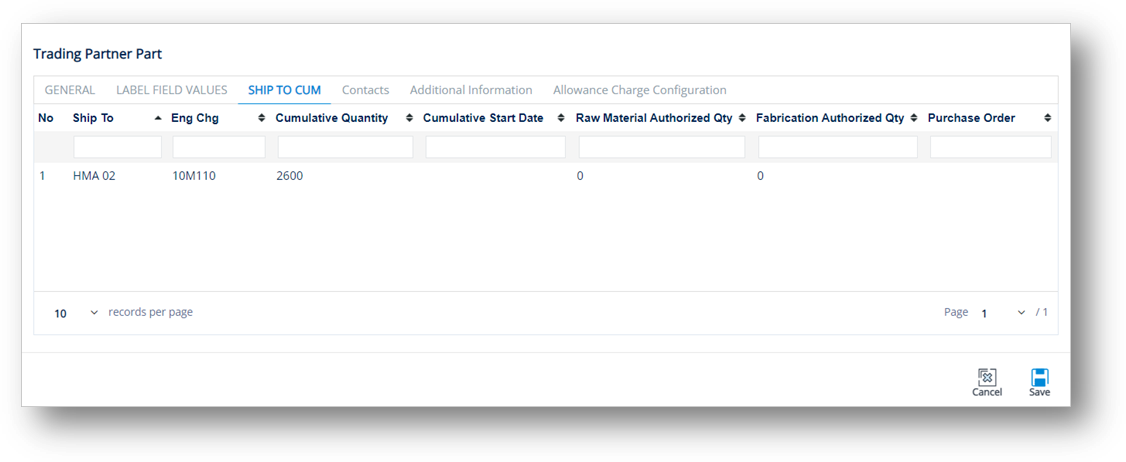
SHIP TO CUM tab
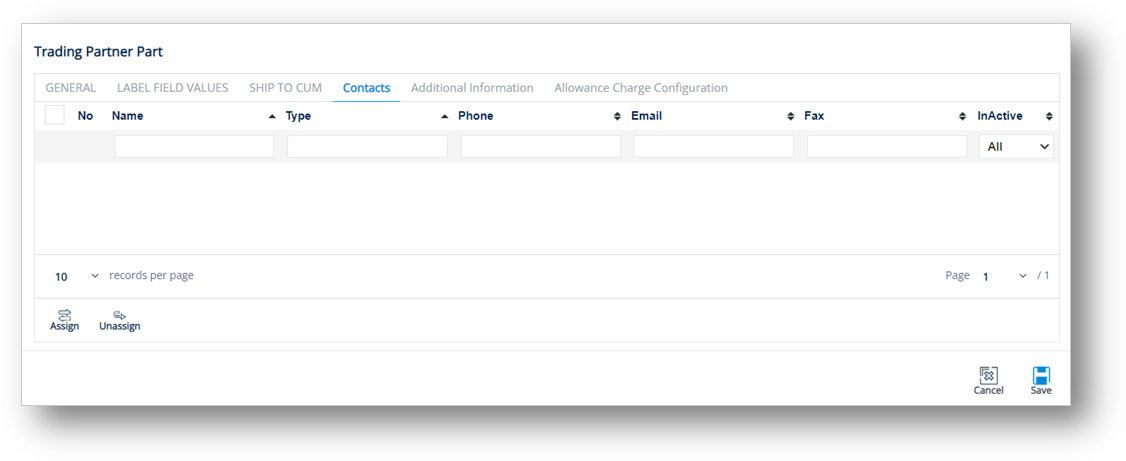
Contacts tab
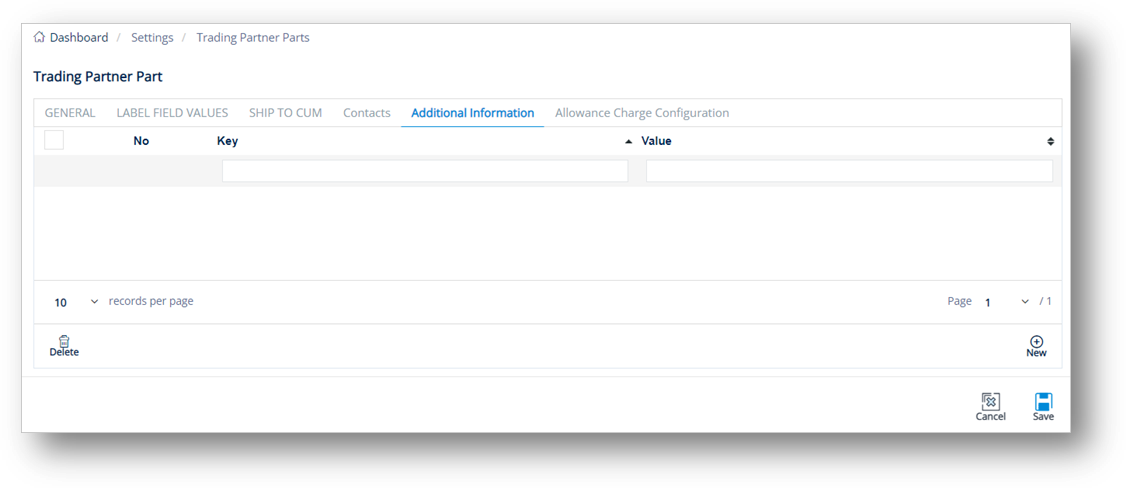
Additional Information tab
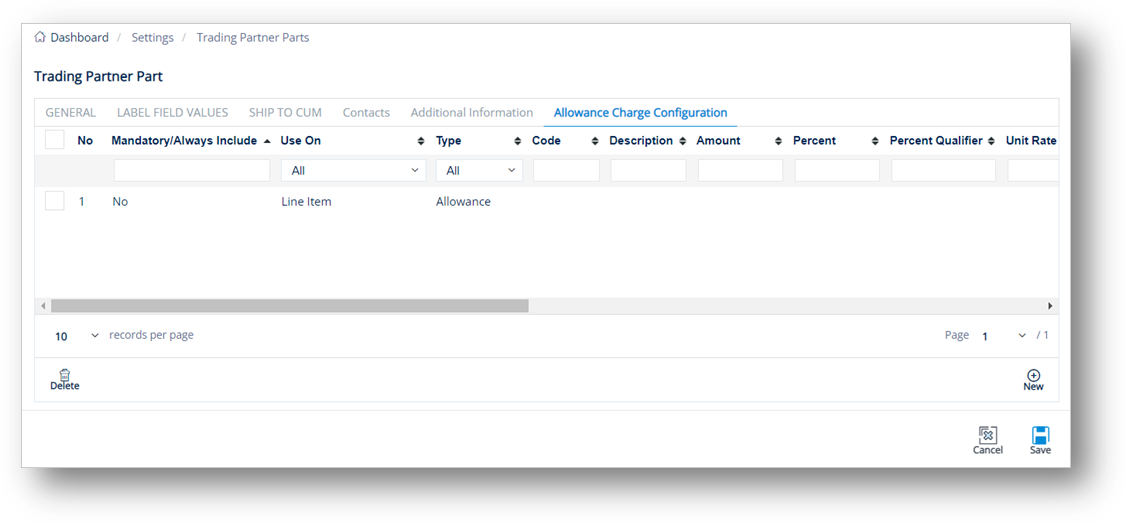
Allowance Charge Configuration tab
To set up a new allowance or charge configuration to a Trading Partner Part
-
On the Trading Partner Part screen, switch to the Allowance Charge Configuration tab.
-
On the Allowance Charge Configuration tab, click
 New.
New. -
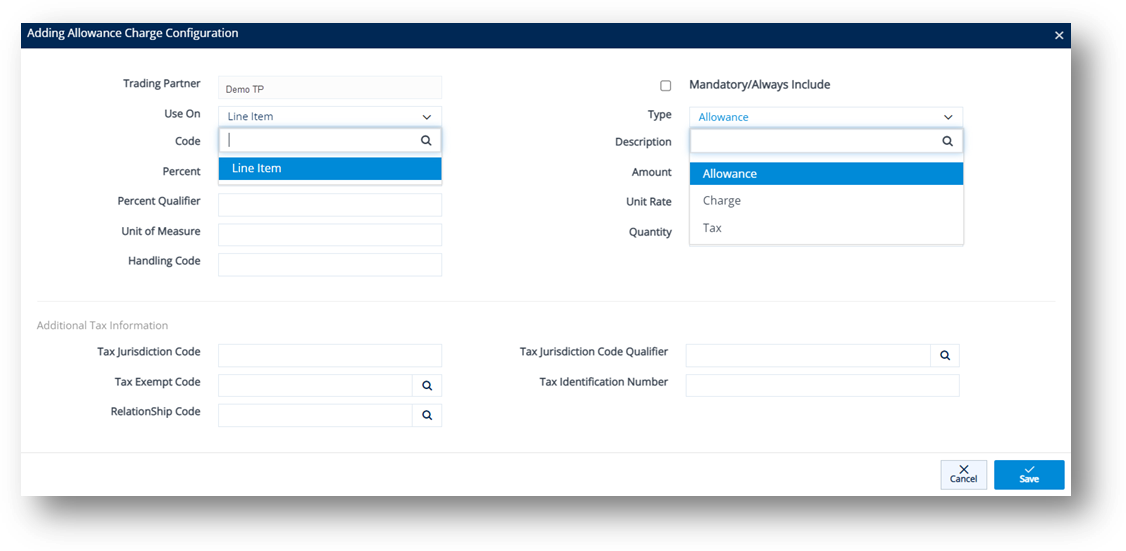
On the Adding Allowance Charge Configuration window, fill out the form.
Note For a full description of each field, refer to the Field Definitions in the next section.
-
Click
 Save. A new Allowance or Charge configuration is added to the Trading Partner Part.
Field Definitions – Allowance Charge Configuration
|
Field |
Definition |
|
Mandatory/Always Include |
Mark the Allowance or Charge record as the required field. |
|
Use On |
Value is Line Item. After being created, the new Allowance or Charge record will be saved in Customer Finance/Supplier Finance > Invoices > Details > Allowance Charge. NOTe For additional details, see If Line Item is selected in the Use On dropdown list. |
|
Type |
Options include Allowance, Charge, or Tax. |
|
Code |
Allowance or Charge Code. Click the |
|
Description |
A brief description of the Allowance or Charge Code. |
|
Percent |
The percentage value of the Allowance or Charge. |
|
Amount |
The amount value of the Allowance or Charge. |
|
Percent Qualifier |
A code to identify the category of the percentage value. |
|
Unit Rate |
Unit price. |
|
Unit of Measure |
Applied measurement unit (e.g., Piece, KG, CM...). |
|
Quantity |
The quantity. |
|
Additional Tax Information |
|
|
Tax Jurisdiction Code |
Code identifying the taxing jurisdiction. |
|
Tax Exempt Code |
Code identifying the exemption status from sales and use tax. |
|
Relationship Code |
Code indicating the relationship between entities. |
|
Tax Jurisdiction Code Qualifier |
Code identifying the source of the data used in the tax jurisdiction code. |
|
Tax Identification Number |
Number assigned to a purchaser (buyer) by the taxing jurisdiction (state, county, etc.), often called a tax exemption number or certificate number. |
|
Handling Code |
A code specifying the method/way to calculate the Allowance or Charge. |
Part Note
There may be cases where you want to be made aware of important Notes in Firm Orders or want shippers/receivers to pay special attention to specific Part Numbers on Shipments. Therefore, the Part Note box feature provides an efficient way to keep track of specific Part Numbers by allowing you to add Notes, Feedback, or Comments to these Parts, such as “This is an IMPORTANT Part, FRAGILE – Please handle with care”, etc.
This topic describes a step-by-step procedure on how a Note, or any special comment about a Part Number, can be displayed on specific screen locations in TrueAuto.
To create a Part Note
After the Part Note feature is activated, you can add a Note/Feedback/Comment by doing the following:
1. On the Settings menu, click Trading Partner Parts.
2. On the Trading Partner Parts screen, click the part that you want to work on.
3. On the Trading Partner Part screen, scroll down to the General section. Then, enter the details in the Note box.
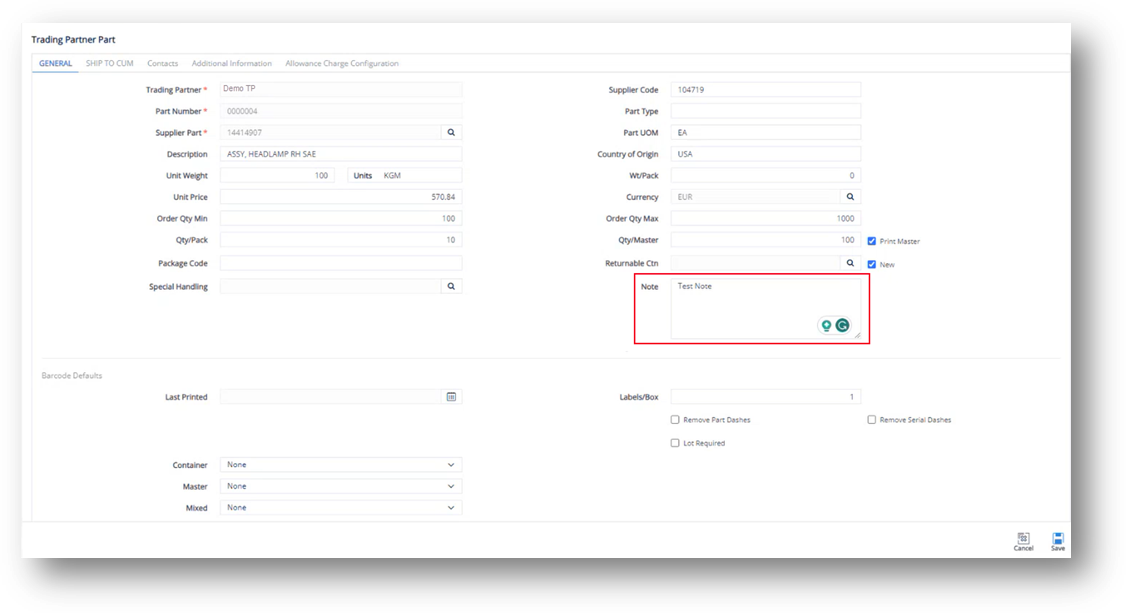
4. Click ![]() Save. The Note is saved for this Part Number.
Save. The Note is saved for this Part Number.
Part Note pop-up window display
After a Note/Feedback/Comment is created on the Trading Partner Part screen, the ![]() note icon can be seen on the three screen locations described below. Contact your administrator if you want to turn ON or OFF the pop-up Note feature in any of these locations.
note icon can be seen on the three screen locations described below. Contact your administrator if you want to turn ON or OFF the pop-up Note feature in any of these locations.
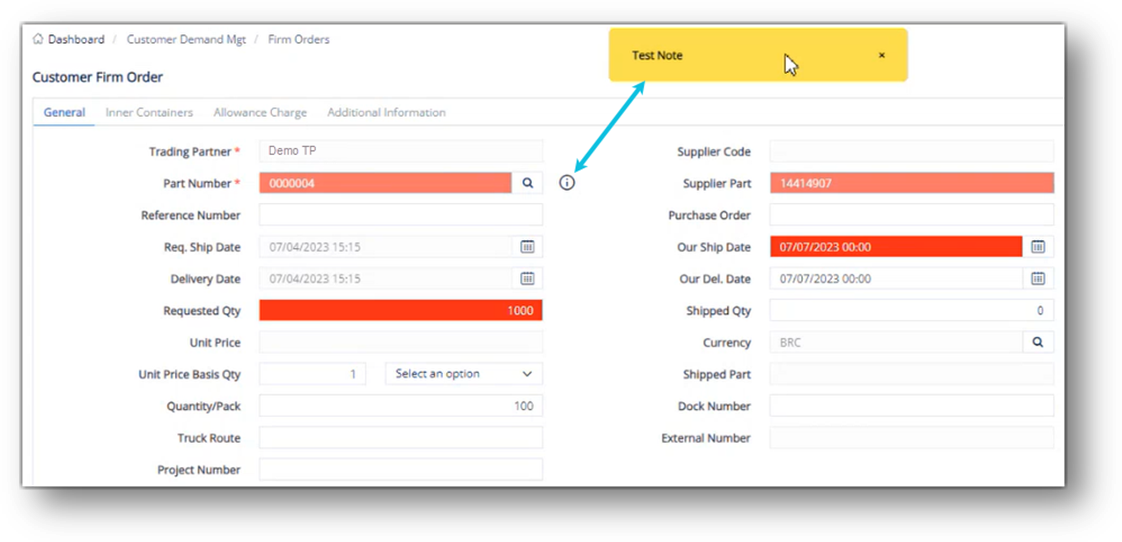
1) Customer Demand Mgt > Customer Firm Orders (Browser view) > General tab
Hover over the ![]() note icon. to view the short content.
note icon. to view the short content.
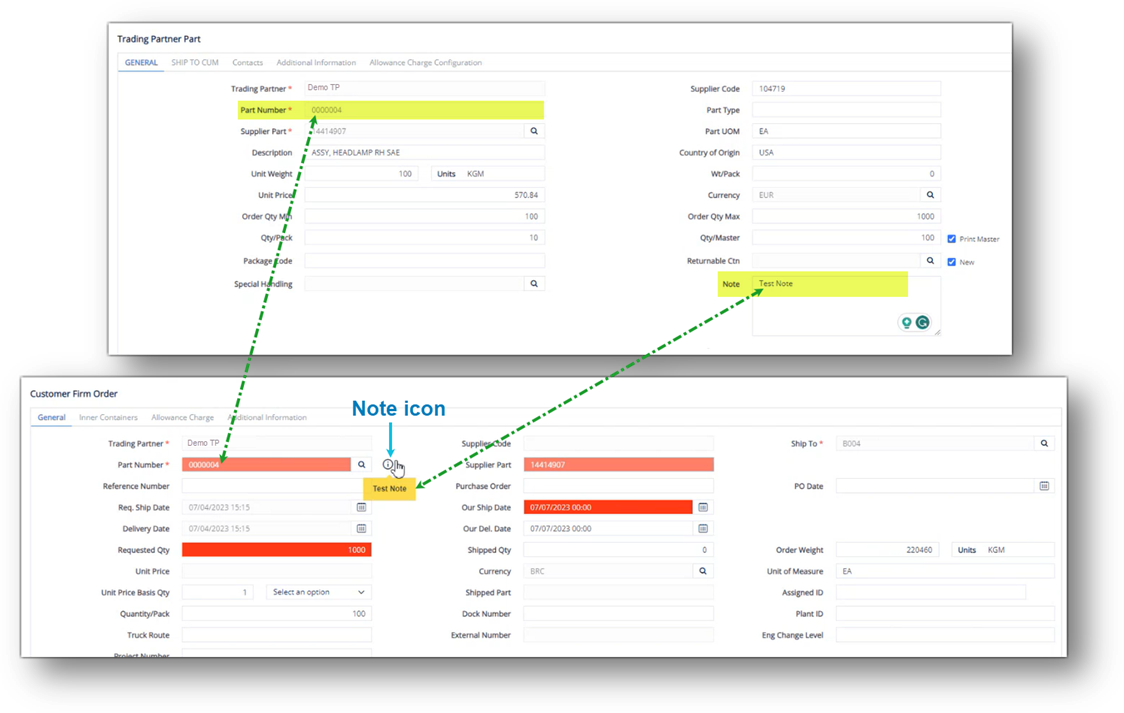
Click on the ![]() note icon to view
the full content.
note icon to view
the full content.
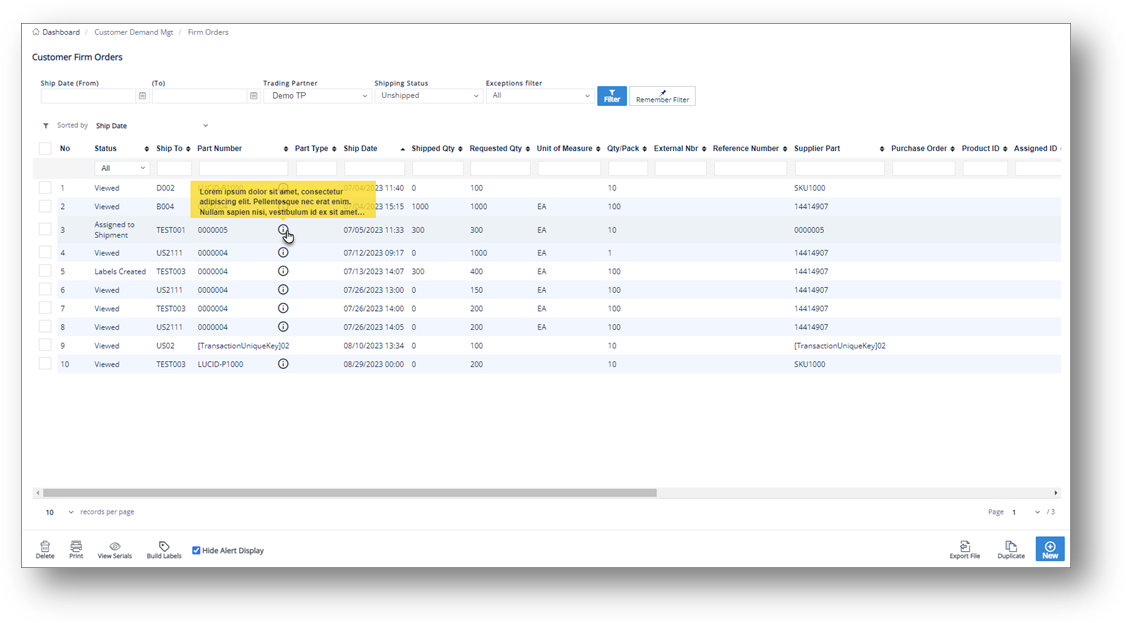
2) Customer Demand Mgt > Customer Firm Orders (Browser view)
Note You might experience a slow loading page when the pop-up Note feature is turned on in this view.
3) Customer Shipments > Customer Shipment > Firm Orders tab

Create a Trading Partner Part
There is little reason to create new parts unless the Trading Partner is non-EDI, you are adding a test part, or you’re adding an accidentally-deleted part. However, it is standard procedure to Change the details of parts.
1. On the Settings menu, click Trading Partner Parts.
2. On the Trading Partner Parts screen, click ![]() New.
New.
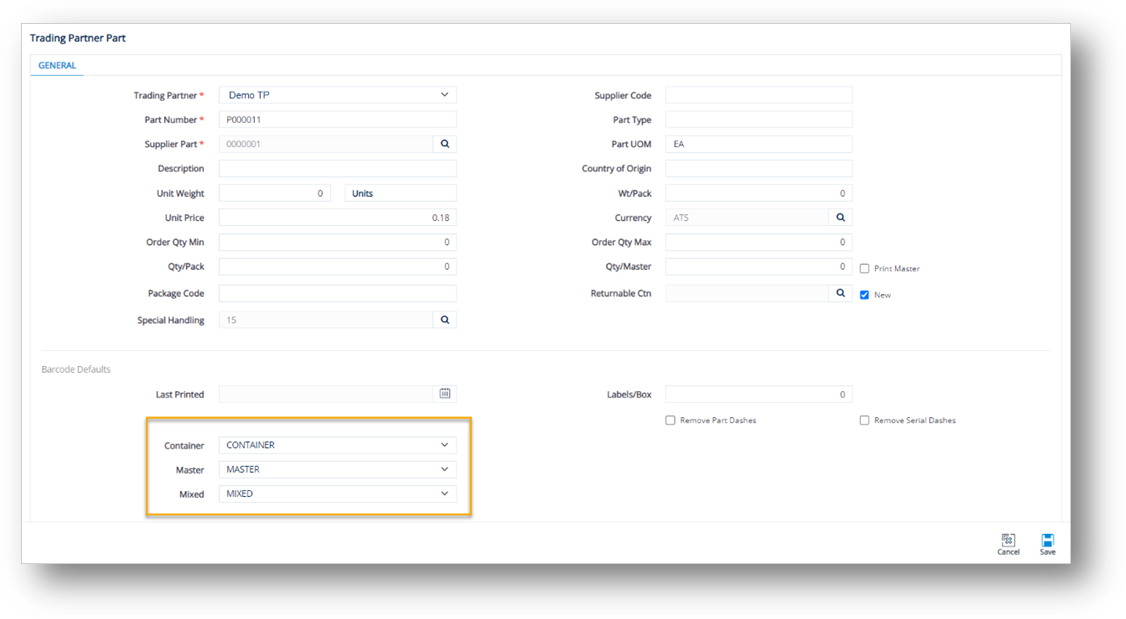
3. Fill out the details of the new part on the GENERAL tab. Use the following Field Definitions.
4. Scroll down to the Barcode Defaults section, and then follow these steps:
a. Select the label template in the Container dropdown list.
b. Select the label template in the Master dropdown list.
c. Select the label template in the Mixed dropdown list.
5. When you’re finished, click ![]() Save.
Save.
The selected templates will be applied to the label printing job. For the priority level, refer to Priority Logic for Label Template Selection.
Field Definitions
|
Field |
Definition |
|
Trading Partner |
The code defining the Trading Partner in TrueAuto. |
|
Supplier Code |
Your Supplier Code assigned by the Trading Partner. |
|
Part Number |
The Trading Partner’s part number. |
|
Part Type |
Unique codes assigned to each type of item. |
|
Supplier Part |
The internal part number or SKU (Stock Keeping Unit). |
|
Part UOM |
The Unit of Measure for the part. |
|
Description |
The description for the part. |
|
Origin Country |
The country of origin for the part. |
|
Unit Weight |
Weight of an individual piece. |
|
Wt/Pack |
(QPP x Unit Weight) + Weight of Container. If blank, Gross, Net and Tare Weights will be calculated via the Container Record. |
|
Unit Price |
Price of an individual piece. |
|
Qty/Pack |
Quantity filling one container. |
|
Qty/Master |
Parts in a master (pallet). Used for label printing and shipping weight calculations. Print Master: Set TrueAuto to automatically print a master label when a container print job meets the quantity in exactly one or more master containers. Example 1: Quantity per master = 180, Quantity Per Pack = 60, 360 pcs worth of labels printed, 360/180=2. 2 Master Labels will automatically print. Example 2: Quantity per master = 180, Quantity Per Pack = 60, 300 pcs worth of labels printed, 300/180=1.67, 0 Master Labels will automatically print. |
|
Package Code |
Unique codes assigned to the packaging of the part. |
|
Returnable Ctn |
The standard Returnable Container type for this part (must match a record in the Container file). |
|
Last Printed |
The last time this label was printed. |
|
Labels/Box |
Number of labels to print per container (usually 2). |
|
Remove Part Dashes |
Removes dashes from the part numbers on the label. |
|
Remove Serial Dashes |
Removes dashes from the serial numbers on the label. |
Delete a Trading Partner Part
-
On the Settings menu, click Trading Partner Parts.
-
On the Trading Partner Parts screen, select the part that you want to remove, and then click
 Delete.
 -
On the confirmation message, click OK.